Showing posts with label appetizer. Show all posts

Monday, April 18, 2011

Salsa Verde

I didn’t actually set out to make my own salsa verde. I have a black bean soup recipe I’ve made before that’s really good and it calls for a whole cup of the stuff. I figured if I’m making this soup from scratch, then why in the world can’t I make the salsa verde from scratch, too? Good question.


Salsa Verde

Ingredients:

2 large fresh Anaheim chilies
1/2 pound tomatillos, husked, rinsed, diced
1 1/2 cups low-salt chicken broth
2 large green onions, chopped
1 large serrano chili, stemmed, seeded
1 large garlic clove
1/4 cup (firmly packed) fresh cilantro leaves
1 tablespoon whipping cream
1 tablespoon fresh lime juice (optional)


Char Anaheim chilies directly over gas flame or in broiler until blackened on all sides. Enclose in paper bag; let stand 10 minutes. Peel, seed, and chop chilies.

Combine tomatillos, broth, green onions, serrano chili, and garlic in medium saucepan; bring to boil over medium-high heat. Reduce heat to medium-low; simmer until mixture is reduced to 1 2/3 cups, stirring occasionally, about 18 minutes. Transfer mixture to blender. Add Anaheim chilies, cilantro, and cream. Puree until smooth. Season salsa with salt and pepper. Add lime juice, if desired. (Can be made one day ahead. Transfer to small bowl; cover and chill. Rewarm before serving.)


This is pretty easy to make, but it does take a little while what with all of the charring and husking and cooking involved. The tomatillos are funny little things. They’re so cute and like… you guessed it… little bitty tomatoes. They are firm and not juicy at all so they dice really well. As far as the Anaheim chilies, I tend to use Poblanos. They’re available in my local stores and while I’ve seen the Anaheims (lighter green) before, I’ve just always used Poblanos (darker green).


Unhusked tomatillo


Tomatillo after being husked and rinsed


I also use jarred sliced jalapenos instead of a Serrano. I just don’t want to have that level of heat. I could use a fresh jalapeno, too. I know there would be a taste difference in the two, especially if I can get some of the fresh ones from our summer farmers market. The most recent time I made this, I used too many jarred jalapenos and the salsa came out a little on the spicy side. The chips evened it all out in the end, and with the addition of the salsa to the soup as called for in the recipe, the other flavors greatly tamed the heat.

If I ever got into canning, I would make batch after batch of this stuff and put it up all summer long. It’s really good and so fresh tasting. It’s even really good to eat alone. I can dip chips in this stuff all day long.
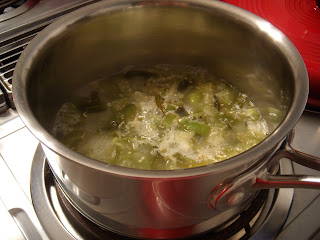


Simmering on the stove


Open wide!


So back to the black bean soup recipe I mentioned earlier. After I made the salsa, I added the requisite one cup of it to the blender along with two cans of undrained black beans, a teaspoon of cumin, a handful of cilantro, a cup of chicken broth and a dash of fat free half and half.
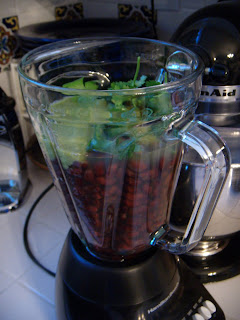


Getting ready to blend this bad boy up


After it was thoroughly blended, the soup went into a pot and simmered on the stove until it was warm. Then I topped the soup with a little more salsa verde and some crumbled queso fresco. Delicious and good for you on a cool evening.




Voila!

Friday, July 9, 2010

Fried Green Tomatoes

There are a few foods that are quintessentially Southern. Chief among those are sweet tea, grits with butter and salt (not sugar), chicken and waffles, pimento cheese, casseroles of any shape or form, and these little golden brown delicacies right here. You can't get green tomatoes just any time of the year, so anyone with a craving for them in, say, December, will have to find refuge in the freezer case of their local grocery store or try to satiate their desires with some suitable replacement. If you find out what that replacement is, please let me know.


Fried Green Tomatoes

Green tomatoes
Cornmeal
Buttermilk or regular milk
Oil, for frying
Salt and pepper, to taste

Slice green tomatoes to approximately ½ or ¾ inch thickness. Blot with paper towels to remove any excess juice. Dredge tomato slices in milk, letting excess drip off, then dredge in cornmeal to cover. Shake off excess cornmeal and set aside until the cornmeal has absorbed the milk. Fry in hot oil for two to three minutes on each side, or until golden brown. Drain on paper towels and season to taste. Serve hot.


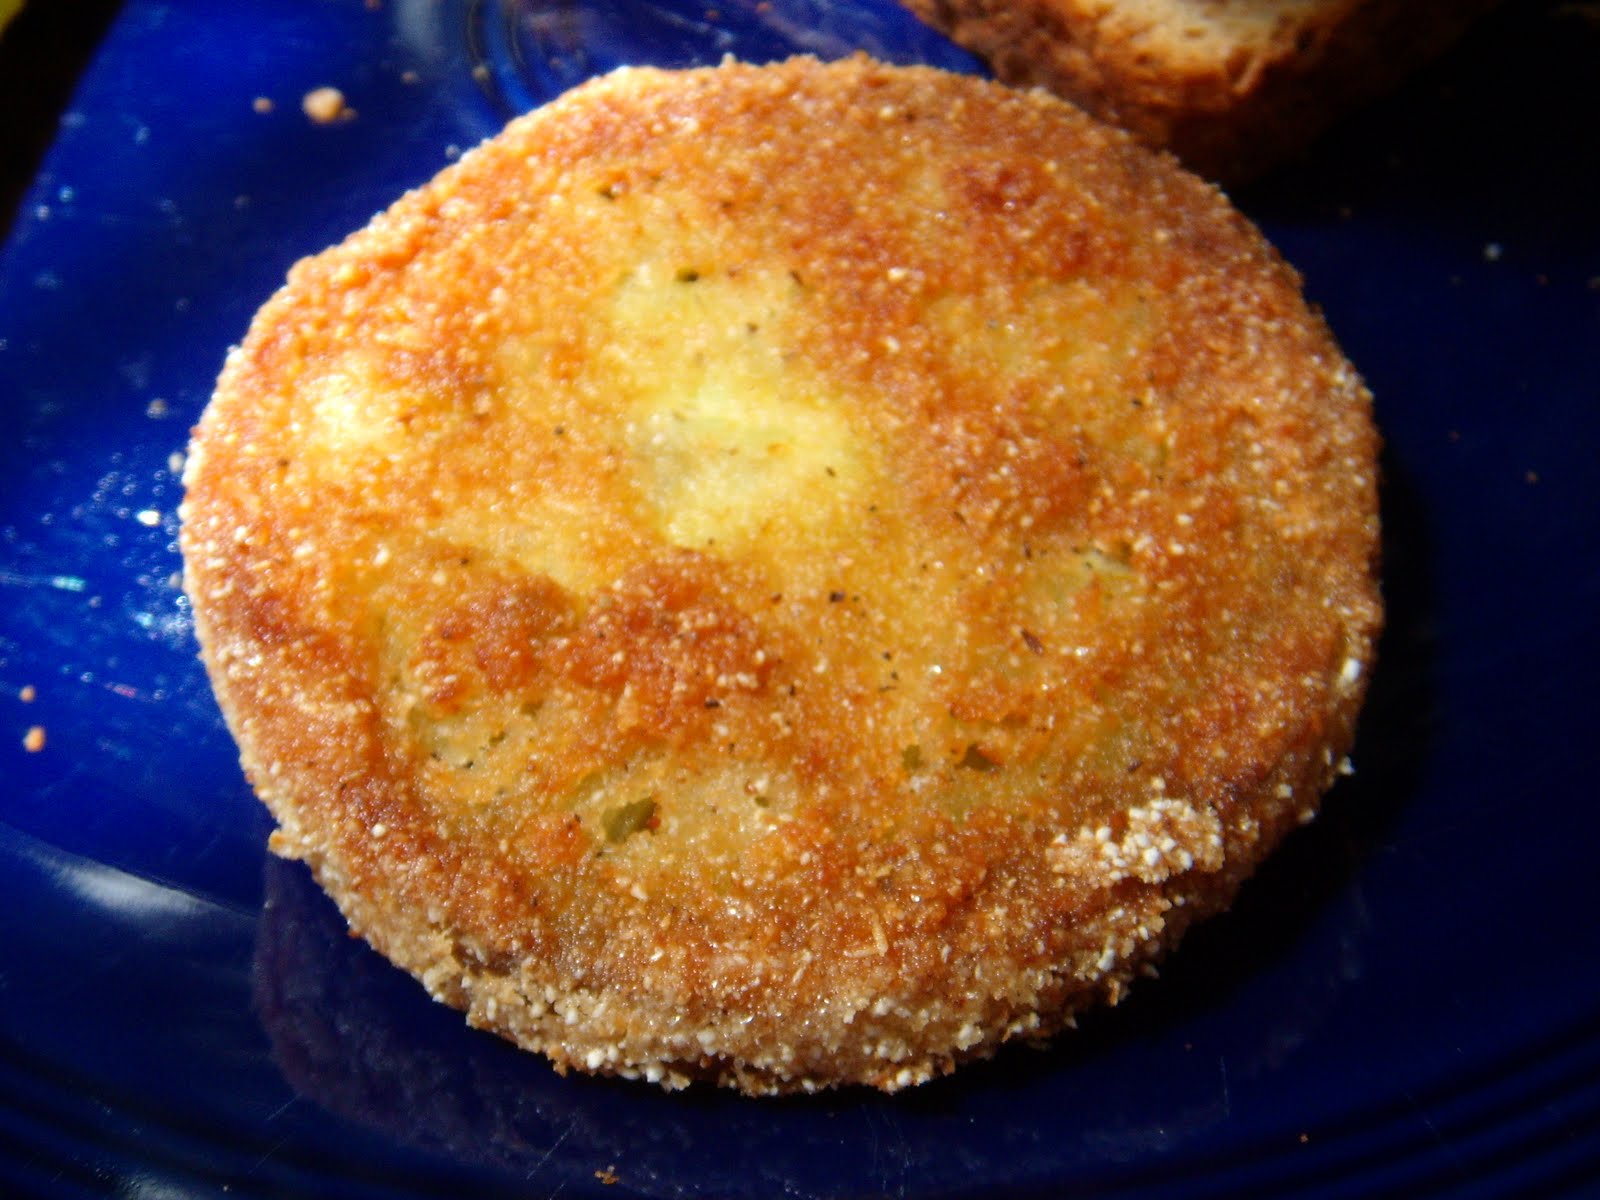
There are some very important rules to follow in this recipe. First of all is the buttermilk versus regular milk debate. I've done both and the buttermilk holds the cornmeal much more effectively. Regular milk also does well, but there is a noticeable difference. If anything, the coating might be a little more crispy with the buttermilk since it will hold more cornmeal. Second is how thick to slice the tomatoes. I would definitely go with the 1/2 inch measurement at least. You don't want a floppy tomato slice. It should be firm. Additionally, blotting the tomatoes lets you control the amount of moisture in the slices. Too much moisture and they'll be soggy.

On that note, the other important thing to note is that when all of the slices are dredged and waiting to go into the fryer, make sure the cornmeal has been absorbed by the milk. This is important because if you were to dredge the slices and immediately drop them in the hot oil, the cornmeal would fall off in the oil and start to burn in the pan, thereby burning your tomatoes. Not good eats. But if you follow all of the directions, you should come up with something like this:

Fried Green Tomatoes

Then you can go one step better and add toasted bread and bacon:


Fried Green Tomatoes

Sorry, you'll have to give me just a minute to recover after seeing those pictures. They just look. So. Good.

Okay, I'm better. And yes, that's a pickle on the plate. We like our pickles fried in the South, too, but that's another recipe for another time.

Wednesday, April 7, 2010

Empanadas

You know those Totinos Pizza Rolls in the freezer section at the store? The little crispy pillows of overly processed dried out "meat" that may or may not actually be pepperoni, chemically enhanced cheese that cooks to a blob consistency and a sauce with tomato-like qualities that super heats to temperatures only found during NASA missions to the center of our solar system? Yeah, those things. Well, after making these Empanadas I don't see how I could ever purchase anything like that ever again. Not that I was making it a habit to purchase them before, but now I really won't. So there, Totinos.


Empanadas

Makes 36 servings

Ingredients
8 ounces skinned and boned chicken breasts, cut into 1/2-inch pieces
1/2 small onion, minced (about 1/4 cup)
1/2 green bell pepper, minced
1/2 tomato, seeded and coarsely chopped
4 pimento-stuffed green olives, coarsely chopped
2 tablespoons raisins
2 tablespoons chicken broth
1 tablespoon tomato paste
1 teaspoon minced fresh cilantro or parsley
1 garlic clove, minced
1/2 teaspoon salt
1/2 teaspoon ground cumin
1/2 teaspoon pepper
Vegetable cooking spray
1 tablespoon dry breadcrumbs (optional)
36 (3-inch) square wonton wrappers
Salt to taste


Cook first 13 ingredients in a large skillet coated with cooking spray over medium heat 5 minutes or until chicken is done, stirring often.

Process chicken mixture in a food processor until coarsely chopped. (Mixture should be fairly dry. Add 1 tablespoon breadcrumbs if mixture is wet.) Cover and chill 30 minutes.

Arrange 1 wonton wrapper on a clean, flat surface. Lightly brush edges of wrapper with water. Place 1 heaping teaspoon of chicken mixture in center of wrapper. Fold dough over filling, pressing edges with a fork to seal. Repeat with remaining wrappers and chicken mixture. Arrange empanadas on a baking sheet coated with cooking spray. Lightly coat empanadas with cooking spray.

Bake at 400° for 12 minutes or until golden brown, turning after 6 minutes. Sprinkle with salt to taste.


This recipe uses wonton wrappers - my favorite! I've used them so many different ways and I know there are other uses out there just dying to be discovered. These would be great for appetizers or for kids coming home from school and wanting a treat. You know exactly what is in them and while they're not exactly health food, they're still not store-bought processed unknowns. And I'm not bashing store-bought processed food, but I think this is a better alternative.

The mixture was a little moist when I took it out of the food processor and I didn't use the bread crumbs - they're optional anyway. I also halved this recipe and it made fewer than half of the full recipe quantity but I may have overstuffed the empanadas a bit. It didn't seem to affect the final product. The only change I made was not to add olives since I didn't have any. I did add raisins and I couldn't taste them at all, but you have to think that a tablespoon of raisins is maybe five or six. Maybe seven. I don't know, but they didn't shine through.

Empanadas


Empanadas


Thanks to the world's most imprecise oven, I once again cooked these little things a smidgen too long and the edges were extra browned. They still tasted fine. And speaking of taste, they had a distinct sweetness to them. No, I don't think that was the raisin coming through, but it could have been the sauteing of the vegetables at the beginning which brought out some of the natural sugars. I don't know. But they were good.


Empanadas


They do need time to cool, but since there is no sauce then that time is dramatically reduced. They would probably be good with a dipping sauce of some kind, but off the top of my head I can't think of one. I would steer clear from any kind of Ranch dressing, but I bet there are other options out there that would work well.

Monday, November 2, 2009

Cream Cheese Dumplings

This was such a fun recipe and another great option for party appetizers or a way to experiment with these different fillings and tastes. I knew this recipe was something I wanted to make, but I also thought plain cream cheese was a bit ho-hum. But by digging through the fridge and pushing the limits a bit, I was able to create some pretty awesome taste combinations.


Cream Cheese Dumplings

Heat olive oil (about 2 inches) in a large, deep skillet
Take two blocks of cream cheese and mix them with any of the following:
Feta cheese
Goat
cheese
Garlic
Basil
Oregano
Sun dried tomatoes (in oil, drained and minced)
Salt
Pepper

Take wonton wrappers and lay them on a flat surface. Place a small spoonful of mixture in the center of the wrapper and lightly wet seams all the way around with water.

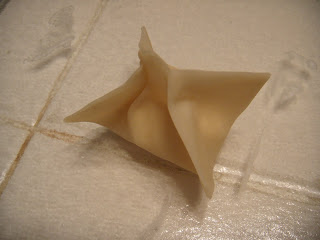
Pinch corner to corner to seal (will make an X pattern when looking straight down at it). Place wontons in oil and fry on each side until brown. Drain on paper towels


The only thing about this recipe that I didn't care for was the fact that my house smelled like the back of a greasy diner for a day or two after making the dumplings. I even had the vent on when the frying was taking place and it didn't trap all of the smell. But they were absolutely worth it.


The recipe says to use olive oil for frying, but I used canola oil. I also used low-fat Philly Cream Cheese and it turned out completely fine. I normally wouldn't advocate using fat-free in something like this, just because you never know about the consistency, but the low-fat was great. For the fillings, I followed a few of the choices from the actual recipe but I also threw in a few of my own:


Cream Cheese, Sun Dried Tomatoes and Basil
This kind of tasted like a pizza, only better. The sun dried tomatoes (packed in oil) had a nice warmth and the basil (fresh from my little potted plants outside) gave it that bite.


Mozzarella, Turkey Pepperoni and Basil
Here I used a mozzarella string cheese stick that I cut into chunks, and I cut the turkey pepperoni slices into quarters, and slivered the basil. It worked really well, except that the cheese didn't hold up as well as I had hoped. It melted and expanded in the hot oil, of course, but then it cooled down significantly and kind of turned into a blob. It tasted good, though.


Cream Cheese, Feta Cheese and Diced Garlic
Another delicious one! The feta really broke through and overpowered the cream cheese, which is exactly what I was hoping would happen. The garlic was great, too, after being super heated with the hot oil.


Diced Shrimp and Hoisin Sauce
Ooh, you weren't expecting this one, were you? Hoisin sauce is a Chinese dipping sauce, like soy sauce or plum sauce. I had this sauce on hand for a recipe I found in Cooking Light, Hoisin Glazed Beef Kebabs. I used frozen cooked shrimp that I thawed and diced into small pieces and mixed them with a teaspoon or so of the hoisin. Pretty good, but I think it was a solid third place as compared to some of the other mixtures I tried.


Cream Cheese Dumplings

When the dumpling is folded, you see the "X"


Cream Cheese Dumplings

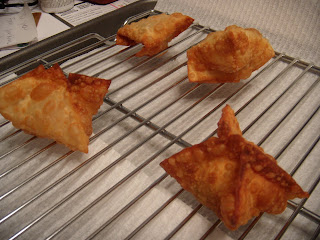
Cooling on the wire rack after coming out of the oil


Now I can't imagine these are all that good for you, but they're certainly fun to make and they definitely taste good. I used a large pot to fry in, but a deep fryer would also be the best choice. The wonton wrappers I used are Nasoya Wonton Wraps and I was able to find them at a few stores in town. They're refrigerated and usually found in the produce section, at least in my area. They're about 2"-3" square and come in a pack of 60 or so. When they go into the oil, they literally take no more than three or four minutes until they are crisp and brown and ready to come out. Please resist the urge to eat one immediately and do give them time to cool off.


I will definitely make these again and I'll do a few more combinations. I'd love to do one with chocolate, but I don't how well it would respond to the high temperatures since chocolate can burn easily. I think fruit might be good, too. Or, you can cut the wrappers into strips and fry them. From there, they can be used to top soup or just put out in a bowl for people to snack on. Pretty versatile!

Monday, September 28, 2009

Prosciutto and Parmesan Gougères

For the Husband's birthday last year, I surprised him with a class at our local Viking Cooking School. The theme was "Date Night in New York City" and we cooked different dishes particular to New York City establishments. This little gem was part of that class. We made these ourselves and then took the recipe home for future attempts. They're perfect for a party or appetizers before a holiday meal.


Prosciutto and Parmesan Gougères


½ stick unsalted butter (4 T) cut into small pieces
½ C water
¼ t fine salt
1/8 t granulated sugar
¾ C all-purpose flour
3 large eggs (plus one lightly beaten egg)
½ C finely grated Parmesan cheese (2 oz)
6 T finely chopped prosciutto (about 1 ½ oz)
1 pinch freshly grated nutmeg
1 pinch paprika

Preheat oven to 400 degrees; place a rack in the center of the oven.

Combine the butter, water, salt and sugar in a medium sauce pan over medium-high heat; bring to a boil. Immediately remove from heat and add the flour, beating vigorously with a wooden spoon until smooth.

Place the pan back over medium-high heat; cook, stirring constantly, until a smooth mass forms and pulls away from the sides of the pan, about two minutes. The bottom of the pan will be coated with a thin crust.

Transfer the choux paste to the bowl of an electric mixer fitted with the paddle attachment. On medium speed, add the three eggs, one at a time, mixing well after each addition. Add the parmesan, prosciutto, nutmeg and paprika.

Using a pastry bag fitted with a ½-inch round tip, pipe the warm choux paste onto parchment-lined baking sheets, forming mounds about ¾-inch in diameter. (Note: you may need to use a knife to cut off the choux paste when piping.) Lightly brush just the tops with the beaten egg, then gently smooth with wet fingers. (Note: Be careful to avoid dripping the egg down the sides of the mounds, as this may inhibit rising.)

Place in the preheated oven and bake for 15 minutes. Reduce oven to 375 degrees and continue baking until puffed and golden brown, about 20 minutes more. Transfer the gougères to a wire rack, cool slightly and serve warm or at room temperature.

Now even though I'm not necessarily known for following a recipe to a tee, and have sometimes made bizarre substitutions in place of ingredients I don't have on hand, that doesn't fly when it comes to precision baking like this. Every measurement, every iota of flour and eggs and salt has to be included or you risk dire consequences. And there are too many good things in this recipe for it not to turn out well.


This recipe honestly is more simple than it appears. It's very straightforward and shouldn't pose a problem for someone who wasn't born to bake. The choux paste, for instance, is nothing more than a dough. As for using a piping bag, I used a quart-sized Ziploc bag with a small corner of the bag snipped off. Just dollop the choux paste into the bag and pipe the dough onto the parchment lined baking pan. The freshly piped gougères looked like this:


Prosciutto and Parmesan Gougères


Prosciutto and Parmesan Gougères


When they bake, they don't rise all that much. They mainly become airy and much like puffs. Like this:


Prosciutto and Parmesan Gougères


The recipe says to bake them for an additional 20 minutes once you reduce the heat, but I actually put mine back in for about another 5-8 minutes when I took them out at the 20-minute mark to taste test them. The inside was still a little wet and hadn't dried out, so I let them go a little while longer. That extra few minutes really did the job, and they were fantastic! The egg glaze is what makes them so glossy, and it's really easy to pop three or four at a time until you realize the entire batch has been demolished. These would really be great for a pre-Thanksgiving appetizer or for a housewarming party.


Monday, August 24, 2009

Spiced Pita Chips and Greek Feta Spread

I intentionally chose these two recipes to go together for this blog entry. I figured they were ideal partners and what good is one without the other? There are probably other options when it comes to dipping pita chips, but this Greek-style dip was as good as any.


Spiced Pita Chips

Ingredients
2 tablespoons olive oil
1 teaspoon ground cumin
1/2 teaspoon ground coriander
1/4 teaspoon cayenne pepper
1/2 teaspoon garlic powder
1/4 teaspoon fresh ground black pepper
1/4 teaspoon salt
3 whole-wheat pitas, cut into 1/8's

Directions
Preheat oven to 350 degrees F. Combine olive oil and all spices in a large bowl. Add pita wedges and toss to coat, Spread in 1 layer on a baking sheet and bake for about 15 minutes, tossing once, or until pita is brown and crisp. Cool completely before serving.


Greek Feta Spread

½ lb Greek or French feta cheese
3 T extra virgin olive oil
1 garlic clove, thinly sliced
1 T minced fresh mint or 1 t crumbled dried mint
¼ t red pepper flakes, plus more as needed
6 Italian pepperoncini, plus more as needed, chopped

In a food processor, combine the cheese, olive oil, garlic, mint, the ¼ t red pepper flakes and the 6 chopped pepperoncini and process until smooth. Taste and add more red pepper flakes or pepperoncini as needed. Makes 1 ½ cups, serves four.


I made the pita chips first. I used whole wheat pitas and decided to halve the recipe. However, to provide the optimum amount of spice, I decided to keep the olive oil and spice amounts the same as if I were doing the full recipe. This turned out to be a wise decision, as the spices wouldn't have gone nearly as far if I had halved them, too. I mixed the olive oil and spices in a small bowl and dumped the triangular-cut pitas in there and just swirled it all around with a spoon. The pitas appeared to absorb a lot of the oil and I really had to make sure everything was distributed evenly. But once I was satisfied, I put them on the baking dish and popped them into the oven. They crisped up nicely, but still could have used more spice. After a day or two, they actually started to get a little tough and brittle, but they were still good and the spice held well.

Then I made the Greek feta dip. In this recipe I halved (approximately) the feta, olive oil and pepperoncini, but kept the full amounts of garlic, red pepper flakes and mint. I dumped everything into my mini food processor and took it for a spin. I even plated it up nicely for a photo op.

Spiced Pita Chips and Greek Feta Spread


So the pita chips are done and I have dip for them. I scooped up a bite of dip on the chip and as the combination met my tongue, my taste buds immediately began to seize up and retreat from the bitterness of the pepperoncini. Whoo! It definitely had a bitter twinge to it, but I think it was just that first bite that threw me off. The feta was adequately pungent, but the peppers added a definite kick. It wasn't hot, just an overwhelming bitter taste. So I threw it into the fridge to chill and let the flavors meld. The next night I tried it again and it had definitely softened overnight. The bitter taste was muted and the fact that it was cold, and not room temp, made a big difference. But still, I was faced with a small bowl of dip and a few remaining pita chips. What to do?

My answer came as my eyes settled on a refrigerated dough pizza crust I had just purchased. I pulled out the dough, slathered on some homemade pesto, and added some turkey pepperoni, fresh oregano, the remaining slices of a ball of mozzarella I used earlier in the week, sliced up half of a red pepper, and dolloped on the rest of the Greek feta spread. Genius! The perfect way to clean out the fridge and use the rest of the feta spread in a way that wouldn't be totally overwhelming to my senses.

Monday, February 16, 2009

Masa Griddle Cakes with Poblanos and Goat Cheese

"Pretty freaking good!"

With those words, I have reached the summit. The husband is completely on board with this cooking thing and those three little words sealed the deal. Yes!


Masa Griddle Cakes with Poblanos and Goat Cheese

TOTAL TIME: 1 HR
Ingredients
1 1/4 cups masa harina
1 cup cold water
1/2 teaspoon salt
6 poblano chiles
1/4 cup pure olive oil, plus more for frying
1 onion, finely chopped
Pinch of dried oregano, crumbled
Salt and freshly ground pepper
1 garlic clove, minced
One 15-ounce can black beans, drained
4 ounces chilled fresh goat cheese, crumbled

Directions
In a medium bowl, stir the masa with the water and the salt until a soft dough forms. Divide the dough into 12 balls and flatten them into 2-inch cakes. Transfer to a plastic wrap-lined baking sheet and cover with plastic wrap. Roast the poblanos directly over a gas flame or under a broiler, turning, until charred all over. Transfer to a bowl, cover with plastic wrap and let stand for 10 minutes. Peel, core and seed the chiles, then cut them into thin strips.
In a medium skillet, heat 2 tablespoons of the olive oil until shimmering. Add half of the onion and cook over moderate heat until softened, about 7 minutes. Add the poblano strips and oregano and cook for 2 minutes, stirring occasionally. Season with salt and pepper and keep warm. In a medium saucepan, heat the remaining 2 tablespoons of olive oil until shimmering. Add the garlic and the remaining onion and cook over moderate heat until softened, about 7 minutes. Add the beans and cook, coarsely mashing them with a potato masher just until creamy, about 2 minutes. Season with salt and pepper and keep warm.

Heat a griddle. When it is hot, generously brush it with oil and add the masa cakes. Cook over moderately high heat, turning once or twice, until they are golden and crisp, about 4 minutes. Transfer the cakes to a platter and top each with a dollop of the beans and a mound of the poblano mixture. Garnish with the goat cheese and season with salt and pepper. Serve right away.


Because these appeared to be little side dishes or appetizers, we cooked steaks to accompany them. That make it a pretty good meal. I halved this recipe and came up with five little masa cakes. And this masa stuff is interesting. It's corn flour, not corn meal like this Southern girl is used to. It's for tortillas, not cornbread. But it mixed up into this crumbly dough that packed well and flattened just fine. Kind of like slightly wet sand at the beach.


One thing that needs to be added next time is more heat - and by heat, I mean Tabasco sauce. We determined the beans could benefit the most from added heat, and the poblanos (of which I used two) didn't seem to add any heat at all. They rank just above "complete wuss" on the Scoville scale. The goat cheese is awesome, adding a dash of tangy goodness to the whole mix. I didn't have a griddle for the masa cakes, so I just used a pan brushed with oil. They probably could have gone for a little longer in order to achieve the optimum crispiness, but our steaks were ready and we didn't want them to be cold.


Masa Griddle Cakes with Poblanos and Goat Cheese

Finished product, all five of them


Masa Griddle Cakes with Poblanos and Goat Cheese

A close up - you can see the way it's all piled onto the cakes


This is a dish I would make again with a few adjustments. More heat is needed, plus I have to figure out a way to keep the cakes warm, specifically the beans. The beans and poblano/onion mixture cooled down very quickly after it all came off the stove. I even nuked the beans and poblanos before I plated everything and it still cooled down a good bit. So that needs to be overcome, but otherwise it's "pretty freaking good."