Showing posts with label bread. Show all posts

Wednesday, April 7, 2010

Marbled Chocolate Banana Bread

I want to start off by saying I found this recipe in Cooking Light. I note that point specifically because once you take a bite of this moist, chocolaty bread, you will not at all believe it is light. Everything in moderation and all that jazz, but this is an outstanding recipe and a great way to use up some over ripe bananas.


Marbled Chocolate Banana Bread

Yield: 16 slices

2 C all purpose flour
½ t salt
1 C sugar
1 ½ C mashed bananas (about 3)
½ C egg substitute (2 eggs)
1/3 C plain low-fat yogurt
½ C semi-sweet chocolate chips
¾ t baking soda
¼ C butter, softened
Cooking spray

Preheat oven to 350˚. Lightly spoon flour into dry measuring cups. Combine flour, baking soda and salt. Place sugar and butter in a large bowl; beat with a mixer at medium speed until well blended. Add banana, egg and yogurt; beat until blended. Add flour mixture; beat at low speed until just moist.

Place chocolate chips in a medium microwave safe bowl. Microwave at high for one minute until almost melted, stirring until smooth. Cool slightly. Add 1 cup of batter to chocolate and stir until combined. Spoon chocolate batter alternately with plain batter into an 8 ½ x 4 ½ greased loaf pan. Swirl batters together using a knife. Bake at 350˚ for one hour or until wooden pick inserted in center comes out clean. Cool 10 minutes in pan on a wire rack; remove from pan; cool completely on wire rack.

Calories: 183 (23% from fat)
Fat: 4.7g (sat 2.8g,mono 1.4g,poly 0.2g)
Protein: 3.1g
Carbohydrate: 33.4g
Fiber: 1.3g
Cholesterol:
8mg
Iron: 1.1mg
Sodium: 180mg
Calcium: 18mg


This is so incredibly delicious. The first time I made it, I literally wanted to eat the entire loaf hot out of the oven. The mouth watering combination of chocolate and bananas with the texture of hot, fresh bread will quite literally send your senses into gastronomic overdrive. This bread keeps pretty well for a few days, but honestly, there is no sensible reason for it to sit more than three or four days before it's gobbled right up. It also freezes well, too, if wrapped in plastic wrap and aluminum foil.
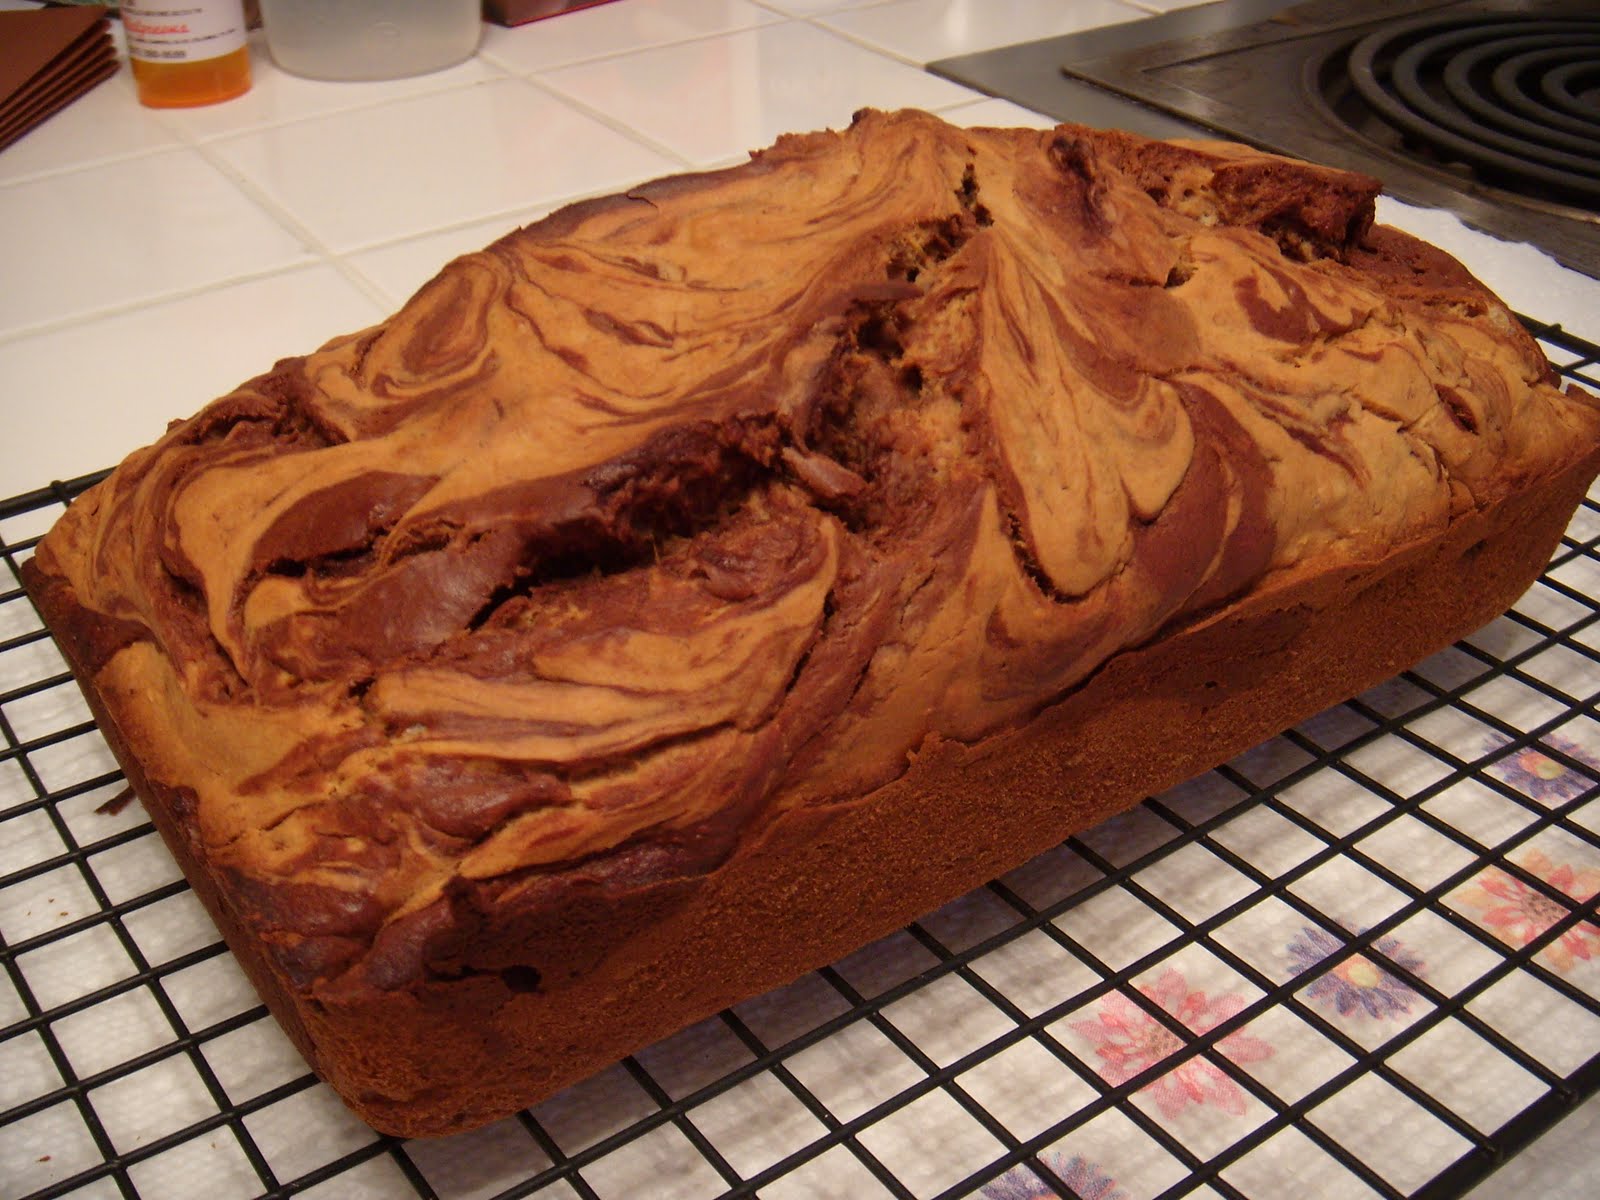
Marbled Chocolate Banana Bread


This bread is so versatile and can be eaten as a snack, a light dessert or my favorite, breakfast! Toast two pieces in the oven until slightly browned and the ends crunchy (the slices would likely fall apart in a traditional toaster oven, but be my guest), and then - wait for it! - spread a little peanut butter on each slice. Ring, ring! Hello, who is it? It's your stomach and brain calling, and they have just simultaneously passed out from the lip smacking fusion of the holy trinity of taste and deliciousness. The Cajun holy trinity has nothing on this combo.

A few notes. With the bananas, it's really important that they be very ripe simply because it makes them easier to mash, plus they are much sweeter when they're more ripe. Some good black speckling on the peel is a fine indicator. I sliced them up into chunks and use a pastry cutter to do the mashing, or you could also use a blender or a fork. But they have to be pretty well mashed for this to work. A few little solids here and there won't cause a problem. Also, instead of the plain low-fat yogurt, I use low-fat vanilla yogurt just to add that little extra pop. Plus, I use real eggs and not the egg substitute. You could also sub in some whole wheat flour, a teaspoon of cinnamon, a smidgen of vanilla extract, etc. Whatever your little heart desires.

Sunday, February 14, 2010

Poblano-Pepper Jack Corn Bread

Cornbread is such a southern staple. It is perfect all by itself, or you can pair it with a big bowl of vegetable soup or some soup beans and you have what could possibly be the perfect meal. Or if you're like the Husband, you can crumble a few wedges up in a glass of cold milk. Not really my thing, but he loves it. This recipe says cornbread in the title, but the end result is more like corn cake. Kind of spongy, maybe even a little tiny bit sweet, but very good.


Poblano-Pepper Jack Cornbread

ACTIVE: 25 MIN
TOTAL TIME: 1 HR 45 MIN
Ingredients
1 medium poblano chile
7 tablespoons unsalted butter, 6 tablespoons melted
1 small onion, cut into 1/4-inch dice
1/2 cup thawed frozen corn kernels
1 cup all-purpose flour
1 cup yellow cornmeal
1 tablespoon sugar
2 teaspoons baking powder
1 teaspoon salt
1 cup milk
2 large eggs, beaten
4 ounces pepper jack cheese, shredded (1 1/4 cups)

Light a grill or preheat the broiler. Grill or broil the poblano, turning frequently, until charred all over, about 4 minutes. Transfer the chile to a bowl, cover with plastic wrap and let stand for 15 minutes. Peel and seed the poblano and cut it into 1/4-inch dice.

Preheat the oven to 350°. Lightly butter an 8-inch round cake pan. In a medium skillet, melt 1 tablespoon of the butter. Add the onion and cook over moderately high heat until softened, about 5 minutes. Add the poblano and corn and cook until heated through, about 1 minute.


In a large bowl, whisk the flour with the cornmeal, sugar, baking powder and salt. Add the 6 tablespoons of melted butter along with the milk and eggs and whisk until just incorporated. Fold in the poblano-corn mixture and 3/4 cup of the pepper jack cheese. Scrape the batter into the prepared cake pan and sprinkle the remaining 1/2 cup of cheese on top.

Bake the cornbread for 35 minutes, until the top is light golden and a toothpick inserted in the center comes out clean. Transfer the cornbread to a rack to cool for 20 minutes. Run a knife around the edge of the cornbread, turn it out onto the rack and let cool slightly. Cut the cornbread into wedges and serve warm.


One of the recipes the Husband graciously bestowed upon me during our marriage was his cornbread recipe. I don't know exactly who in the family was responsible for it, but it's a simple, solid recipe with four basic ingredients. This is all to say that I'm not used to a cornbread recipe taking as many ingredients as this one does. But, they're all important. The corn gives it some sweet (plus the little bit of sugar), the poblano and pepper jack cheese give it some heat, and all that butter just brings it home.

This was more of a cakey texture than regular dense cornbread. I was also unfamiliar with baking cornbread in a vessel other than a cast iron skillet, but the cake pan worked well. The batter filled the cake pan to the top and I was a smidge concerned that it would overflow in the oven, but that didn't come close to happening.


Poblano-Pepper Jack Corn Bread


One thing I changed was that I reserved the shredded pepper jack that you're supposed to put on top of the batter before it goes in the oven. In my experience, super heating cheese like that in the oven results in an inedible mess that first melts and then solidifies under the heat. So I held off until the cornbread was done, then I sprinkled the shredded pepper jack on top , put it back under the broiler for about 30 seconds, and then took it out.

Poblano-Pepper Jack Corn Bread


This was really good! The corn and diced poblano were a nice punch with each bite and the cheese that had been mixed into the batter was melted and stringy. Not your grandmother's cornbread, that's for sure. But this would go very well with some chili or even vegetable soup.

Monday, November 2, 2009

Whole Wheat Bread, Round 3

This is my third go 'round for Whole Wheat Bread. The first attempt went really well and the bread was delicious. The second time was a disaster, though I was pretty sure I had duplicated the same recipe I used the first time. But here was the issue: I previously used Arrowhead Mills Stone Ground Whole Wheat flour which was perfect, but the second time I used another brand, Hodgson Mill. What I didn't know was that the Hodgson Mill bread was gluten free, or something similar. When I used the bread recipe on the Arrowhead Mills package, but used the Hodgson Mill flour, the result was a crumbly mess that absolutely fell apart when I sliced into it. There was no saving the bread and it was a complete waste. I couldn't figure it out until I finally looked on the side of the Hodgson Mill package at their bread recipe, which calls for wheat gluten. So this third time, I followed the recipe on the Hodgson Mill package, used the wheat gluten, and voila! Delicious bread once again.


Basic Whole Wheat Bread

2 C warm water
2 packages of yeast
3 T brown sugar
1 T Hodgson Mill Vital Wheat Gluten
3 C Hodgson Mill Whole Wheat Graham Flour
1/4 C vegetable oil
1 t salt
3 to 3 1/2 C bread flour, divided

Put water in a large bowl. Add yeast, stir to dissolve. Add brown sugar, gluten and whole wheat flour. Beat well, about 200 strokes. Let yeast develop for about 10 minutes. Add oil and salt; mix thoroughly. Add two cups of the bread flour; beat well. Work in enough of the remaining bread flour to form a soft dough.

Turn out onto a lightly floured surface and knead 6 to 8 minutes, or until dough is smooth and elastic. Place in large oiled bowl and turn to coat. Cover bowl with a clean towel. Let rise in a warm, draft free place for about one hour or until doubled in bulk.

Punch dough down. Divide dough into two equal parts and form each piece into a loaf. Place in greased 9x5x3-inch loaf pans. Cover and let rise about 45 minutes, or until nearly doubled. While dough is rising, preheat oven to 400 degrees. Bake loaves about 35 minutes or until top is golden brown. Bread is done when it slides easily from the pan and sounds hollow when tapped on the bottom. Let cool on wire racks. Yield: 2 loaves.


This time I didn't try to include nuts and seeds to the dough as I was going for simplicity. As far as the 3 to 3 1/2 cups of bread flour, I think I only used the two the recipe calls for in the first paragraph. When I was kneading the dough it got very dry on me and semi crumbly. I just continued working it and it eventually came together, but there was no way I needed an extra cup or more of bread flour at that point.

Also when I divided the dough I wasn't completely careful with making sure both amounts were sized the same, nor did I shape them into a loaf before I put them in the pans. As a result, my loaves were a tad misshapen but again, they still tasted fantastic. And I didn't use a bread maker with this recipe. Just the good old oven. It's not hard to make bread, but it's just something that takes ultimate precision. Much like ensuring your flour isn't gluten-free.

Whole Wheat Bread


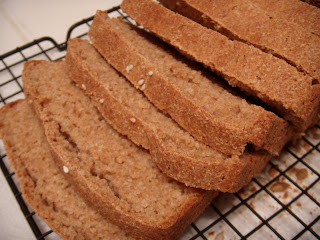
It's so good to pop a few slices in the oven for a few minutes and then slather them with real butter. Yes, REAL butter. None of that fake stuff, yogurt butter or whatever else is on the shelves. Those products have their place in the cooking world, but fresh hot bread and real butter is a combination like no other. And the smell of fresh hot bread baking is unreal.

And while baking bread is a very precise science, it's not so difficult that it can't be done. I've never used a bread machine and as long as you follow the directions and know exactly what your recipe calls for, you too can have bread success!

Friday, April 24, 2009

Extra Recipe #1 - Whole Wheat Bread

As part of the healthy eating we've been doing, we are only eating whole wheat/whole grain bread. It's healthier and, I think, tastier than white bread. White bread is all the Husband and I ate when we were kids - but didn't everyone? There may be some crunchy granola kids out there whose parents only fed them organic soy beans and tofu smoothies, but not us. We ate white bread and we loved it. We had no idea it wasn't the best thing for you to do, like riding on the handlebars of your friend's bike while not wearing a helmet and then getting scratched and scraped all over when she crashed into a blackberry bush. But anyway, we ate white bread and did crazy things and we all survived.


But now we see all of these healthy foods come out with a huge emphasis on whole grains and how they're so much better for your body. And something I don't understand is that whole grains are the original form of these little buggers that haven't been refined. Once the grains are refined, they're used for white bread. So why did everyone go through all that trouble to remove the husks and refine these grains to turn them into white bread? Why weren't they just left in their original form? It would have been much less work.


So, armed with this information we are now eating whole wheat/grain breads. They're a little expensive at about $3.50/loaf and the loaves are smaller than what you'll get for a loaf of white. We were in a new Kroger in town recently and found this brand of flour:


First of all, it says organic - the magic word that makes everything healthier, right? Ehh, not so much, but this isn't a post about organic vs. non-organic food. Anyway, this whole wheat flour sounded like the perfect excuse to make my own bread. Plus, there was a bread recipe on the package which was reason enough to make it. Recipe to come soon.


Whole Wheat Bread


Whole Wheat Bread


The recipe indicated it would be about two hours to make the bread from beginning to end. This was somewhat bad timing because I didn't begin this process until about 7:45pm, but I figured 'what the heck.' This dough called for yeast, which was something I haven't used in a while when I make bread. I've been using a bottle of light beer for the yeast, which actually really works well. Corona has been my beer of choice. The only problem with using beer as yeast is that the bread really develops that yeasty beer taste after a few days. You have to eat it quickly or it will start to ferment. You don't want that.


The dough went into the oiled pan and as I searched in vain for a warm place in our drafty positively air tight, lovely 75-year old house, I suddenly remembered our pseudo laundry room right off of the kitchen. I plopped the bread pan on top of the dryer, laid a damp cloth over the bread, set the dryer for 40 minutes, and went off to watch TV. Foolproof, right? Well, the dough did rise but not quite enough. The recipe called for it to double and it was probably another 40 minutes from completely being doubled, but at this point it was approaching 9:30 and I knew it still had 45-50 minutes to bake. That was probably the downfall of this whole experience - the fact that it didn't rise all the way. Must be a better steward of time next time I do this.


I also put some sesame and sunflower seeds on top of the dough before it went in the oven to emulate the store bought brands. Next time I may try to bake those into the bread because when it came out of the oven, the seeds and nuts hadn't adhered at all. When I inverted the bread onto the cooling rack, all of the seeds and nuts fell off onto the counter top. Lesson learned. It absolutely smelled heavenly, though! I immediately cut it into slices to let the heat escape so I could store it and get to bed - it's about 10:30pm by now and I'm fading fast. The Husband worked late and had just arrived home when the bread came out, so he was the first to try a piece. It was good but kind of dense. The full rise definitely would have prevented that.


I do want to try to make this bread again, though. I'll do a few things differently: full rise, seeds and nuts in the bread, and mix in less flour even if it's really sticky. It called for an initial 2 cups of flour but up to 2-3 more to add in to the final dough. I used a little more than 5 because the kneading process was becoming a sticky mound on my cutting board. Thank heavens for my bench scraper or I would have been totally lost. This was a good first attempt and I'm going to give it another shot.