Boeuf BourguignonYes, this is the entire recipe. Like I said, this was difficult and I wasn't immediately sure where to begin since there was so much involved.
Ingredients
1 6-ounce chunk of bacon
1 9- to 10-inch fireproof casserole 3 inches deep
1 tablespoon olive oil or cooking oil
1 slotted spoon
3 pounds lean stewing beef cut into 2-inch cubes
1 sliced carrot
1 sliced onion
1 teaspoon salt
1/4 teaspoon pepper
2 tablespoons flour
3 cups of a full-bodied young red wine such as one of those suggested for serving or a Chianti
2-3 cups brown beef stock or canned beef bouillon
1 tablespoon tomato paste
2 cloves mashed garlic
1/2 teaspoon thyme
a crumbled bay leaf
the blanched bacon rind
18-24 small white onions (brown-braised in stock)
1 pound quartered fresh mushrooms sauteed in butter
parsley sprigs
Directions
Remove rind and cut bacon into lardons (sticks, 1/4-inch thick and 1 1/2-inches long). Simmer rind and bacon for 10 minutes in 1 1/2 quarts of water. Drain and dry.
Preheat oven to 450 degrees.
Saute the bacon in the oil over moderate heat for 2 to 3 minutes to brown lightly. Remove to a side dish with a slotted spoon. Set casserole aside. Reheat until fat is almost smoking before you saute the beef.
Dry the beef in paper towels; it will not brown if it is damp. Saute it, a few pieces at a time, in the hot oil and bacon fat until nicely browned on all sides. Add it to the bacon.
In the same fat, brown the sliced vegetables. Pour out the sauteing fat.
Return the beef and bacon to the casserole and toss with the salt and pepper. Then sprinkle on the flour and toss again to coat the beef lightly with the flour. Set casserole uncovered in middle position of preheated oven for 4 minutes. Toss the meat and return to oven for 4 minutes more. (This browns the flour and covers the meat with a light crust.) Remove casserole and turn oven down to 325 degrees.
Stir in the wine and enough stock or bouillon so that the meat is barely covered. Add the tomato paste, garlic, herbs and bacon rind. Bring to simmer on top of the stove. Then cover the casserole and set in lower third of preheated oven. Regulate heat so liquid simmers very slowly for 2 1/2 to 3 hours. The meat is done when a fork pierces it easily.
While the beef is cooking, prepare the onions and mushrooms. Set them aside until needed.
When the meat is tender, pour the contents of the casserole into a sieve set over a saucepan. Wash out the casserole and return the beef and bacon to it. Distribute the cooked onions and mushrooms over the meat.
Skim fat off the sauce. Simmer sauce for a minute or two, skimming off additional fat as it rises. You should have about 2 - 2 1/2 cups of sauce thick enough to coat a spoon lightly. If too thin, boil it down rapidly. If too thick, mix in a few tablespoons of stock or canned bouillon. Taste carefully for seasoning. Pour the sauce over the meat and vegetables.
(*) Recipe may be completed in advance to this point.
FOR IMMEDIATE SERVING
Cover the casserole and simmer for 2 to 3 minutes, basting the meat and vegetables with the sauce several times. Serve in its casserole, or arrange the stew on a platter surrounded with potatoes, noodles or rice, and decorated with parsley.
FOR LATER SERVING
When cold, cover and refrigerate. About 15 to 20 minutes before serving, bring to the simmer, cover and simmer very slowly for 10 minutes, occasionally basting the meat and vegetables with the sauce.
VEGETABLE AND WINE SUGGESTIONS
Boiled potatoes are traditionally served with this dish. Buttered noodles or steamed rice may be substituted. If you also wish a green vegetable, buttered peas would be your best choice. Serve with the beef a fairly full-bodied, young red wine, such as Beaujolais, Cotes du Rhone, Bourdeaux-St. Emilion or Burgundy.
First, the bacon. I couldn't find the chunk of bacon with the rind, most likely big thick slab bacon. I just used regular packaged breakfast bacon and I think it turned out fine. The bacon is by no means the star of the dish, or even part of the supporting cast, but it's still important enough to have this level of attention devoted to it. I cut the bacon into small pieces and readied my pot with some water and dumped the bacon in there to simmer. And you know what that created, kids? Bacon water! Yes, it was bacon flavored water. No, I didn't drink any of it, but still, the kitchen smelled like bacon and it was fabulous. Think of all the stuff that could be made better with bacon! Bacon ice cream, bacon flavored chocolate, bacon bourbon! Oh, lovely bacon. You make me happy.
The recipe calls for lean stew beef, and the closest thing I found at the store was a really nice chuck roast. Very lean and it still didn't dry out at the end of the cooking process. I cubed the meat and patted them dry to promote browning.
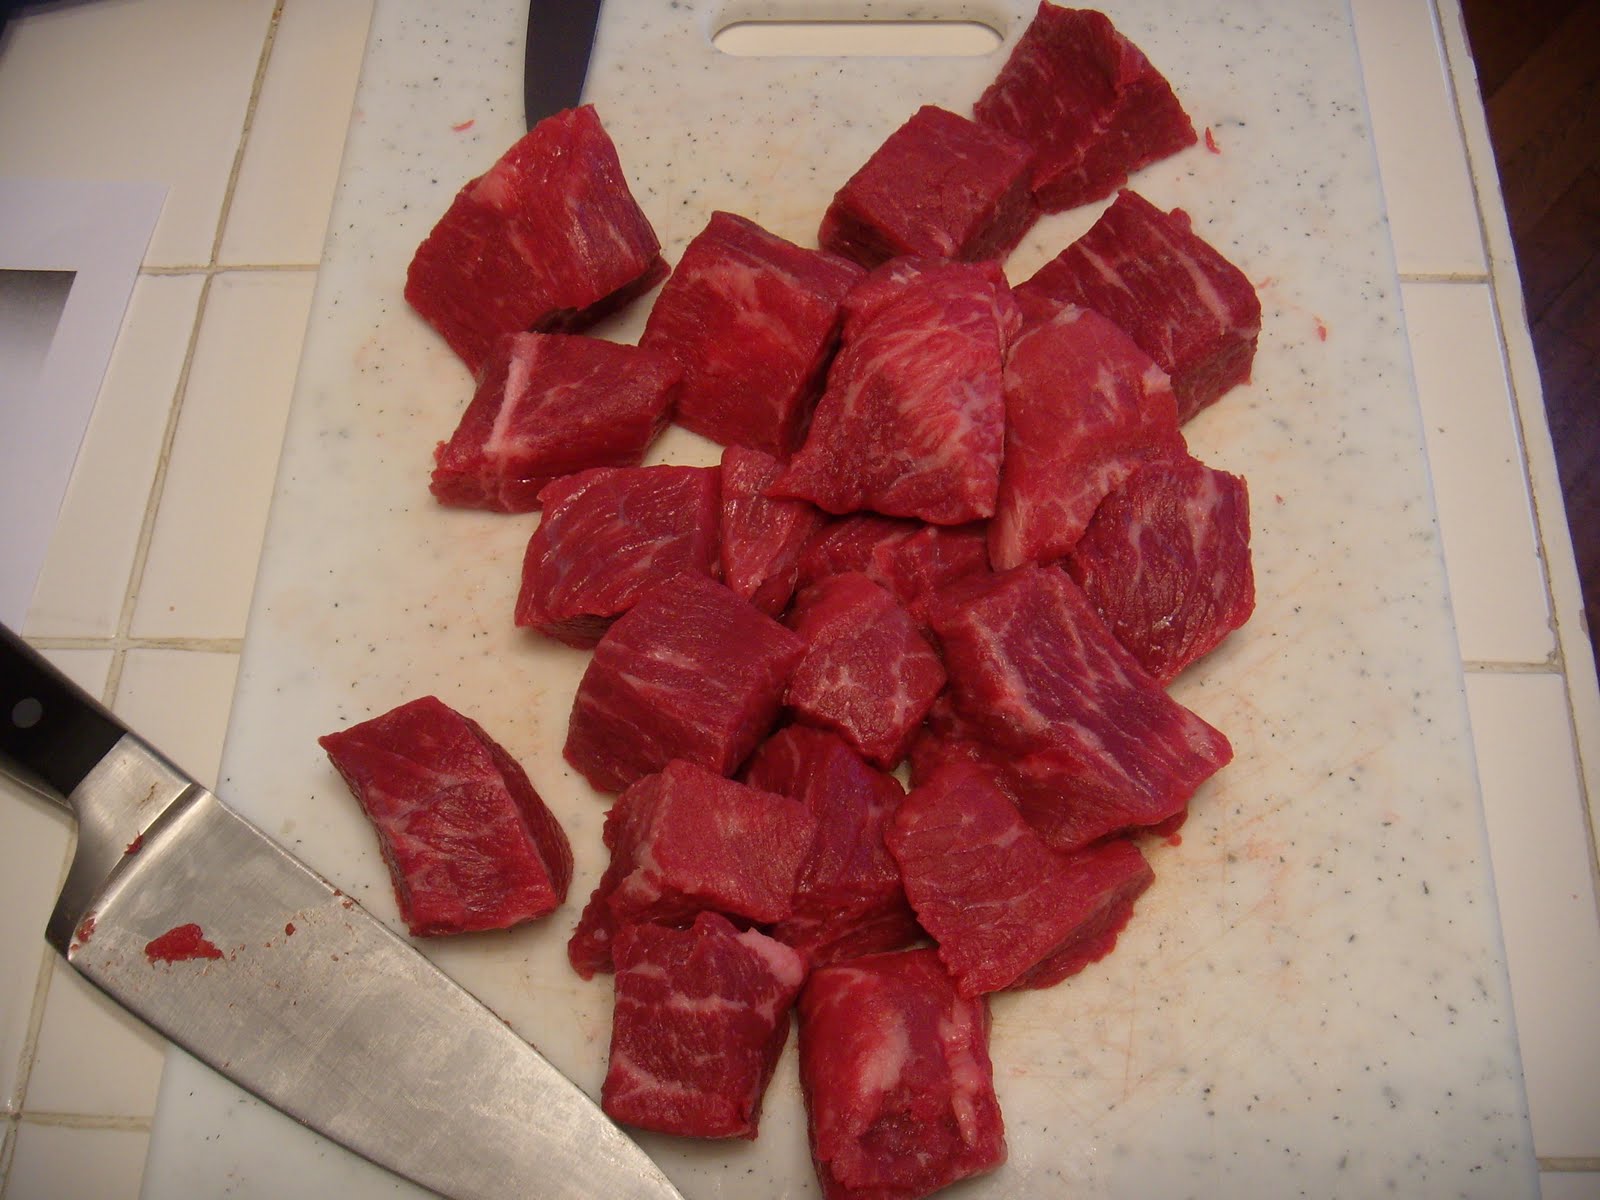
And then the meat went into my cast iron pot, about five pieces at a time. I didn't want to crowd the pot and I needed to give each piece of meat ample space to brown properly.

Once all of the meat was browned, it went off to the side while I browned my sliced onions – not the pearl onions – and sliced carrots in my pot. I added the cubed, browned beef back to the pot with the bacon, tossed with flour, and put it into the 450˚ oven – which is hot! – for four minutes. The buzzer went off, I tossed the meat a little in the pot, the back into the oven for four more minutes. The pot came out again and I lowered the heat to a more respectable 325˚. My kitchen smells fabulous at this point, but it’s also hot as hell in there!
At this point, the Husband has wandered into the kitchen to see where I am in this monumental process. He approves of the smells emanating from the oven and agrees this is heading in the right direction. Then he sees me adding in the next batch of ingredients and he suddenly starts to give me a weird look. A look that says, “I’m not really sure about this anymore…” I’ll tell you why he gave me that look a little later.
This recipe calls for a lot of wine – three cups. The Husband purchased a large bottle of Macaroni Grill Chianti which was delicious. That’s a key rule – never cook with wine you wouldn’t otherwise drink. So I dumped three cups of Chianti into the pot, added some stock to just barely cover the meat, then the tomato paste, herbs and garlic. As for the bacon rind, I just didn’t have it. So… I didn’t add it. I don’t think it made a huge difference, but then again, I’ve only made this dish one time. So what do I know?
After everything went into the oven for its three hour sauna, I started the prep for my pearl onions. Even though the onions are part of the Boeuf Bourguignon recipe, they are actually separate. Here is the recipe straight from Julia’s cookbook:
Brown Braised Onions
18 to 24 peeled white onions about 1 inch in diameter
1½ Tb butter
1½ Tb oil
½ cup of brown stock, canned beef bouillon, dry white wine, red wine, or water
Salt and pepper to taste
A medium herb bouquet: 4 parsley sprigs, ½ bay leaf, and ¼ tsp thyme, tied in cheeseclothDirections
When the butter and oil are bubbling in the skillet, add the onions and sauté over moderate heat for about 10 minutes, rolling the onions about so they will brown as evenly as possible. Be careful not to break their skins. You cannot expect to brown them uniformly.
Then either braise them as follows:
Pour in the liquid, season to taste, and add the herb bouquet. Cover and simmer slowly for 40 to 50 minutes until the onions are perfectly tender but retain their shape, and the liquid has evaporated. Remove herb bouquet. Serve them as they are, or follow one of the suggestions at the end of the recipe.
Or bake them as follows:
Transfer the onions and their sautéing fat to a shallow baking dish or casserole just large enough to hold them in one layer. Set uncovered in upper third of a preheated 350-degree oven for 40 to 50 minutes, turning them over once or twice. They should be very tender, retain their shape, and be a nice golden brown. Remove herb bouquet.
The onions may be cooked hours in advance, and reheated before serving.
I had never worked with pearl onions before and I was convinced I wouldn’t end up using all of the onions I bought – they were in a bag of about 20 or so. I didn’t want the dish to be too onion-y tasting and in my experience, 20 onions, regardless of the size, would cause that to happen. But, obeying Julia, I went ahead with the recipe and began to peel them as best I could. Those little paper skins stuck to my fingers and made a sizeable mess, but in the end they all came out very nicely.

I opted to use the stovetop braising method since my oven was already occupied. These little beauties went into the pan with copious amounts of butter and oil, along with beef stock (my liquid of choice) and herbs. That’s another thing – the French sure know what they’re doing when it comes to cooking. I have never used so much butter and oil in a dish before and it made everything taste and smell so good. According to Williams Sonoma, the combination of butter and oil is because the butter provides flavor but will burn at a relatively low heat, while the oil can withstand a higher heat and therefore allows the butter to be heated to a higher temperature. This method also does a great job browning the onions without burning them. They also break down a little during the cooking process which makes them more tender and able to soak up a lot of the flavor. Also, after 40 minutes of cooking, the natural sugars have emerged and those little onions are now as sweet as can be! They are brown and delicious and tender and I had a hard time not going ahead and sampling one right then and there.
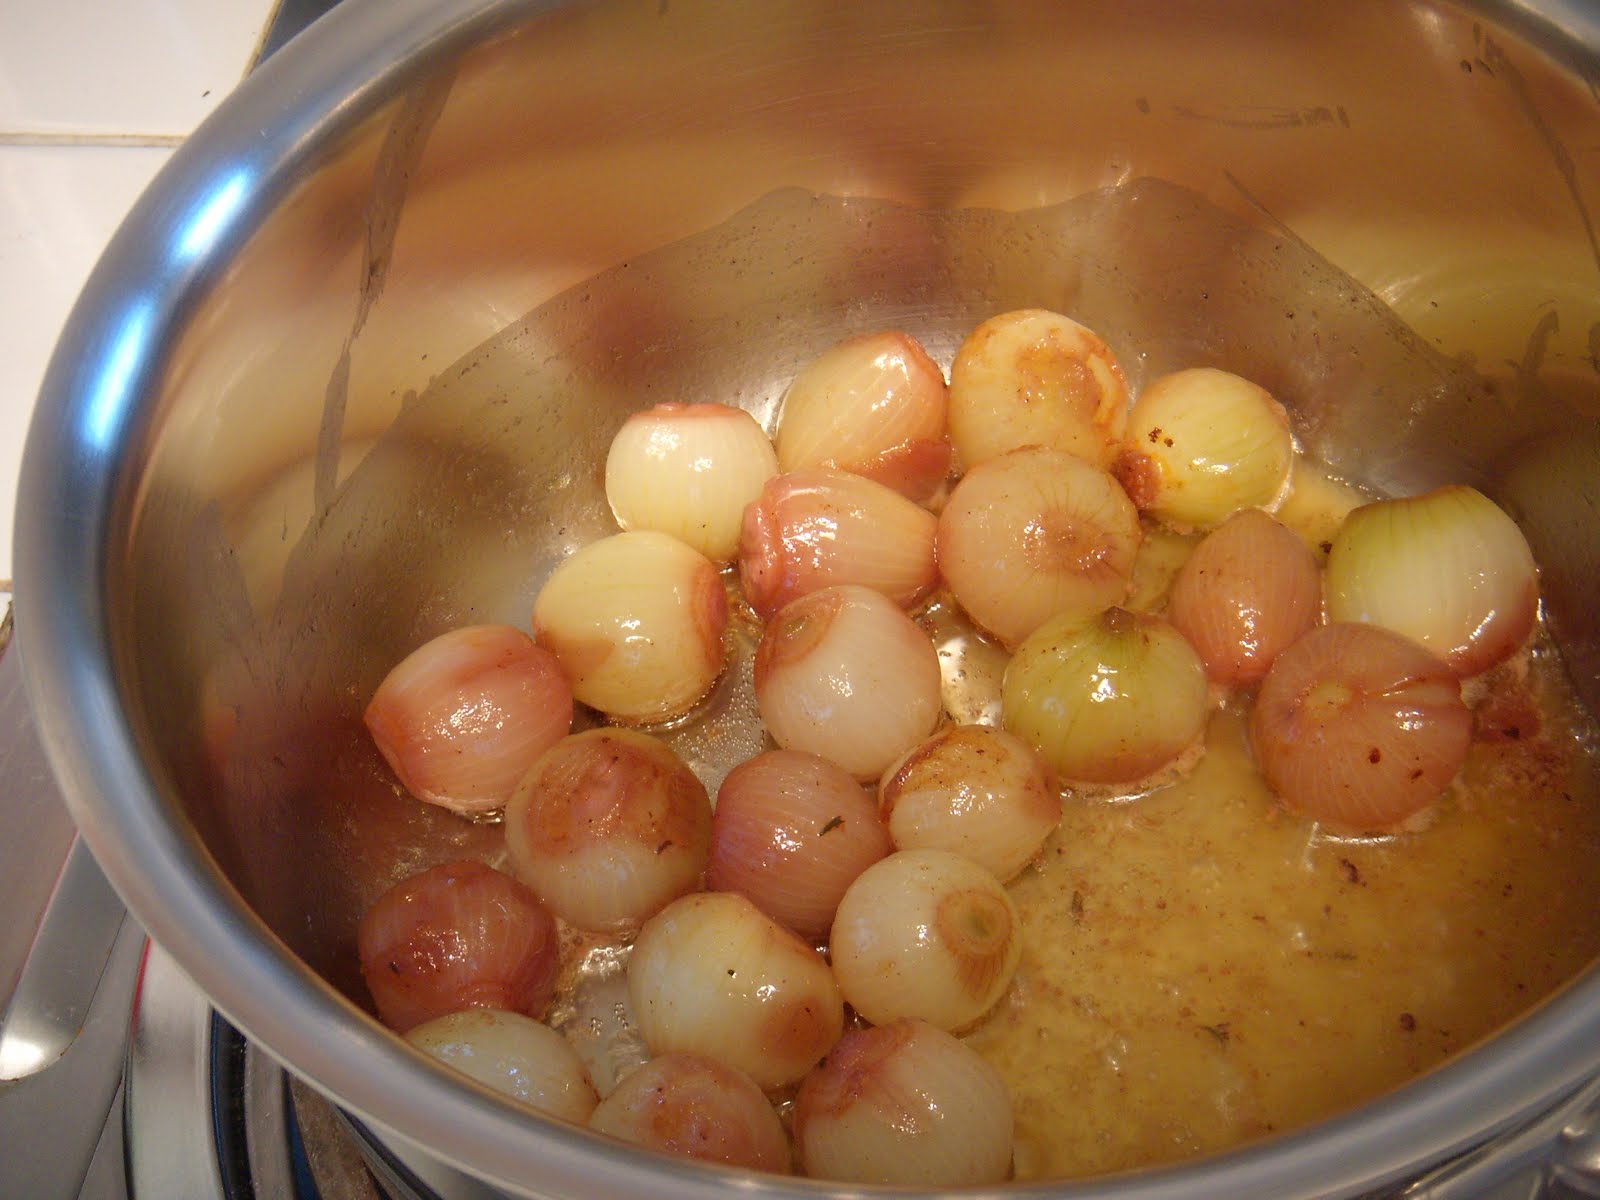
See how good these look? And this isn’t the final product. They continued to reach a deeper brown color and soaked up every bit of that flavor.
Next, the mushrooms. Again, this recipe is separate from the Boeuf Bourguignon recipe.
Sautéed Mushrooms
2 Tb butter
1 Tb oil
½ lb fresh mushrooms, washed, well dried, left whole if small, sliced or quartered if large
Optional: 1 to 2 Tb minced shallots or green onions
Salt and pepper
Directions
Place the skillet over high heat with the butter and oil. As soon as you see that the butter foam has begun to subside, indicating it is hot enough, add the mushrooms. Toss and shake the pan for 4 to 5 minutes. During their sauté the mushrooms will at first absorb the fat. In 2 to 3 minutes the fat will reappear on their surface, and the mushrooms will begin to brown. As soon as they have browned lightly, remove from heat.
Toss the shallots or green onions with the mushrooms. Sauté over moderate heat for 2 minutes.
Sautéed mushrooms may be cooked in advance, set aside, then reheated when needed. Season to taste just before serving.
Use these mushrooms either as a vegetable alone or in a combination with other vegetables, or as an integral part of such dishes as coq au vin, boeuf bourguignon, poulet en cocotte. Successfully sautéed mushrooms are lightly browned and exude none of their juice while they are being cooked; to achieve this the mushrooms must be dry, the butter very hot, and the mushrooms must not be crowded in the pan. If you sauté too many at once they steam rather than fry; their juices escape and they do not brown. So if you are preparing a large amount, or if your heat source is feeble, sauté the mushrooms in several batches.
This last part in italics is an admonition from Julia to ensure the proper way of sautéing mushrooms, or anything really. It was news to me, so I’m glad I had this extra bit of information. So into a pan go more butter and oil:

And then the mushrooms went into the pan. My heat isn’t feeble, but my pan isn’t that large. Looking at my picture now, I realize I probably still put too many shrooms into the pan at once. I should have broken then down into smaller batches. But as I cooked them, they adhered pretty closely to the above description where there wouldn’t be any excess juice and they did brown well, so I guess it turned out well after all.
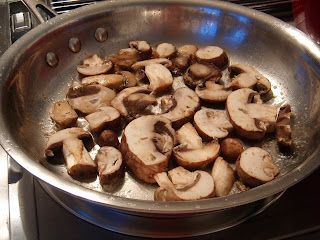
Yep, I would say they turned out just fine.
Before I know it, three hours have passed and my house smells like le Cordon Bleu on graduation day. The Husband has gravitated back to the kitchen to see the finished product and as I take the lid off, the smell almost knocks me off my feet – but in a good way! I wish I had taken a photo of this step. The sauce had reduced to a thick, rich version of its former self and it was a deep reddish-brown. The meat had retained its shape and was visually falling apart in the pot. I happened to notice the Husband has brought his earlier “I’m not really sure about this anymore…” look back to life and is hovering over my shoulder while I fawn over my intoxicating concoction. Brushing him off, I picked up the other pot where I had just finished boiling up some egg noodles and began plating everything. The onions and mushrooms went into the pot and I stirred everything to mix. Noodles on the plate, Boeuf Bourguignon on the plate.
Admittedly, I did skip a large step here. The recipe calls for the casserole contents to be dumped into a sieve over a stock pot, ideally so the solids stay in the sieve and the liquid falls into the sauce pot. Then the pot should be washed out, the solids returned to the pot and the sauce simmered in a separate pot, then again combining the two. What? Huh? Why in the world would you do that? First of all, that cast iron pot just came out of a hot oven after baking for three plus hours. Don’t you think it will take some time to cool down before it can be washed? Second, do you not think the step of washing the pot would erase an untold amount of taste and complexity from the dish? And third, why bother? I don’t pretend to know what was going through the authors’ collective heads when they wrote this recipe, but I’m not following. This step seems like a huge waste of taste and time so I just didn’t do it. That’s how I roll.

And here it is. We even used the good china! In a combination of astonishment, slight arrogance and downright giddiness, I can’t help but say “I can’t believe I did this!” in between every bite. The meat was fork tender – and when I say this, I realize that a lot of cuts of meat can be fork tender. But this was different. Just putting the tines into a piece of meat and turning the fork slightly resulted in an entire hunk of meat separating from itself with no effort. The fibers in the meat had almost completely disappeared, even though this was a seriously lean cut of meat to begin with. The rich sauce thickly coated everything it touched, but it didn’t weigh the dish down. It didn’t become goopy or anything like that. The flavors had melded so well and combined perfectly. Which brings me back to the husband’s “I’m not really sure about this anymore…” look. He tells me this as we’re both devouring the meal. When he first saw me add so much wine, his first concern was that the entire dish would have an overpowering wine taste. But I can say that was absolutely not the case. Neither of us could detect a taste of the wine – the flavors had come together that well. The reduction likely strengthened the flavor but also helped to break it down. I can’t say for sure, I’m just opining. His second concern was the addition of so much liquid. He felt for sure that amount of liquid – remember, it came all the way up to the level of the meat in the pot – would result in boiling the meat and cause it to be tough and leathery. Neither was the case. The acid in the wine likely contributed to the meat being so tender and helping to break down the fibers. Again, just my opinion.
The end result is an amazing dish that I can add to my “I had no idea I could cook stuff like this” list. Seriously, I have determined that as long as it has directions, I can make it. Just follow the stinking directions et voila, I have a masterpiece. This is off the charts. Thanks Julia.


