Showing posts with label five star. Show all posts

Monday, October 22, 2012

Tom Kha Gai

I’ve tried for so long to find a good recipe for Tom Kha Gai, or Thai Chicken Coconut Soup. There’s a great restaurant in our area that serves it and the Husband gets it almost every time we go there. It’s creamy and silky and it has an explosion of Thai flavors that are very specific to the cuisine – if you’ve had Thai food before, you know those flavors. Tart, sweet, spice, heat, all rolled into one dish typically. It’s so amazing. I was looking at doing a cooking class at our local Viking Cooking School and I found this recipe and decided to give it a shot. Bullseye!


Tom Kha Gai

16 ounces chicken stock
4 to 5 kaffir lime leaves*, bruised in a mortar and pestle
2 stalks lemongrass*, white and pale green tips only, trimmed, bruised in a mortar and pestle
1 (2-inch) piece galangal* (or ginger root), thinly sliced
1 (8-ounce) can straw mushrooms, drained and rinsed
1 (13-1/2-ounce) can coconut milk, thick cream removed and reserved from top of can
1 whole dried red chile pepper*, or to taste, slightly crushed in a mortar and pestle
1 (6-ounce) chicken breast, cut into bite-size pieces
2 tablespoons fish sauce, or to taste
3 tablespoons freshly squeezed lime juice, or to taste (juice of about 2 medium limes)
6 green onions, green tops only, cut into 1/16-inch thick slices
1/4 cup whole fresh cilantro leaves, packed
Steamed jasmine rice, for an accompaniment (recipe below)

Directions:

In a medium sauce pan, combine the chicken stock, kaffir lime leaves, lemongrass, galangal, and straw mushrooms over medium-high heat. Bring mixture to a boil, then add the thin coconut milk, Thai chile, and chicken pieces. Immediately reduce the heat to medium and simmer gently, uncovered, until the chicken is just cooked through, about 2 minutes.

Just before serving, stir in the fish sauce, lime juice, green onions, and cilantro. Taste and adjust the seasoning with fish sauce, lime juice, and chiles as needed. (Hint: The key to this dish is executing the final seasoning; for a saltier, more complex dish, add more fish sauce, one teaspoon at a time, up to 4 tablespoons. For a brighter, livelier soup, add more lime juice. For a fiery finish, stir in another chile.) Just before serving, top each bowl with a dollop of coconut cream; serve immediately with jasmine rice.

*These aromatics (kaffir lime leaves, lemongrass, galangal, and whole dried chiles) are for flavoring the liquid only; they are not to be consumed. If you prefer, you may place these aromatics in the center of a dampened, 6-inch square piece of cheesecloth folded double. Draw up the sides to form a pouch and tie with kitchen twine. Continue with the recipe as directed above, then discard the sachet before serving.

To make it light: Substitute light coconut milk; omit the coconut cream.


I’ve made this soup before, using a different recipe, and the results were nothing to write home about. It was watery and the heat was overpowering. But this version is incredible. There’s such a great balance of all of the flavors and they come together really well. I used light coconut soup in the recipe and there was no difference in taste, plus we saved a few calories.


Some of the items may seem very unfamiliar, for instance, fish sauce.


This is some pungent stuff! Just a tip – don’t stick your nose into the opening of the bottle trying to decide if I’m right about this. It will turn you inside out and you may very well try to make the soup without the fish sauce because you cannot agree to put something this foul smelling into your food. You actually don’t get the overpowering fish taste in the soup – trust me. It’s just enough to where it’s a necessary amount, but again, please don’t do a sniff test for yourself. And don’t turn to Google to read about how they make fish sauce. You don’t want to know.


Some other unfamiliar items are kaffir lime leaves, galangal, and lemongrass. The lemongrass is something you can find in the spice aisle of the grocery store. It looks like lightly colored, rolled up cinnamon sticks. Some recipes may call for it to be rehydrated and diced, but here you just use it as flavoring. The galangal looks like ginger root and is of the same family, but the taste isn’t exactly the same. The recipe notes you can use ginger in its place, and that’s what I did. The kaffir lime leaves are really interesting, though. I was able to get these leaves from the international food market in town, the same place I purchased the zatar for the Grilled Middle Eastern Meatballs. They came in a little plastic bag, about 8-10 leaves total, and they smelled like the freshest bunch of limes you can imagine. As with the galangal and lemongrass, these are just used for seasoning. But the flavors resulting from these items are definitely one of a kind.


What I also discovered after the soup was finished cooking is that it really doesn’t make very much. At all. Like, I could have eaten the whole pot by myself. So I steamed some jasmine rice, added a little of the remaining coconut milk that I had reserved for just this use, nuked a thing of Asian vegetables and tossed in some sautéed shrimp I had in the freezer. Ta da! Instant dinner. And a really delicious one at that.

Wednesday, May 18, 2011

Boeuf Bourguignon

Had I never watched "Julie and Julia," I never would have been interested in cooking this recipe. But since I did watch the movie and it was a central focus of the plot, and also because I've gotten used to taking on recipes that look incredibly difficult, I dove in this one head first. It took hours - literally. With prep, stove time and oven time, it was about a five hour process. But the results were amazing, beautiful and a feast for both the eyes and the mouth. Seriously, this was fantastic and I'd do it over again in a heartbeat.


Boeuf Bourguignon

Ingredients
1 6-ounce chunk of bacon
1 9- to 10-inch fireproof casserole 3 inches deep
1 tablespoon olive oil or cooking oil
1 slotted spoon
3 pounds lean stewing beef cut into 2-inch cubes
1 sliced carrot
1 sliced onion
1 teaspoon salt
1/4 teaspoon pepper
2 tablespoons flour
3 cups of a full-bodied young red wine such as one of those suggested for serving or a Chianti
2-3 cups brown beef stock or canned beef bouillon
1 tablespoon tomato paste
2 cloves mashed garlic
1/2 teaspoon thyme
a crumbled bay leaf
the blanched bacon rind
18-24 small white onions (brown-braised in stock)
1 pound quartered fresh mushrooms sauteed in butter
parsley sprigs

Directions
Remove rind and cut bacon into lardons (sticks, 1/4-inch thick and 1 1/2-inches long). Simmer rind and bacon for 10 minutes in 1 1/2 quarts of water. Drain and dry.

Preheat oven to 450 degrees.

Saute the bacon in the oil over moderate heat for 2 to 3 minutes to brown lightly. Remove to a side dish with a slotted spoon. Set casserole aside. Reheat until fat is almost smoking before you saute the beef.

Dry the beef in paper towels; it will not brown if it is damp. Saute it, a few pieces at a time, in the hot oil and bacon fat until nicely browned on all sides. Add it to the bacon.
In the same fat, brown the sliced vegetables. Pour out the sauteing fat.

Return the beef and bacon to the casserole and toss with the salt and pepper. Then sprinkle on the flour and toss again to coat the beef lightly with the flour. Set casserole uncovered in middle position of preheated oven for 4 minutes. Toss the meat and return to oven for 4 minutes more. (This browns the flour and covers the meat with a light crust.) Remove casserole and turn oven down to 325 degrees.

Stir in the wine and enough stock or bouillon so that the meat is barely covered. Add the tomato paste, garlic, herbs and bacon rind. Bring to simmer on top of the stove. Then cover the casserole and set in lower third of preheated oven. Regulate heat so liquid simmers very slowly for 2 1/2 to 3 hours. The meat is done when a fork pierces it easily.

While the beef is cooking, prepare the onions and mushrooms. Set them aside until needed.

When the meat is tender, pour the contents of the casserole into a sieve set over a saucepan. Wash out the casserole and return the beef and bacon to it. Distribute the cooked onions and mushrooms over the meat.

Skim fat off the sauce. Simmer sauce for a minute or two, skimming off additional fat as it rises. You should have about 2 - 2 1/2 cups of sauce thick enough to coat a spoon lightly. If too thin, boil it down rapidly. If too thick, mix in a few tablespoons of stock or canned bouillon. Taste carefully for seasoning. Pour the sauce over the meat and vegetables.

(*) Recipe may be completed in advance to this point.

FOR IMMEDIATE SERVING

Cover the casserole and simmer for 2 to 3 minutes, basting the meat and vegetables with the sauce several times. Serve in its casserole, or arrange the stew on a platter surrounded with potatoes, noodles or rice, and decorated with parsley.

FOR LATER SERVING

When cold, cover and refrigerate. About 15 to 20 minutes before serving, bring to the simmer, cover and simmer very slowly for 10 minutes, occasionally basting the meat and vegetables with the sauce.

VEGETABLE AND WINE SUGGESTIONS

Boiled potatoes are traditionally served with this dish. Buttered noodles or steamed rice may be substituted. If you also wish a green vegetable, buttered peas would be your best choice. Serve with the beef a fairly full-bodied, young red wine, such as Beaujolais, Cotes du Rhone, Bourdeaux-St. Emilion or Burgundy.


Yes, this is the entire recipe. Like I said, this was difficult and I wasn't immediately sure where to begin since there was so much involved.

First, the bacon. I couldn't find the chunk of bacon with the rind, most likely big thick slab bacon. I just used regular packaged breakfast bacon and I think it turned out fine. The bacon is by no means the star of the dish, or even part of the supporting cast, but it's still important enough to have this level of attention devoted to it. I cut the bacon into small pieces and readied my pot with some water and dumped the bacon in there to simmer. And you know what that created, kids? Bacon water! Yes, it was bacon flavored water. No, I didn't drink any of it, but still, the kitchen smelled like bacon and it was fabulous. Think of all the stuff that could be made better with bacon! Bacon ice cream, bacon flavored chocolate, bacon bourbon! Oh, lovely bacon. You make me happy.

The recipe calls for lean stew beef, and the closest thing I found at the store was a really nice chuck roast. Very lean and it still didn't dry out at the end of the cooking process. I cubed the meat and patted them dry to promote browning.
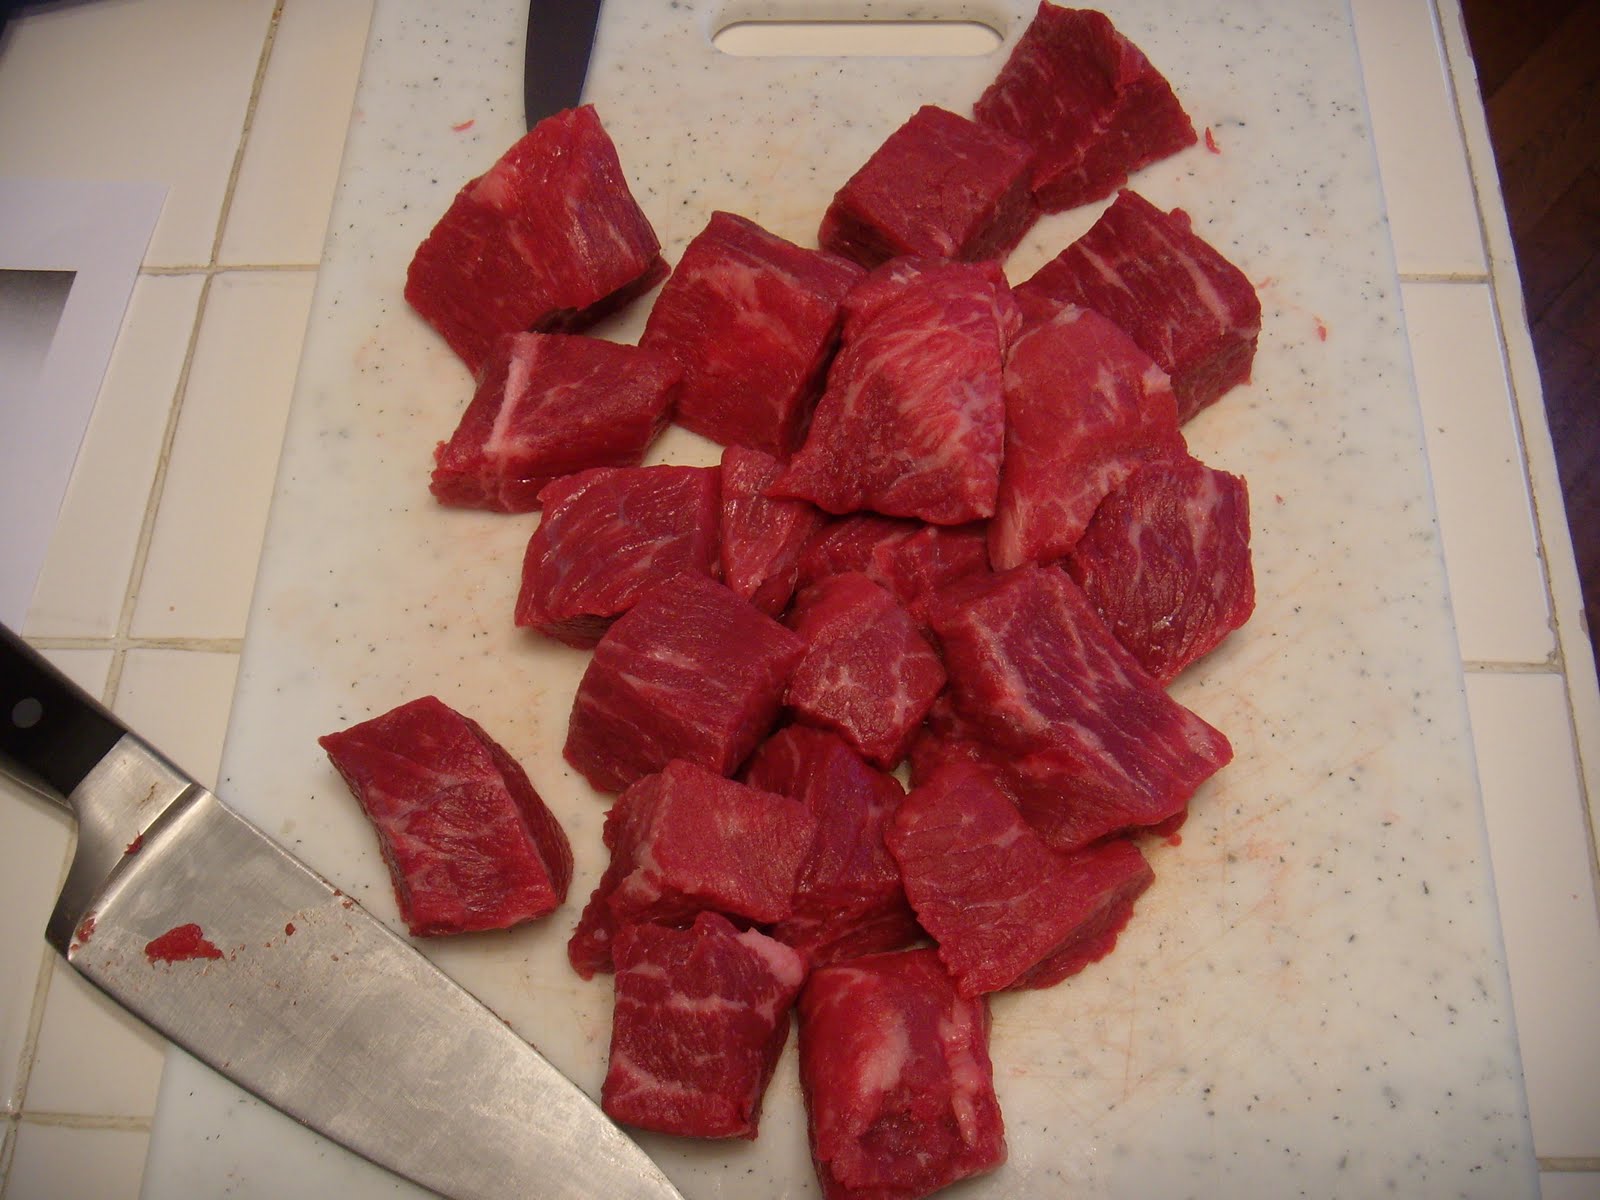


And then the meat went into my cast iron pot, about five pieces at a time. I didn't want to crowd the pot and I needed to give each piece of meat ample space to brown properly.


Once all of the meat was browned, it went off to the side while I browned my sliced onions – not the pearl onions – and sliced carrots in my pot. I added the cubed, browned beef back to the pot with the bacon, tossed with flour, and put it into the 450˚ oven – which is hot! – for four minutes. The buzzer went off, I tossed the meat a little in the pot, the back into the oven for four more minutes. The pot came out again and I lowered the heat to a more respectable 325˚. My kitchen smells fabulous at this point, but it’s also hot as hell in there!

At this point, the Husband has wandered into the kitchen to see where I am in this monumental process. He approves of the smells emanating from the oven and agrees this is heading in the right direction. Then he sees me adding in the next batch of ingredients and he suddenly starts to give me a weird look. A look that says, “I’m not really sure about this anymore…” I’ll tell you why he gave me that look a little later.

This recipe calls for a lot of wine – three cups. The Husband purchased a large bottle of Macaroni Grill Chianti which was delicious. That’s a key rule – never cook with wine you wouldn’t otherwise drink. So I dumped three cups of Chianti into the pot, added some stock to just barely cover the meat, then the tomato paste, herbs and garlic. As for the bacon rind, I just didn’t have it. So… I didn’t add it. I don’t think it made a huge difference, but then again, I’ve only made this dish one time. So what do I know?

After everything went into the oven for its three hour sauna, I started the prep for my pearl onions. Even though the onions are part of the Boeuf Bourguignon recipe, they are actually separate. Here is the recipe straight from Julia’s cookbook:


Brown Braised Onions

18 to 24 peeled white onions about 1 inch in diameter
1½ Tb butter
1½ Tb oil
½ cup of brown stock, canned beef bouillon, dry white wine, red wine, or water
Salt and pepper to taste
A medium herb bouquet: 4 parsley sprigs, ½ bay leaf, and ¼ tsp thyme, tied in cheesecloth


Directions
When the butter and oil are bubbling in the skillet, add the onions and sauté over moderate heat for about 10 minutes, rolling the onions about so they will brown as evenly as possible. Be careful not to break their skins. You cannot expect to brown them uniformly.

Then either braise them as follows:

Pour in the liquid, season to taste, and add the herb bouquet. Cover and simmer slowly for 40 to 50 minutes until the onions are perfectly tender but retain their shape, and the liquid has evaporated. Remove herb bouquet. Serve them as they are, or follow one of the suggestions at the end of the recipe.

Or bake them as follows:

Transfer the onions and their sautéing fat to a shallow baking dish or casserole just large enough to hold them in one layer. Set uncovered in upper third of a preheated 350-degree oven for 40 to 50 minutes, turning them over once or twice. They should be very tender, retain their shape, and be a nice golden brown. Remove herb bouquet.

The onions may be cooked hours in advance, and reheated before serving.


I had never worked with pearl onions before and I was convinced I wouldn’t end up using all of the onions I bought – they were in a bag of about 20 or so. I didn’t want the dish to be too onion-y tasting and in my experience, 20 onions, regardless of the size, would cause that to happen. But, obeying Julia, I went ahead with the recipe and began to peel them as best I could. Those little paper skins stuck to my fingers and made a sizeable mess, but in the end they all came out very nicely.


I opted to use the stovetop braising method since my oven was already occupied. These little beauties went into the pan with copious amounts of butter and oil, along with beef stock (my liquid of choice) and herbs. That’s another thing – the French sure know what they’re doing when it comes to cooking. I have never used so much butter and oil in a dish before and it made everything taste and smell so good. According to Williams Sonoma, the combination of butter and oil is because the butter provides flavor but will burn at a relatively low heat, while the oil can withstand a higher heat and therefore allows the butter to be heated to a higher temperature. This method also does a great job browning the onions without burning them. They also break down a little during the cooking process which makes them more tender and able to soak up a lot of the flavor. Also, after 40 minutes of cooking, the natural sugars have emerged and those little onions are now as sweet as can be! They are brown and delicious and tender and I had a hard time not going ahead and sampling one right then and there.
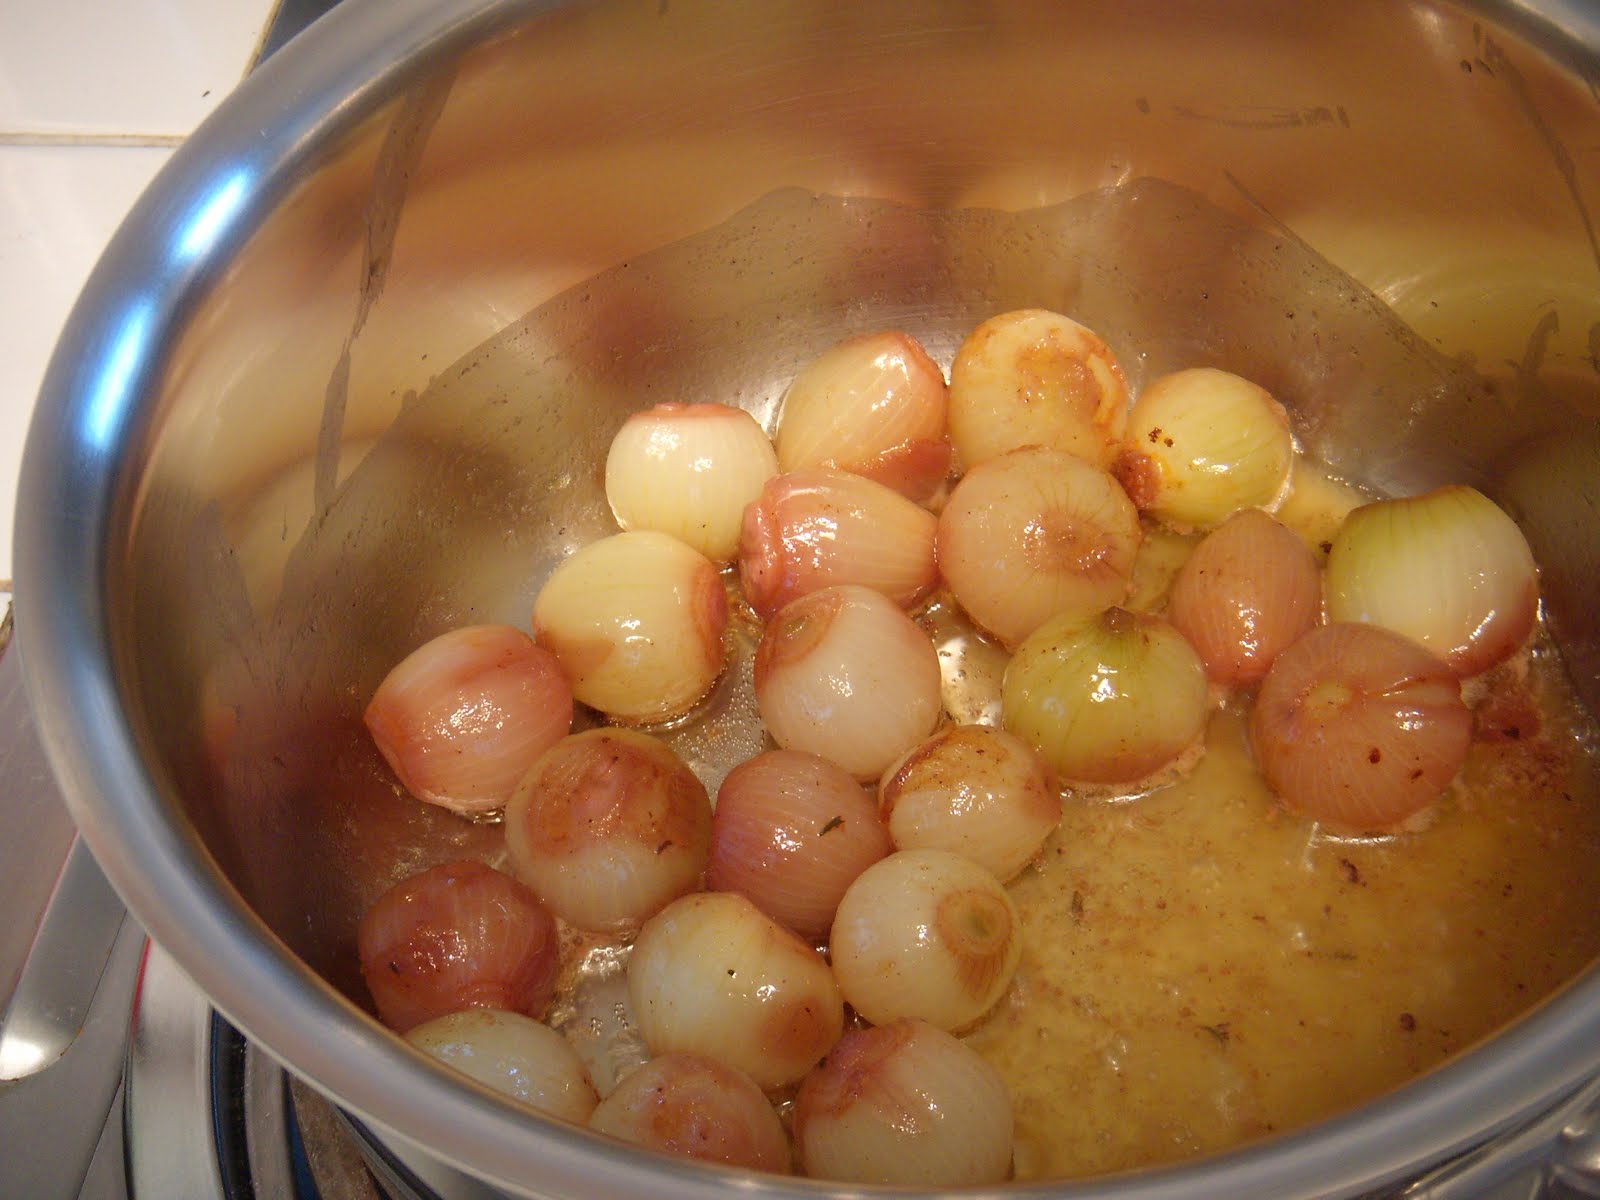


See how good these look? And this isn’t the final product. They continued to reach a deeper brown color and soaked up every bit of that flavor.


Next, the mushrooms. Again, this recipe is separate from the Boeuf Bourguignon recipe.


Sautéed Mushrooms

2 Tb butter
1 Tb oil
½ lb fresh mushrooms, washed, well dried, left whole if small, sliced or quartered if large
Optional: 1 to 2 Tb minced shallots or green onions
Salt and pepper

Directions
Place the skillet over high heat with the butter and oil. As soon as you see that the butter foam has begun to subside, indicating it is hot enough, add the mushrooms. Toss and shake the pan for 4 to 5 minutes. During their sauté the mushrooms will at first absorb the fat. In 2 to 3 minutes the fat will reappear on their surface, and the mushrooms will begin to brown. As soon as they have browned lightly, remove from heat.

Toss the shallots or green onions with the mushrooms. Sauté over moderate heat for 2 minutes.

Sautéed mushrooms may be cooked in advance, set aside, then reheated when needed. Season to taste just before serving.

Use these mushrooms either as a vegetable alone or in a combination with other vegetables, or as an integral part of such dishes as coq au vin, boeuf bourguignon, poulet en cocotte. Successfully sautéed mushrooms are lightly browned and exude none of their juice while they are being cooked; to achieve this the mushrooms must be dry, the butter very hot, and the mushrooms must not be crowded in the pan. If you sauté too many at once they steam rather than fry; their juices escape and they do not brown. So if you are preparing a large amount, or if your heat source is feeble, sauté the mushrooms in several batches.


This last part in italics is an admonition from Julia to ensure the proper way of sautéing mushrooms, or anything really. It was news to me, so I’m glad I had this extra bit of information. So into a pan go more butter and oil:


And then the mushrooms went into the pan. My heat isn’t feeble, but my pan isn’t that large. Looking at my picture now, I realize I probably still put too many shrooms into the pan at once. I should have broken then down into smaller batches. But as I cooked them, they adhered pretty closely to the above description where there wouldn’t be any excess juice and they did brown well, so I guess it turned out well after all.
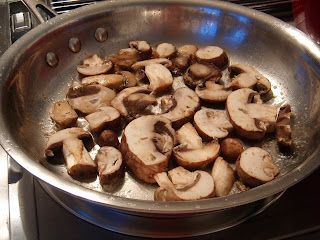


Yep, I would say they turned out just fine.

Before I know it, three hours have passed and my house smells like le Cordon Bleu on graduation day. The Husband has gravitated back to the kitchen to see the finished product and as I take the lid off, the smell almost knocks me off my feet – but in a good way! I wish I had taken a photo of this step. The sauce had reduced to a thick, rich version of its former self and it was a deep reddish-brown. The meat had retained its shape and was visually falling apart in the pot. I happened to notice the Husband has brought his earlier “I’m not really sure about this anymore…” look back to life and is hovering over my shoulder while I fawn over my intoxicating concoction. Brushing him off, I picked up the other pot where I had just finished boiling up some egg noodles and began plating everything. The onions and mushrooms went into the pot and I stirred everything to mix. Noodles on the plate, Boeuf Bourguignon on the plate.

Admittedly, I did skip a large step here. The recipe calls for the casserole contents to be dumped into a sieve over a stock pot, ideally so the solids stay in the sieve and the liquid falls into the sauce pot. Then the pot should be washed out, the solids returned to the pot and the sauce simmered in a separate pot, then again combining the two. What? Huh? Why in the world would you do that? First of all, that cast iron pot just came out of a hot oven after baking for three plus hours. Don’t you think it will take some time to cool down before it can be washed? Second, do you not think the step of washing the pot would erase an untold amount of taste and complexity from the dish? And third, why bother? I don’t pretend to know what was going through the authors’ collective heads when they wrote this recipe, but I’m not following. This step seems like a huge waste of taste and time so I just didn’t do it. That’s how I roll.


And here it is. We even used the good china! In a combination of astonishment, slight arrogance and downright giddiness, I can’t help but say “I can’t believe I did this!” in between every bite. The meat was fork tender – and when I say this, I realize that a lot of cuts of meat can be fork tender. But this was different. Just putting the tines into a piece of meat and turning the fork slightly resulted in an entire hunk of meat separating from itself with no effort. The fibers in the meat had almost completely disappeared, even though this was a seriously lean cut of meat to begin with. The rich sauce thickly coated everything it touched, but it didn’t weigh the dish down. It didn’t become goopy or anything like that. The flavors had melded so well and combined perfectly. Which brings me back to the husband’s “I’m not really sure about this anymore…” look. He tells me this as we’re both devouring the meal. When he first saw me add so much wine, his first concern was that the entire dish would have an overpowering wine taste. But I can say that was absolutely not the case. Neither of us could detect a taste of the wine – the flavors had come together that well. The reduction likely strengthened the flavor but also helped to break it down. I can’t say for sure, I’m just opining. His second concern was the addition of so much liquid. He felt for sure that amount of liquid – remember, it came all the way up to the level of the meat in the pot – would result in boiling the meat and cause it to be tough and leathery. Neither was the case. The acid in the wine likely contributed to the meat being so tender and helping to break down the fibers. Again, just my opinion.

The end result is an amazing dish that I can add to my “I had no idea I could cook stuff like this” list. Seriously, I have determined that as long as it has directions, I can make it. Just follow the stinking directions et voila, I have a masterpiece. This is off the charts. Thanks Julia.

Tuesday, February 1, 2011

Why Lodge Cast Iron Enamel Pots Rock!

I got a toy for Christmas! A culinary toy, that is. Ta da!


My beautiful new enamel pot

*Source: Amazon.com


This thing flat out rocks! I have wanted one for a while, but I had no idea how versatile they were nor how well they performed until I actually put mine to use. I've made a few soups and they've all turned out wonderfully. I also made a great Thai Coconut Chicken from Cooking Light that was incredible. Sure, I played a part in how well it turned out simply by the addition of my own hand (/bragging), but the pot cooked so evenly and did a fantastic job of browning the chicken and cooking it all the way through while not drying it out or burning it at all. It really was amazing.

These pots do come with their very own set of instructions and the manufacturers are particular about how you take care of them. They're cast iron and sturdy, but the enamel is fragile and can chip or crack. It can be put in the oven, but not too hot because the black plastic handle on the lid will melt. Also, they advise that you not heat the pans to more than medium or so on the stove top, as they will hold more than enough heat for you at a low setting. I was able to maintain a low boil with one of my soups at a three or four setting (out of 10) on the stove eye. No metal tools in the pot, only wooden or plastic. The best place to store it is on top of your stove to prevent getting beaten up in the cupboards. Hand wash and don't air dry (oops...). But I plan to take care of this little jewel and look forward to using it for many, many years to come.

Friday, July 9, 2010

Fried Green Tomatoes

There are a few foods that are quintessentially Southern. Chief among those are sweet tea, grits with butter and salt (not sugar), chicken and waffles, pimento cheese, casseroles of any shape or form, and these little golden brown delicacies right here. You can't get green tomatoes just any time of the year, so anyone with a craving for them in, say, December, will have to find refuge in the freezer case of their local grocery store or try to satiate their desires with some suitable replacement. If you find out what that replacement is, please let me know.


Fried Green Tomatoes

Green tomatoes
Cornmeal
Buttermilk or regular milk
Oil, for frying
Salt and pepper, to taste

Slice green tomatoes to approximately ½ or ¾ inch thickness. Blot with paper towels to remove any excess juice. Dredge tomato slices in milk, letting excess drip off, then dredge in cornmeal to cover. Shake off excess cornmeal and set aside until the cornmeal has absorbed the milk. Fry in hot oil for two to three minutes on each side, or until golden brown. Drain on paper towels and season to taste. Serve hot.


There are some very important rules to follow in this recipe. First of all is the buttermilk versus regular milk debate. I've done both and the buttermilk holds the cornmeal much more effectively. Regular milk also does well, but there is a noticeable difference. If anything, the coating might be a little more crispy with the buttermilk since it will hold more cornmeal. Second is how thick to slice the tomatoes. I would definitely go with the 1/2 inch measurement at least. You don't want a floppy tomato slice. It should be firm. Additionally, blotting the tomatoes lets you control the amount of moisture in the slices. Too much moisture and they'll be soggy.

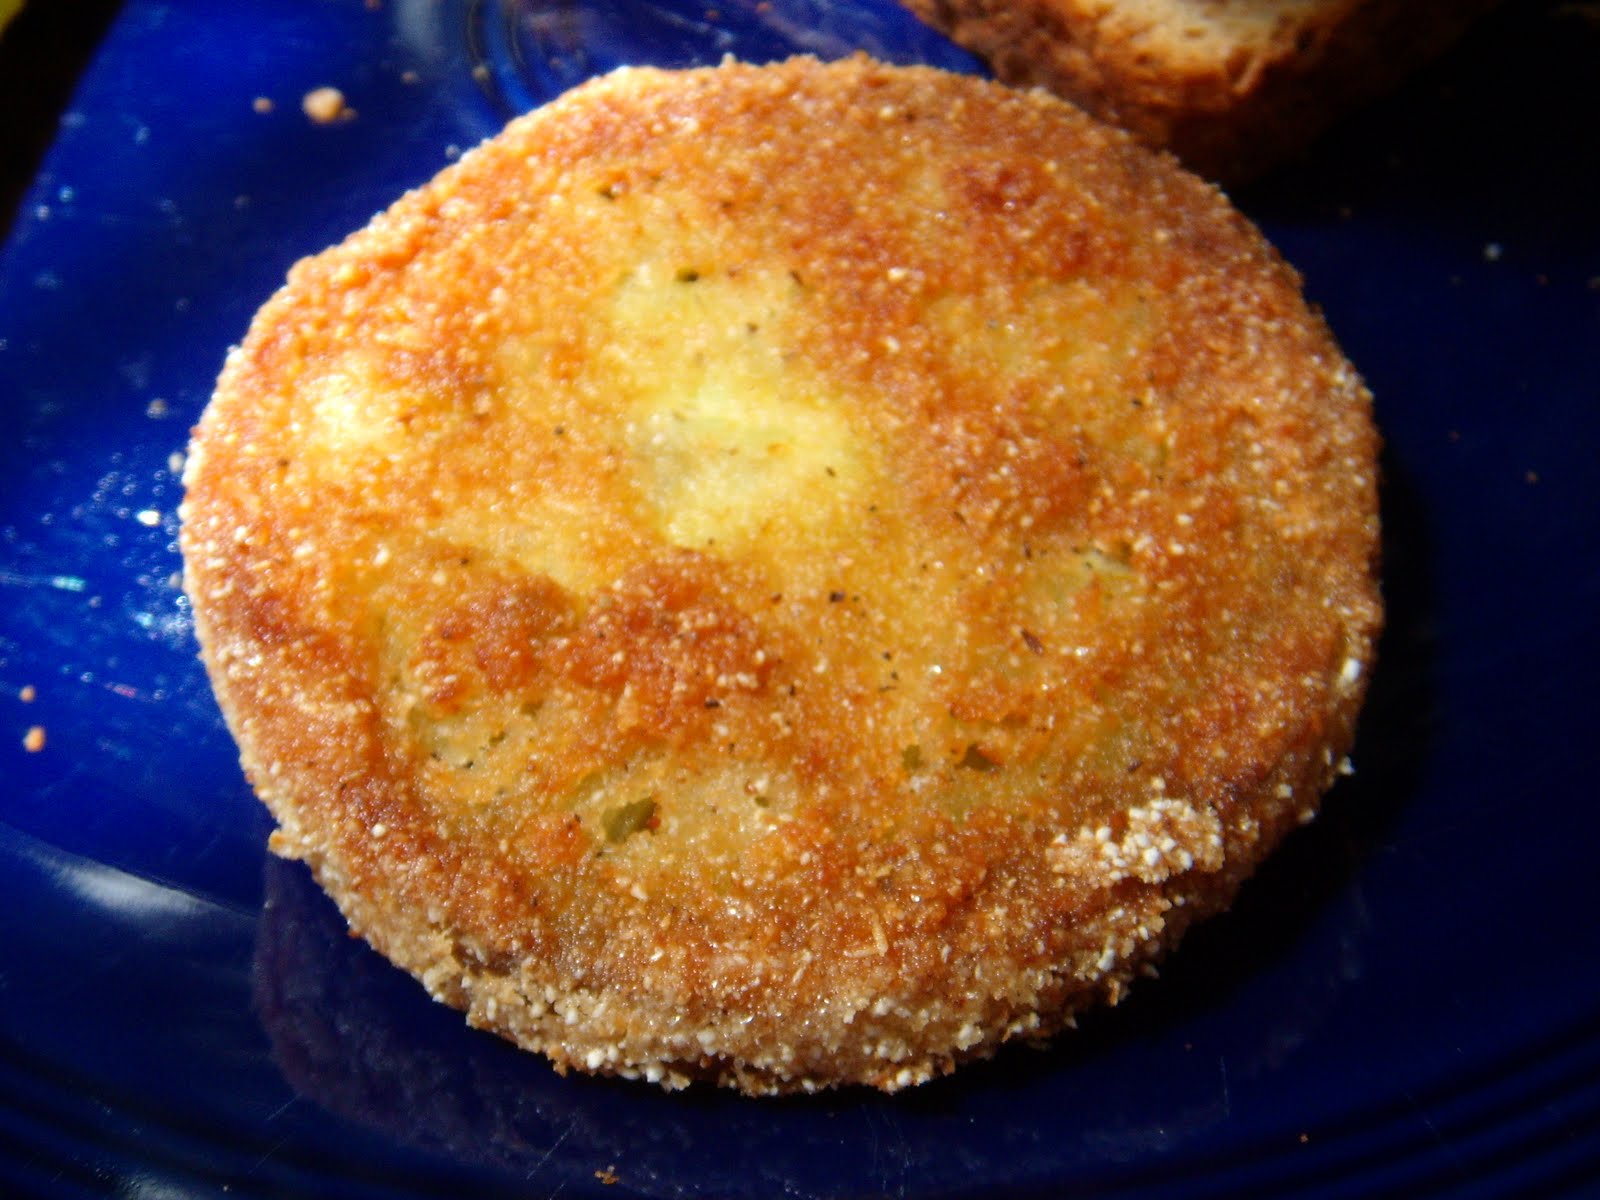
On that note, the other important thing to note is that when all of the slices are dredged and waiting to go into the fryer, make sure the cornmeal has been absorbed by the milk. This is important because if you were to dredge the slices and immediately drop them in the hot oil, the cornmeal would fall off in the oil and start to burn in the pan, thereby burning your tomatoes. Not good eats. But if you follow all of the directions, you should come up with something like this:

Fried Green Tomatoes

Then you can go one step better and add toasted bread and bacon:


Fried Green Tomatoes

Sorry, you'll have to give me just a minute to recover after seeing those pictures. They just look. So. Good.

Okay, I'm better. And yes, that's a pickle on the plate. We like our pickles fried in the South, too, but that's another recipe for another time.

Wednesday, April 7, 2010

Marbled Chocolate Banana Bread

I want to start off by saying I found this recipe in Cooking Light. I note that point specifically because once you take a bite of this moist, chocolaty bread, you will not at all believe it is light. Everything in moderation and all that jazz, but this is an outstanding recipe and a great way to use up some over ripe bananas.


Marbled Chocolate Banana Bread

Yield: 16 slices

2 C all purpose flour
½ t salt
1 C sugar
1 ½ C mashed bananas (about 3)
½ C egg substitute (2 eggs)
1/3 C plain low-fat yogurt
½ C semi-sweet chocolate chips
¾ t baking soda
¼ C butter, softened
Cooking spray

Preheat oven to 350˚. Lightly spoon flour into dry measuring cups. Combine flour, baking soda and salt. Place sugar and butter in a large bowl; beat with a mixer at medium speed until well blended. Add banana, egg and yogurt; beat until blended. Add flour mixture; beat at low speed until just moist.

Place chocolate chips in a medium microwave safe bowl. Microwave at high for one minute until almost melted, stirring until smooth. Cool slightly. Add 1 cup of batter to chocolate and stir until combined. Spoon chocolate batter alternately with plain batter into an 8 ½ x 4 ½ greased loaf pan. Swirl batters together using a knife. Bake at 350˚ for one hour or until wooden pick inserted in center comes out clean. Cool 10 minutes in pan on a wire rack; remove from pan; cool completely on wire rack.

Calories: 183 (23% from fat)
Fat: 4.7g (sat 2.8g,mono 1.4g,poly 0.2g)
Protein: 3.1g
Carbohydrate: 33.4g
Fiber: 1.3g
Cholesterol:
8mg
Iron: 1.1mg
Sodium: 180mg
Calcium: 18mg


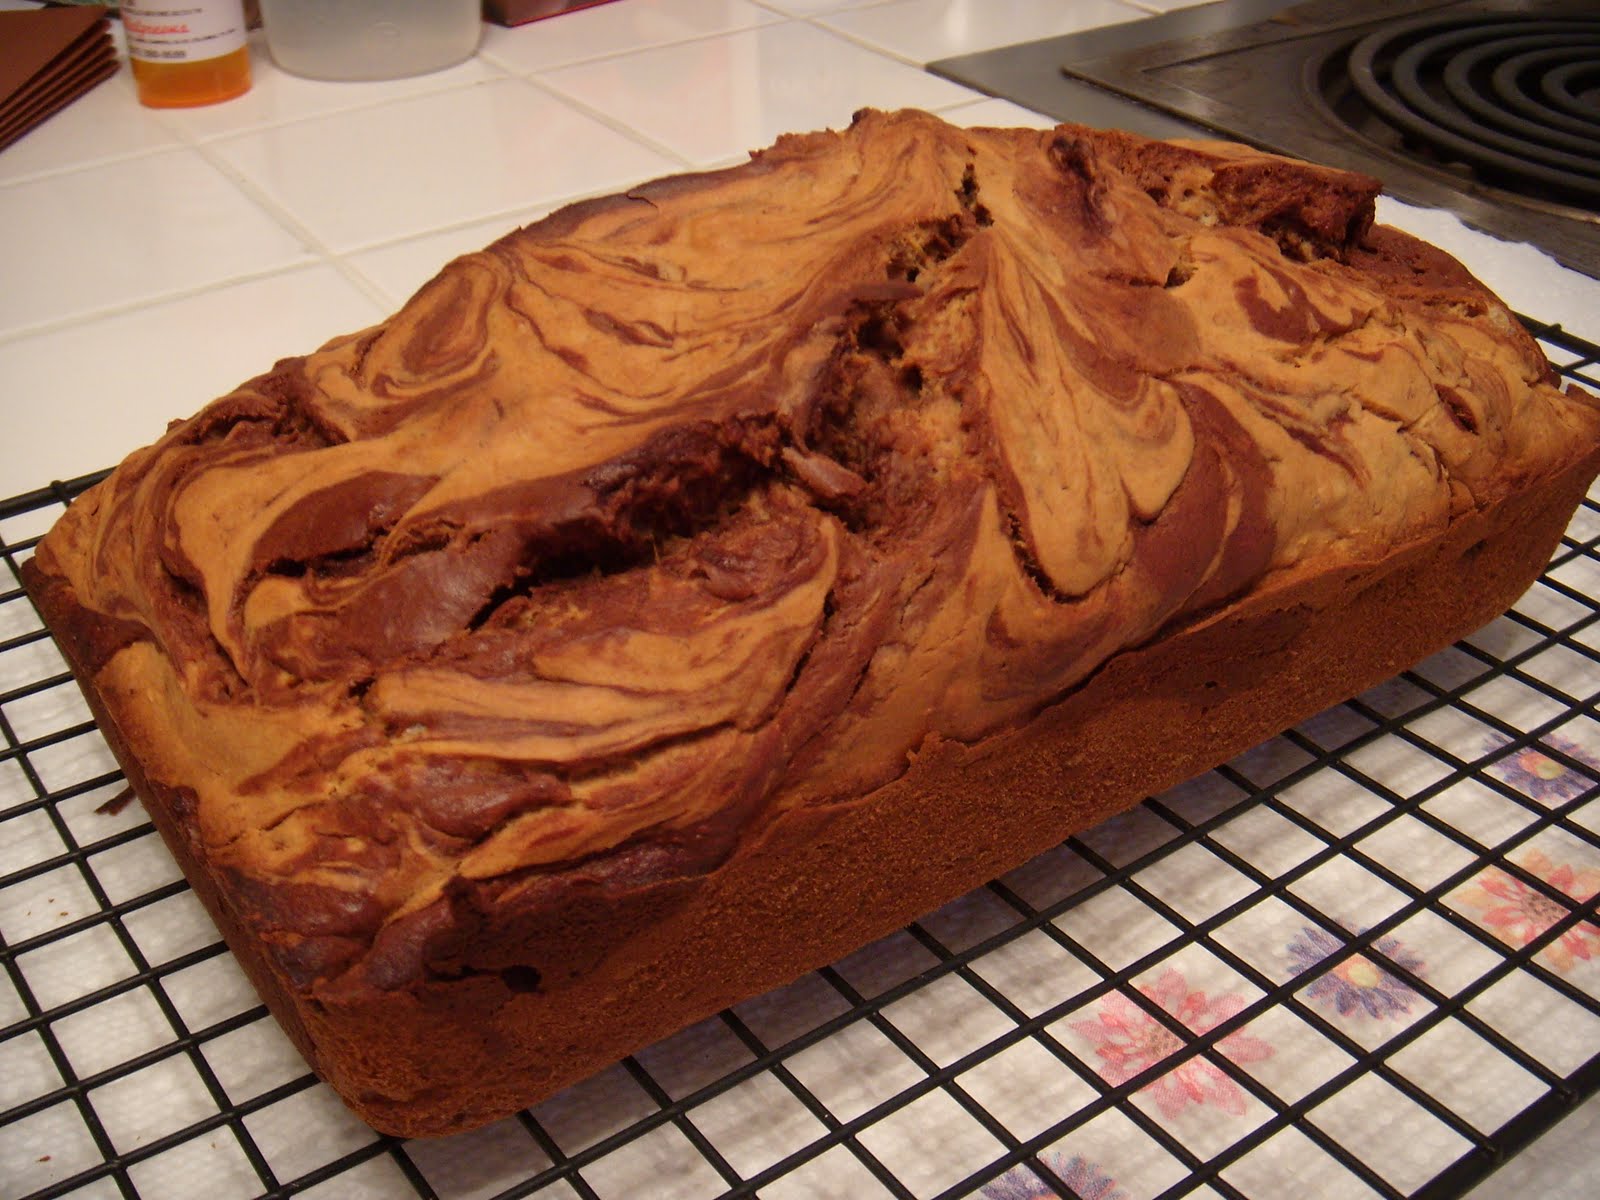
This is so incredibly delicious. The first time I made it, I literally wanted to eat the entire loaf hot out of the oven. The mouth watering combination of chocolate and bananas with the texture of hot, fresh bread will quite literally send your senses into gastronomic overdrive. This bread keeps pretty well for a few days, but honestly, there is no sensible reason for it to sit more than three or four days before it's gobbled right up. It also freezes well, too, if wrapped in plastic wrap and aluminum foil.

Marbled Chocolate Banana Bread


This bread is so versatile and can be eaten as a snack, a light dessert or my favorite, breakfast! Toast two pieces in the oven until slightly browned and the ends crunchy (the slices would likely fall apart in a traditional toaster oven, but be my guest), and then - wait for it! - spread a little peanut butter on each slice. Ring, ring! Hello, who is it? It's your stomach and brain calling, and they have just simultaneously passed out from the lip smacking fusion of the holy trinity of taste and deliciousness. The Cajun holy trinity has nothing on this combo.

A few notes. With the bananas, it's really important that they be very ripe simply because it makes them easier to mash, plus they are much sweeter when they're more ripe. Some good black speckling on the peel is a fine indicator. I sliced them up into chunks and use a pastry cutter to do the mashing, or you could also use a blender or a fork. But they have to be pretty well mashed for this to work. A few little solids here and there won't cause a problem. Also, instead of the plain low-fat yogurt, I use low-fat vanilla yogurt just to add that little extra pop. Plus, I use real eggs and not the egg substitute. You could also sub in some whole wheat flour, a teaspoon of cinnamon, a smidgen of vanilla extract, etc. Whatever your little heart desires.

Sunday, February 14, 2010

Dinner Party!

Wow, I have come a long way. I'm not necessarily talking about the beginning of my marriage when I flat out could not cook, but even since the beginning of this blog. I've tackled so many cooking methods and ingredients, successes and failures, and I'm no worse for wear. I guess that confidence kind of got to me. And so it happened about a month ago when the Husband had an open weekend where he didn't have to work and we were left with deciding what to do. We talked about taking a little two-day trip somewhere, we talked about driving to a basketball game, and then the Husband said a few little words that lit a fire in me.

"How about hosting a dinner party?"

At first it sounded nice, but a little crazy. I had been talking about hosting a dinner party for a few years. But every time I got the opportunity, I either let it pass with no action or something else came up (much to my relief) and I just put the thought in the back of my mind. Truth be told, I was afraid. Afraid, she says! What's the big deal - you invite your good friends over, cook a great meal, throw in some delightful conversation, and the evening is a resounding success. The part that I was afraid of was the "cook a great meal" part. I couldn't even cook for myself and the Husband some nights - how was I going to manage cooking for eight other people and make sure it tasted good?

But then that confidence crept up inside me again. I knew I cooked some amazing dishes for this blog, and I was starting to get more comfortable with my abilities and pushing any limitations to see if I could get to the next level. A dinner party was, in effect, the next level. I knew what had to be done. I emailed our friends and invited them over before I had a chance to chicken out. I was locked in! I had to do it! Maybe I should have just done that sooner, but this timing was going to work out well. The Husband and I tossed around a lot of ideas for the meal and we finally came up with a great menu:

Potato and Ricotta Gnocchi with Bolognese Sauce
Mixed Greens Salad
Cauliflower Casserole
Roasted Zucchini
Chocolate Mousse

The gnocchi was an all around hit every time I made it, so that was a good choice. Everyone likes pasta and this gave everyone the chance to try something most of them probably hadn't eaten before. The Cauliflower Casserole came from my Aunt, who passed it along to my Dad, who cooked it as part of Christmas dinner last year. The Husband, my brother and I all turned our noses up at the name, confident that nary a bite would pass our lips. But, being the grownups we are, we tried it. And we all really liked it! And so did our guests, as evidenced by one of our friends literally scraping the bottom of the baking dish with the serving spoon. The Roasted Zucchini came from Southern Living and was also a hit - I only wish I had made more. And finally, the Chocolate Mousse came from a Betty Crocker Cookbook that my Dad gave me and the Husband for our first Christmas.

We did some major prep work for this event. I even wrote out a to-do list that started three days in advance of the party, from grocery shopping to cutting up veggies the night before to starting the gnocchi dough that morning. I was ready. For the gnocchi, I knew I would have to at least double the recipe I was used to making. There were going to be ten of us and a lot of big appetites. I eventually tripled the dough and the sauce just to make sure I had enough, and as it turned out that was way too much. I would have been okay with doubling it. I made the dough that morning and let it rest, as directed. About two hours before guests were to arrive I pulled out the dough to get it rolled out and cut into the little gnocchi pillows. But when I scooped the dough onto the floured cutting board, my blood ran cold. The dough was way too wet, gooey almost, and completely unable to be shaped. My first thought was one of panic, but thankfully my next thought was somewhat more rational. I grabbed the flour and added more to my dough, stirring away. Still runny. More flour. Getting better. More flour. Finally I had some dough I could work with. Crisis averted, but still something I had not planned.

When we moved from the salad course to the main course, we took a little longer than anticipated to actually get the gnocchi cooked and plated and on the table, but our guests were very gracious and kept the conversation flowing while the Husband and I worked our tails off in the kitchen trying to get the gnocchi wrapped up. All in all, we had a wonderful time with our wonderful friends, and all were very complimentary. One friend, in fact, really put a smile on my face when she said, "I didn't realize you could cook like this!" Neither did I. But now I do.

Cauliflower Casserole

Ingredients
1 medium head cauliflower, broken into florets
1 8-oz carton sour cream
1 C shredded sharp cheddar
1/2 C crushed corn flakes cereal
1/4 C finely chopped green pepper
1/4 C finely chopped sweet red pepper
1 t salt
1/4 C grated Parmesan cheese
Paprika to taste

Place cauliflower florets into saucepan with a small amount of water; cover and cook for five minute and drain.

Combine the cauliflower, sour cream, cheddar cheese, corn flakes, peppers and salt. Transfer to a greased 2-quart baking dish.

Sprinkle with Parmesan cheese and paprika. Bake uncovered in 325° oven for 30-35 minutes, stirring often.

I think the main reason this recipe turned out so well, despite the cauliflower, is because of all the cheese and sour cream. It's probably not all that healthy, but it's a show stopper. When steaming the cauliflower, I used an actual steamer as opposed to boiling it as stated in the recipe. I also could have used a larger head of cauliflower because once everything was dumped into the baking dish, it looked a little sparse. Our guests confirmed that after the dish was scraped clean and I swear I saw some pleading eyes begging for more.

Finally, the chocolate mousse. A little goes a long way with this item. It's so rich and delicious and just the perfect ending to a great meal. I served it in wine glasses and I meant to rim the glasses with sugar but I totally forgot. It still turned out perfect.

After our guests left and the kitchen had been totally covered up with dirty dishes and hand towels and empty wine bottles (we're a drinkin' bunch), I just felt such a sense of accomplishment and relief. We did it, and we did it up nice. Our friends were happy and full and I pushed another limitation and did something I didn't think I could do. Excuse the cliche, but I kind of felt like a kitchen rock star. It felt good.

Monday, November 2, 2009

Cream Cheese Dumplings

This was such a fun recipe and another great option for party appetizers or a way to experiment with these different fillings and tastes. I knew this recipe was something I wanted to make, but I also thought plain cream cheese was a bit ho-hum. But by digging through the fridge and pushing the limits a bit, I was able to create some pretty awesome taste combinations.


Cream Cheese Dumplings

Heat olive oil (about 2 inches) in a large, deep skillet
Take two blocks of cream cheese and mix them with any of the following:
Feta cheese
Goat
cheese
Garlic
Basil
Oregano
Sun dried tomatoes (in oil, drained and minced)
Salt
Pepper

Take wonton wrappers and lay them on a flat surface. Place a small spoonful of mixture in the center of the wrapper and lightly wet seams all the way around with water.

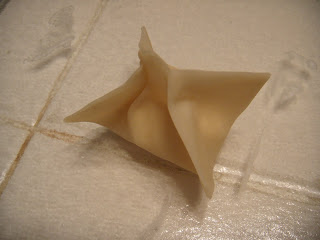
Pinch corner to corner to seal (will make an X pattern when looking straight down at it). Place wontons in oil and fry on each side until brown. Drain on paper towels


The only thing about this recipe that I didn't care for was the fact that my house smelled like the back of a greasy diner for a day or two after making the dumplings. I even had the vent on when the frying was taking place and it didn't trap all of the smell. But they were absolutely worth it.


The recipe says to use olive oil for frying, but I used canola oil. I also used low-fat Philly Cream Cheese and it turned out completely fine. I normally wouldn't advocate using fat-free in something like this, just because you never know about the consistency, but the low-fat was great. For the fillings, I followed a few of the choices from the actual recipe but I also threw in a few of my own:


Cream Cheese, Sun Dried Tomatoes and Basil
This kind of tasted like a pizza, only better. The sun dried tomatoes (packed in oil) had a nice warmth and the basil (fresh from my little potted plants outside) gave it that bite.


Mozzarella, Turkey Pepperoni and Basil
Here I used a mozzarella string cheese stick that I cut into chunks, and I cut the turkey pepperoni slices into quarters, and slivered the basil. It worked really well, except that the cheese didn't hold up as well as I had hoped. It melted and expanded in the hot oil, of course, but then it cooled down significantly and kind of turned into a blob. It tasted good, though.


Cream Cheese, Feta Cheese and Diced Garlic
Another delicious one! The feta really broke through and overpowered the cream cheese, which is exactly what I was hoping would happen. The garlic was great, too, after being super heated with the hot oil.


Diced Shrimp and Hoisin Sauce
Ooh, you weren't expecting this one, were you? Hoisin sauce is a Chinese dipping sauce, like soy sauce or plum sauce. I had this sauce on hand for a recipe I found in Cooking Light, Hoisin Glazed Beef Kebabs. I used frozen cooked shrimp that I thawed and diced into small pieces and mixed them with a teaspoon or so of the hoisin. Pretty good, but I think it was a solid third place as compared to some of the other mixtures I tried.


Cream Cheese Dumplings

When the dumpling is folded, you see the "X"


Cream Cheese Dumplings

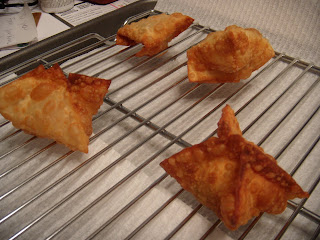
Cooling on the wire rack after coming out of the oil


Now I can't imagine these are all that good for you, but they're certainly fun to make and they definitely taste good. I used a large pot to fry in, but a deep fryer would also be the best choice. The wonton wrappers I used are Nasoya Wonton Wraps and I was able to find them at a few stores in town. They're refrigerated and usually found in the produce section, at least in my area. They're about 2"-3" square and come in a pack of 60 or so. When they go into the oil, they literally take no more than three or four minutes until they are crisp and brown and ready to come out. Please resist the urge to eat one immediately and do give them time to cool off.


I will definitely make these again and I'll do a few more combinations. I'd love to do one with chocolate, but I don't how well it would respond to the high temperatures since chocolate can burn easily. I think fruit might be good, too. Or, you can cut the wrappers into strips and fry them. From there, they can be used to top soup or just put out in a bowl for people to snack on. Pretty versatile!

Monday, September 28, 2009

Prosciutto and Parmesan Gougères

For the Husband's birthday last year, I surprised him with a class at our local Viking Cooking School. The theme was "Date Night in New York City" and we cooked different dishes particular to New York City establishments. This little gem was part of that class. We made these ourselves and then took the recipe home for future attempts. They're perfect for a party or appetizers before a holiday meal.


Prosciutto and Parmesan Gougères


½ stick unsalted butter (4 T) cut into small pieces
½ C water
¼ t fine salt
1/8 t granulated sugar
¾ C all-purpose flour
3 large eggs (plus one lightly beaten egg)
½ C finely grated Parmesan cheese (2 oz)
6 T finely chopped prosciutto (about 1 ½ oz)
1 pinch freshly grated nutmeg
1 pinch paprika

Preheat oven to 400 degrees; place a rack in the center of the oven.

Combine the butter, water, salt and sugar in a medium sauce pan over medium-high heat; bring to a boil. Immediately remove from heat and add the flour, beating vigorously with a wooden spoon until smooth.

Place the pan back over medium-high heat; cook, stirring constantly, until a smooth mass forms and pulls away from the sides of the pan, about two minutes. The bottom of the pan will be coated with a thin crust.

Transfer the choux paste to the bowl of an electric mixer fitted with the paddle attachment. On medium speed, add the three eggs, one at a time, mixing well after each addition. Add the parmesan, prosciutto, nutmeg and paprika.

Using a pastry bag fitted with a ½-inch round tip, pipe the warm choux paste onto parchment-lined baking sheets, forming mounds about ¾-inch in diameter. (Note: you may need to use a knife to cut off the choux paste when piping.) Lightly brush just the tops with the beaten egg, then gently smooth with wet fingers. (Note: Be careful to avoid dripping the egg down the sides of the mounds, as this may inhibit rising.)

Place in the preheated oven and bake for 15 minutes. Reduce oven to 375 degrees and continue baking until puffed and golden brown, about 20 minutes more. Transfer the gougères to a wire rack, cool slightly and serve warm or at room temperature.

Now even though I'm not necessarily known for following a recipe to a tee, and have sometimes made bizarre substitutions in place of ingredients I don't have on hand, that doesn't fly when it comes to precision baking like this. Every measurement, every iota of flour and eggs and salt has to be included or you risk dire consequences. And there are too many good things in this recipe for it not to turn out well.


This recipe honestly is more simple than it appears. It's very straightforward and shouldn't pose a problem for someone who wasn't born to bake. The choux paste, for instance, is nothing more than a dough. As for using a piping bag, I used a quart-sized Ziploc bag with a small corner of the bag snipped off. Just dollop the choux paste into the bag and pipe the dough onto the parchment lined baking pan. The freshly piped gougères looked like this:


Prosciutto and Parmesan Gougères


Prosciutto and Parmesan Gougères


When they bake, they don't rise all that much. They mainly become airy and much like puffs. Like this:


Prosciutto and Parmesan Gougères


The recipe says to bake them for an additional 20 minutes once you reduce the heat, but I actually put mine back in for about another 5-8 minutes when I took them out at the 20-minute mark to taste test them. The inside was still a little wet and hadn't dried out, so I let them go a little while longer. That extra few minutes really did the job, and they were fantastic! The egg glaze is what makes them so glossy, and it's really easy to pop three or four at a time until you realize the entire batch has been demolished. These would really be great for a pre-Thanksgiving appetizer or for a housewarming party.


Monday, May 18, 2009

Gingerbread

Ahh, the holidays. A time to fellowship with family you don't see very often, eat way too much food and fall into a turkey coma watching football. And when the tryptophan wears off, it's time to go back for seconds - this time to the dessert table. At my family's holiday celebrations, sometimes it seems like there are more desserts than anything else - chocolate cake, fruit pies, chess pies, cookies and brownies. Oink. But this gingerbread recipe would really set the tone for the holidays. Now this is not a cookie, but it's actual gingerbread. Moist, rich, dense and downright delicious.


Gingerbread

1 C granulated sugar
½ C applesauce
¼ C butter
¼ C molasses
2 C all-purpose flour
4 t ground ginger
1 t ground cinnamon
1 t baking soda
¼ t salt
1 C fat-free buttermilk
2 large eggs, lightly beaten
Whipped cream, optional

Beat the first four ingredients at medium speed with an electric mixer until blended.

Stir together flour and next four ingredients in a medium bowl. Combine buttermilk and eggs in a separate bowl. Add both mixtures alternately to butter mixture, beginning and ending with flour mixture. Beat at low speed until blended after each addition. Pour batter into a lightly greased 10-inch cast-iron skillet.

Bake at 325 for 35-40 minutes or until a wooden pick inserted in center comes out clean. Serve with whipped cream, if desired.


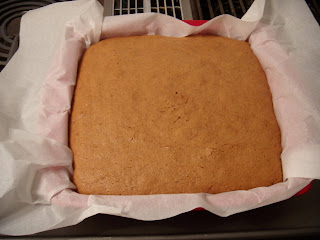
First things first - I will definitely cook this again and I will proudly put my name all over it. It's so good, and even better after a few days because the top of the gingerbread gets kind of sticky. It comes together very easily, so no problems there. When I cooked it, I did not use a cast iron skillet and here's why: we have two cast iron skillets, one for cornbread that belonged to the Husband's great-grandmother and one miscellaneous one that is possibly as old as the former, but it is most certainly not for sweets. I used it before for fried chicken. If I were to put gingerbread in either of those skillets I would never hear the end of it. So I used a 9x9 silicone baking pan lined with parchment paper, which worked wonderfully. The gingerbread lifted right out once it was done with no cleanup necessary.

Gingerbread


One error I made was simply a result of how eager I was to try the gingerbread - I cut it too soon before it cooled down enough. That resulted in some crumbly pieces, but they didn't go to waste (translation: I ate them). This recipe filled up the entire 9x9 pan so there was a lot to go around. I took about 10 pieces to work and my hungry co-workers did their part to make sure the Husband and I weren't tasked with eating the entire batch, though we certainly could have. And if you add whipped cream, whoa nelly. You're in for a real treat.

Gingerbread


This was a delicious recipe that will certainly become a favorite for us.

Wednesday, March 25, 2009

Shrimp and Grits

Woo-hoo! Shrimp out the wazoo for us lately. I buy it on sale and I always have a bag or two in the freezer of peeled, deveined, cooked, frozen shrimp. Thaw it out in the sink under running water for a few minutes and you can do a million things with it, including this recipe. This was kind of a cheating recipe for me since it's not a new meal, but it's still worth adding. I got this from a Southern Living magazine a few years ago and it's absolutely incredible. This dish also comes together fairly quickly. It's very indulgent with the cheese, bacon and bacon fat, but it's so worth it.


Shrimp and Grits

Prep: 15 minutes
Cook: 30 minutes
Serves: 4

1.5 C quick cooking grits
¼ C shredded sharp cheddar cheese
1.5 T butter
4 T hot sauce, divided
1 pound unpeeled, medium-size fresh shrimp
¼ t salt
2 bacon slices
½ C chopped green onions
1 T fresh lemon juice
1 T chopped flat leaf parsley

Cook grits according to package directions. Remove from heat, and stir in cheese, butter and three tablespoons hot sauce until melted and blended. Cover and set aside.


Peel shrimp and devein (unnecessary if you're using frozen shrimp). Toss with salt and remaining 1 tablespoon hot sauce.

Cook bacon in a large skillet over medium-high heat 5 to 7 minutes or until crisp; remove bacon, reserving drippings in skillet. Crumble bacon. Add shrimp and green onions to skillet, and sauce 3 minutes or just until shrimp turn pink. Stir in lemon juice.

Spoon grits onto a serving platter; top evenly with shrimp mixture and sprinkle with parsley and bacon. Serve with additional hot sauce, if desired.


Yumma. A few things I change - I cook about a quarter of the amount of grits called for. I use Quaker plain grits in the cardboard canister and I split the difference between the two serving and four serving amounts. Two isn't nearly enough and four will feed a small army. The three servings gives us plenty for one serving each and a little left over to eat out of the bottom of the pan if you're still yearning for more cheesy goodness. Also, I add more cheese, salt, hot sauce, pepper and garlic than the recipe calls for. I like all of those things, so I add more of them. Just my preference.


As far as cooking the bacon and reserving the fat, I can't really bring myself to do it. I cooked it that way the first time I made this dish and while it was delicious, I usually stay far away from using actual fat in my cooking. Instead, I cook the bacon in the microwave and either A) reserve a tiny bit of the drippings to put in the pan for the shrimp, or B) cook the shrimp in olive oil. You can do either. I think they taste the same. Oh, and I also cook more bacon because, well, bacon is heavenly.

Shrimp and Grits


Cheese, bacon and shrimp. The Holy Trinity.

And there you go! This really is something I only cook occasionally, especially now that the husband is back on the health food band wagon. It's a nice treat, and a tasty one at that.

Monday, February 9, 2009

Potato and Ricotta Gnocchi with Bolognese Sauce

This was another one of those "What the hell am I thinking" kind of recipes. It looks very intimidating, it's a totally unfamiliar cooking concept, and it requires a certain exactness in measurements that I simply don't seem to possess. But yet again, here I am staring down a recipe I am determined to make and I am not about to let anything stop me.


Potato and Ricotta Gnocchi with Bolognese Sauce
8 restaurant servings

For gnocchi:
• 1 pound Yukon Gold potatoes
• 1 pound ricotta cheese
• 5 egg yolks
• 1 tablespoon kosher salt
• 6 ounces all-purpose flour – by weight – plus more for dusting
• 1 1/2 tablespoons grated Parmesan cheese

For sauce:
• 1 tablespoon olive oil
• 1/2 onion, small dice
• 2 stalks celery, small dice
• 1 carrot, small dice
• 1 bay leaf
• 2 pounds ground beef
• 2 pounds ground pork
• 1/4 cup red wine
• 1/2 cup chicken broth
• 1 tablespoon kosher salt
• 1/2 teaspoon black pepper
• 1 cup tomato puree
• 1 tablespoon tomato paste

DIRECTIONS
For sauce:
Heat olive oil in large sauté pan until it just begins to smoke. Add pork and beef and sauté until golden brown and cooked through. Break large chunks with a wooden spoon. Remove cooked meat with a slotted spoon and pour off all but 1 tablespoon of liquid left behind.

Return pan to heat and when it just begins to smoke add vegetables and sauté until golden brown. Remove vegetables from pan and pour off remaining liquid.

Return pan to heat and add red wine, scraping bits from the bottom of the pan. Continue cooking wine until it reduces to a syrupy consistency.

Add chicken stock, tomato sauce, and tomato paste to pan and bring to a simmer. Add meat and vegetables and bay leaf to pan and return to a simmer. Reduce heat to medium and let mixture slowly simmer for approximately 30 minutes, or until liquid has reduced to a sauce-like consistency. Season with salt and black pepper to taste.

For gnocchi:
Peel the potatoes and simmer until they can be easily pierced with a small knife. Remove the potatoes from water and let them cool for 5 minutes. While still warm, pass the potatoes through a ricer and let cool for 5 minutes more.

Meanwhile, in a medium-size bowl, mix ricotta, egg yolks, salt, pepper and grated Parmesan. (If the ricotta is too soft or watery, line a colander with cheesecloth and set it over a bowl. Set the bowl in the refrigerator and let it drain for 1 hour.)

Add the potato to the ricotta mixture and gently mix by hand. Be careful not to overwork. Add the flour in two portions, mixing by hand and being careful not to overwork. Let the dough rest for 1 hour before portioning.

When ready, dust a clean work surface with flour and divide the dough into 4 portions. Gently roll the dough from the center outwards, stretching to create one long, ropelike piece. The dough should be about 1/2- to 3/4-inch thick.

With a bench scraper, cut the gnocchi into individual pieces approximately 1 inch long. Remove gnocchi to a baking tray dusted with flour. To cook, bring 2 quarts water to a boil and add 2 tablespoons kosher salt. Add 8 to 10 pieces of gnocchi and cook until all the gnocchi begin to float. Warm 3 to 4 ounces Bolognese sauce in a sauté pan.

Quickly remove from boiling water and add gnocchi to the pan with warm Bolognese sauce. Toss to coat and serve immediately.


Potato and Ricotta Gnocchi with Bolognese Sauce

Finished product


Just, wow. I had no idea I could cook something like this. The pot stickers were awe-inspiring enough, but this was just off the charts. From start to finish, it took about two hours to complete the meal, from the gnocchi dough having to sit for an hour to putting the sauce together. But man, it was worth it! For starters, I am never purchasing store-bought gnocchi ever again. Ever. I mean it. This was kind of time consuming, but the taste is one meeelion times better than that Target brand stuff I bought. Light, fluffy, doughy - all good things. I didn't have a gnocchi board:

... but I managed fine. These are mainly used to make ridges to trap the sauce, but this sauce was so meaty and had so little liquid that it couldn't help but cling to the gnocchi.

And the sauce - wow. First of all, I halved the amount of beef and pork and kept the other measurements for the sauce pretty much the same. I added more of the liquid, like chicken broth, tomato sauce/puree, red wine and tomato paste. However, I simmered it on the stove without a lid so all of that liquid evaporated and we were left with just meat. We got it a little more soupy right before we served it, but it tasted wonderful.

I also made the full amount of gnocchi and froze the extras before I cooked them. When cooking the gnocchi, there was no time table on how long to let them cook before they were ready. I found that it only took about four minutes before they started to rise to the top of the water. I wanted to keep cooking them for fear of them tasting under done, but they were so good.

This is another winner, and it will forever have a place in my recipe box. This would be a good company recipe to make for a dinner party or another big event. The trick would be getting the gnocchi to cook and keep them warm until everyone has a serving, but we covered the individual bowls with foil and that did the trick.

Tip: To freeze leftover gnocchi, place them individually on a large cookie sheet and place in the freezer. When they harden, put them in a Ziploc bag and seal tight. If you just throw them in a bag all together, they'll freeze into a gnocchi blob and will be very hard to thaw and cook properly. They thawed nicely in the bag overnight in the fridge.

Update: A week or two later, I thawed the leftover frozen gnocchi to have for another dinner. The gnocchi held their shape, but they didn't taste as good as when they were fresh. They also seemed a bit more doughy than when they were fresh. They weren't bad, but they're better the first time around.

Crispy Pork and Kimchi Pot Stickers

When I was picking out recipes for this quest, I figured I would have a mix of easy recipes and more complicated recipes. This fell into the "more complicated" category. Just looking at the kimchi and unseasoned rice vinegar made me twitch, thinking I would have to search the ends of the earth to find these items. Once again, imagine my surprise when I found these items at our local Big Box retailer. Oh unnamed massive retailer, you saved me once again but that does not change my distaste for you.


Crispy Pork and Kimchi Pot Stickers

TOTAL TIME: 1 HR
SERVINGS: makes about 36 dumplings
Ingredients
SAUCE
1 teaspoon sesame seeds
1/3 cup soy sauce
1/4 cup unseasoned rice vinegar
2 tablespoons water
1 garlic clove, minced
1 scallion, thinly sliced
DUMPLINGS
1/2 pound ground pork
1/2 pound kimchi (Korean pickled cabbage), drained and finely chopped
4 scallions, green parts only, thinly sliced
1 large egg, beaten
2 teaspoons cornstarch
1/2 tablespoon sugar
1/2 tablespoon soy sauce
1/2 teaspoon kosher salt
1/4 teaspoon freshly ground pepper
36 gyoza wrappers
2 tablespoons vegetable oil
1 cup water
Directions
MAKE THE SAUCE: In a small skillet, toast the sesame seeds over moderately high heat for 30 seconds, shaking the pan, until lightly browned. In a small bowl, stir
the soy sauce with the vinegar, water, garlic, scallion and toasted sesame seeds.

1. MAKE THE DUMPLINGS: Line a large baking sheet with parchment paper. In a large bowl, combine the ground pork with the kimchi, scallions, egg, cornstarch, sugar, soy sauce, salt and pepper. Using your hands, mix the dumpling ingredients thoroughly.

2. Place 4 gyoza wrappers on a work surface; keep the rest covered with plastic wrap. Lightly moisten the edges of the gyoza wrappers with water. Place a level tablespoon of the ground pork and kimchi filling on one side of each wrapper and fold in half to form half-moons. Press the edges of the wrapper firmly to seal, making pleats for decoration. Lift each dumpling by the pleated edge, transfer it to the baking sheet and press down lightly to flatten the bottom; the dumpling should be standing with the pleat side up on the baking sheet. Repeat with the remaining gyoza wrappers and pork and kimchi filling.

3. In a large, nonstick skillet, heat 1 tablespoon of the oil. Add half of the pot stickers to the skillet, flattened side down. Pour in 1/2 cup of the water, cover and cook over moderately high heat until the water has evaporated, the filling is cooked through and the bottoms are browned, 8 to 10 minutes. Transfer to a serving platter and keep warm. Wipe out the skillet and repeat with the remaining oil, pot stickers and water. Serve with the dipping sauce on the side.


Crispy Pork and Kimchi Pot Stickers

Freshly formed pot stickers


Crispy Pork and Kimchi Pot Stickers

Blurry, cooked pot stickers


Crispy Pork and Kimchi Pot Stickers

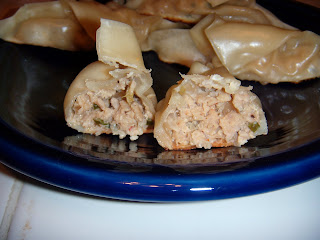
Yummy pork filling


The Husband made the dipping sauce while I mixed together the pork and kimchi filling. Now let me say something about this kimchi. It smells just like you would imagine - like pickled, spicy cabbage. Oof. And boy, does that stuff stain. And since the recipe calls for such a small amount, I still have almost a whole jar of this stuff still left to eat. I also have lots of those wrappers left, considering I halved this recipe. So it looks like we're having pot stickers again in the near future. But I completely don't mind because this meal was that good. We decided next time we would halve the recipe and add in a few pieces of sushi for each of us just to round out the meal.

I admit - I was a little afraid of this recipe. I'm now cooking for the Husband, too, and not just myself, so there is a lot more riding on my success or failure of dinner. Success - happy Husband. Failure - call Papa John's. But I can say with confidence that neither of us even considered calling the Papa once this meal was on the table. This was a total success! The dipping sauce really made the meal, and next time I may even sprinkle some of the sesame seeds onto the pot stickers before they go into the pan. We'll also add more of the kimchi since it doesn't have the kick we thought it would, and we would add hot chili flakes to the dipping sauce and maybe some chili garlic sauce to the filling.

I let them go in the pan for about nine minutes, and the bottoms had browned nicely and the pot stickers were a little chewy, but I imagine that's how they're supposed to be. They weren't inedible or anything.

Overall, this was delicious and while there is room to improve, I think these are good enough to eat as is.