Showing posts with label dessert. Show all posts

Sunday, February 14, 2010

Dinner Party!

Wow, I have come a long way. I'm not necessarily talking about the beginning of my marriage when I flat out could not cook, but even since the beginning of this blog. I've tackled so many cooking methods and ingredients, successes and failures, and I'm no worse for wear. I guess that confidence kind of got to me. And so it happened about a month ago when the Husband had an open weekend where he didn't have to work and we were left with deciding what to do. We talked about taking a little two-day trip somewhere, we talked about driving to a basketball game, and then the Husband said a few little words that lit a fire in me.

"How about hosting a dinner party?"

At first it sounded nice, but a little crazy. I had been talking about hosting a dinner party for a few years. But every time I got the opportunity, I either let it pass with no action or something else came up (much to my relief) and I just put the thought in the back of my mind. Truth be told, I was afraid. Afraid, she says! What's the big deal - you invite your good friends over, cook a great meal, throw in some delightful conversation, and the evening is a resounding success. The part that I was afraid of was the "cook a great meal" part. I couldn't even cook for myself and the Husband some nights - how was I going to manage cooking for eight other people and make sure it tasted good?

But then that confidence crept up inside me again. I knew I cooked some amazing dishes for this blog, and I was starting to get more comfortable with my abilities and pushing any limitations to see if I could get to the next level. A dinner party was, in effect, the next level. I knew what had to be done. I emailed our friends and invited them over before I had a chance to chicken out. I was locked in! I had to do it! Maybe I should have just done that sooner, but this timing was going to work out well. The Husband and I tossed around a lot of ideas for the meal and we finally came up with a great menu:

Potato and Ricotta Gnocchi with Bolognese Sauce
Mixed Greens Salad
Cauliflower Casserole
Roasted Zucchini
Chocolate Mousse

The gnocchi was an all around hit every time I made it, so that was a good choice. Everyone likes pasta and this gave everyone the chance to try something most of them probably hadn't eaten before. The Cauliflower Casserole came from my Aunt, who passed it along to my Dad, who cooked it as part of Christmas dinner last year. The Husband, my brother and I all turned our noses up at the name, confident that nary a bite would pass our lips. But, being the grownups we are, we tried it. And we all really liked it! And so did our guests, as evidenced by one of our friends literally scraping the bottom of the baking dish with the serving spoon. The Roasted Zucchini came from Southern Living and was also a hit - I only wish I had made more. And finally, the Chocolate Mousse came from a Betty Crocker Cookbook that my Dad gave me and the Husband for our first Christmas.

We did some major prep work for this event. I even wrote out a to-do list that started three days in advance of the party, from grocery shopping to cutting up veggies the night before to starting the gnocchi dough that morning. I was ready. For the gnocchi, I knew I would have to at least double the recipe I was used to making. There were going to be ten of us and a lot of big appetites. I eventually tripled the dough and the sauce just to make sure I had enough, and as it turned out that was way too much. I would have been okay with doubling it. I made the dough that morning and let it rest, as directed. About two hours before guests were to arrive I pulled out the dough to get it rolled out and cut into the little gnocchi pillows. But when I scooped the dough onto the floured cutting board, my blood ran cold. The dough was way too wet, gooey almost, and completely unable to be shaped. My first thought was one of panic, but thankfully my next thought was somewhat more rational. I grabbed the flour and added more to my dough, stirring away. Still runny. More flour. Getting better. More flour. Finally I had some dough I could work with. Crisis averted, but still something I had not planned.

When we moved from the salad course to the main course, we took a little longer than anticipated to actually get the gnocchi cooked and plated and on the table, but our guests were very gracious and kept the conversation flowing while the Husband and I worked our tails off in the kitchen trying to get the gnocchi wrapped up. All in all, we had a wonderful time with our wonderful friends, and all were very complimentary. One friend, in fact, really put a smile on my face when she said, "I didn't realize you could cook like this!" Neither did I. But now I do.

Cauliflower Casserole

Ingredients
1 medium head cauliflower, broken into florets
1 8-oz carton sour cream
1 C shredded sharp cheddar
1/2 C crushed corn flakes cereal
1/4 C finely chopped green pepper
1/4 C finely chopped sweet red pepper
1 t salt
1/4 C grated Parmesan cheese
Paprika to taste

Place cauliflower florets into saucepan with a small amount of water; cover and cook for five minute and drain.

Combine the cauliflower, sour cream, cheddar cheese, corn flakes, peppers and salt. Transfer to a greased 2-quart baking dish.

Sprinkle with Parmesan cheese and paprika. Bake uncovered in 325° oven for 30-35 minutes, stirring often.

I think the main reason this recipe turned out so well, despite the cauliflower, is because of all the cheese and sour cream. It's probably not all that healthy, but it's a show stopper. When steaming the cauliflower, I used an actual steamer as opposed to boiling it as stated in the recipe. I also could have used a larger head of cauliflower because once everything was dumped into the baking dish, it looked a little sparse. Our guests confirmed that after the dish was scraped clean and I swear I saw some pleading eyes begging for more.

Finally, the chocolate mousse. A little goes a long way with this item. It's so rich and delicious and just the perfect ending to a great meal. I served it in wine glasses and I meant to rim the glasses with sugar but I totally forgot. It still turned out perfect.

After our guests left and the kitchen had been totally covered up with dirty dishes and hand towels and empty wine bottles (we're a drinkin' bunch), I just felt such a sense of accomplishment and relief. We did it, and we did it up nice. Our friends were happy and full and I pushed another limitation and did something I didn't think I could do. Excuse the cliche, but I kind of felt like a kitchen rock star. It felt good.

Wednesday, November 11, 2009

Pear and Cranberry Turnovers

Yum! This recipe was one of the few dessert selections I chose at the beginning of this quest. I wanted something fun and different and this absolutely fits. I was really excited about using fresh cranberries in this recipe, and since it's holiday time I was able to find them easily at the store. All in all, this was pretty easy to put together.


Pear and Cranberry Turnovers

ACTIVE: 25 MIN
TOTAL TIME: 1 HR 30 MIN
SERVINGS: MAKES 8 TURNOVERS

Ingredients
2 Bosc pears (1 pound), peeled and cut into 1/2-inch dice
1/3 cup plus 1 1/2 tablespoons sugar
1 tablespoon all-purpose flour, plus more for dusting
3/4 cup fresh or frozen cranberries
Pinch each of ground cloves, cinnamon and salt
One 14-ounce package cold all-butter puff pastry
1 egg, beaten
Whipped cream or vanilla ice cream, for serving

Directions
Preheat the oven to 400°. In a medium bowl, toss the pears with 1/3 cup of the sugar, 1 tablespoon of the flour and the cranberries, cloves, cinnamon and salt.

On a lightly floured work surface, roll out the puff pastry to a 14 1/2-inch square about 1/8 inch thick. Using a sharp knife, cut the pastry into 8 squares. Spoon the pear filling onto a corner of each square, leaving a 1/2-inch border. Fold the pastry over the filling to make a triangle and firmly press the edges to seal. Crimp the edges with a fork. Prick each triangle once with the fork to allow steam to escape during baking. Transfer the turnovers to a baking sheet and refrigerate for at least 30 minutes, until chilled.

Brush the tops of the turnovers with the beaten egg and sprinkle with the remaining 1 1/2 tablespoons of sugar. Bake the turnovers for 30 minutes, until golden brown. Let the turnovers cool for at least 5 minutes. Serve with whipped cream or ice cream.


Before this recipe, I do not believe I had ever purchased a bag of fresh cranberries. I was also never a huge fan of jellied cranberry sauce when I was a kid, but someone once made some fresh cranberry sauce that was delicious. I have this weird aversion to meat and fruit combinations, so while I didn't apply said sauce to my turkey, I did taste it separately and it was really good. So from here on out, fresh cranberries are the way to go. Also, fresh cranberries aren't really something you can just eat out of the bag. Whoo-boy, those suckers are tart! I don't know what I expected when I crunched on one, but I just about turned inside out. Thankfully, cooking cranberries lessens the tart and brings in just the right amount of sweet.

With the pears peeled and cubed, cranberries washed and sugar/spices added in the bowl, it makes a whole lot of filling. The recipe calls for one sheet of pastry dough that you roll out to make it larger. My dough could have used a few more once-overs with my rolling pin because I had trouble getting eight exact squares. They were more like lopsided rectangles and the end pieces were a tad on the small side. There was some creative stretching going on to get the dough to the right size. Plus, with the unbaked cranberries and all that sugar, the filling really isn't something you can eat out of the bowl if there is still some left over. So I just added it all and really pulled that dough so it covered everything and sealed.

Pear and Cranberry Turnovers


I highly recommend putting down a sheet of parchment paper under the turnovers. As you will see in the "after" photo, the sugary sauce that results will become a little burned (or maybe it's just my oven) and will stick to your baking sheet. Parchment paper will lift right off and you can throw it away with minimal cleaning needed to your baking sheet. You also don't have to use a non-stick cooking spray with the parchment paper.

The finished product was really good, with the exception of the slightly crispy edges. The cranberries mellowed out significantly and any residual tartness was covered by the copious amounts of sugar that went into the filling. The pastry was light and flaky, and the egg wash gave it a nice sheen on top.

Pear and Cranberry Turnovers


Even with just the Husband and myself here at the house, we polished all eight of these off in short order. They're easily reheatable in the microwave and lasted about a week in the fridge. The Husband also gives his approval for these: "Oh, those are tasty." Sweet.

Thursday, November 5, 2009

Peanut Butter Granola

I figured this could be a mutli-purpose recipe that would serve both the dessert and breakfast tastes. I immediately found a breakfast option, and dessert can't be far behind.


Peanut Butter Granola

Prep: 15 minutes
Cook: 3 minutes
Bake: 20 minutes
Cool: 20 minutes

3 C uncooked oats
½ C dry-roasted peanuts
½ C sweetened flaked coconut
3 T sesame seeds
½ C creamy peanut butter
½ C firmly packed brown sugar
¼ C butter
1 T light corn syrup
¼ t salt

Preheat oven to 350˚. Toss together oats through sesame seeds. Cook peanut butter through salt in a small saucepan over medium heat 3 minutes or until smooth. Stir peanut butter mixture into oat mixture until blended. Spread mixture in a single layer on a lightly greased, aluminum foil lined 17x12 inch jelly roll pan. Bake 20 minutes or until lightly golden, stirring after 10 minutes. Transfer to wax paper and cool completely, about 20 minutes. Serve with vanilla yogurt and sliced bananas. Makes 6 cups.


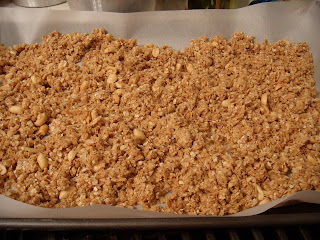
Like I said, this immediately became a breakfast food. I had a recipe for a yogurt parfait that I found right around the time I decided to make the peanut butter granola, so I figured the best possible idea was to combine the two. Otherwise, I would not have had any use for the granola. It held up well when it was all being mixed together and there were even some small clumps that loosely formed. And when I spread it all out on the parchment paper, I was shocked at how much there really was. I mean, there was a ton of this stuff.


Peanut Butter Granola


But it cooked nicely, and again with my oven, I could have backed the time off by about two minutes. There was a small burned taste when it all came out of the oven, but it wasn't very strong and was easily masked by the yogurt. It's probably not substantial enough to be used as a granola-type cereal, and I guess it could be a topping for some kind of apple crisp. But for me, it worked well as a parfait. I used Yoplait Vanilla yogurt and sliced up some banana and layered it all in a glass. Perfect! And portable, too. I took some in the mornings when I left for work and I was able to sneak in a few bites at stop lights. Maybe not the safest thing to do while driving, but I was fairly responsible about it, only driving with my knees when absolutely necessary.


Peanut Butter Granola


And there you go! I'm sure there are a lot of other ways to use this granola, but the parfait was the easiest thing for me. And in the immortal words of Donkey from Shrek, "Everybody loves parfaits!"

Monday, May 18, 2009

Gingerbread

Ahh, the holidays. A time to fellowship with family you don't see very often, eat way too much food and fall into a turkey coma watching football. And when the tryptophan wears off, it's time to go back for seconds - this time to the dessert table. At my family's holiday celebrations, sometimes it seems like there are more desserts than anything else - chocolate cake, fruit pies, chess pies, cookies and brownies. Oink. But this gingerbread recipe would really set the tone for the holidays. Now this is not a cookie, but it's actual gingerbread. Moist, rich, dense and downright delicious.


Gingerbread

1 C granulated sugar
½ C applesauce
¼ C butter
¼ C molasses
2 C all-purpose flour
4 t ground ginger
1 t ground cinnamon
1 t baking soda
¼ t salt
1 C fat-free buttermilk
2 large eggs, lightly beaten
Whipped cream, optional

Beat the first four ingredients at medium speed with an electric mixer until blended.

Stir together flour and next four ingredients in a medium bowl. Combine buttermilk and eggs in a separate bowl. Add both mixtures alternately to butter mixture, beginning and ending with flour mixture. Beat at low speed until blended after each addition. Pour batter into a lightly greased 10-inch cast-iron skillet.

Bake at 325 for 35-40 minutes or until a wooden pick inserted in center comes out clean. Serve with whipped cream, if desired.


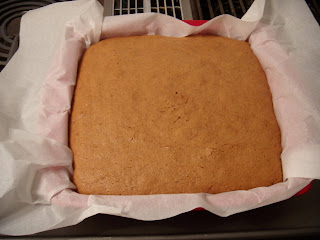
First things first - I will definitely cook this again and I will proudly put my name all over it. It's so good, and even better after a few days because the top of the gingerbread gets kind of sticky. It comes together very easily, so no problems there. When I cooked it, I did not use a cast iron skillet and here's why: we have two cast iron skillets, one for cornbread that belonged to the Husband's great-grandmother and one miscellaneous one that is possibly as old as the former, but it is most certainly not for sweets. I used it before for fried chicken. If I were to put gingerbread in either of those skillets I would never hear the end of it. So I used a 9x9 silicone baking pan lined with parchment paper, which worked wonderfully. The gingerbread lifted right out once it was done with no cleanup necessary.

Gingerbread


One error I made was simply a result of how eager I was to try the gingerbread - I cut it too soon before it cooled down enough. That resulted in some crumbly pieces, but they didn't go to waste (translation: I ate them). This recipe filled up the entire 9x9 pan so there was a lot to go around. I took about 10 pieces to work and my hungry co-workers did their part to make sure the Husband and I weren't tasked with eating the entire batch, though we certainly could have. And if you add whipped cream, whoa nelly. You're in for a real treat.

Gingerbread


This was a delicious recipe that will certainly become a favorite for us.

Monday, April 27, 2009

Five Minute Chocolate Cake in a Mug

Don't laugh. You know you want to make this yourself. That's a pretty tempting title and now you're intrigued, aren't you? Of course, you could have been one of the 2,394,042 people who received this recipe in an email forward and a message something along the lines of, "OMG you have to try this! It is SOOOOO cool and it really works!!" Normally when I get an email with a message that sounds like a chain letter, I delete it. But naturally, I was drawn to the recipe because I'm a sucker for chocolate, and especially chocolate that can be made into cake form in less than five minutes AND doesn't even require an oven. I'm all about simplicity. And somewhere deep inside, I secretly hoped this recipe wouldn't work. I don't need to be five minutes from a hunk of chocolate cake. It's not good for the waistline. But after trying this, I am sold. And I may need to invest in some pants with an elastic waistband.


Five Minute Chocolate Cake in a Mug

4 tablespoons self rising flour
4 tablespoons sugar
2 tablespoons Hershey's cocoa (regular or dark)
1 egg
3 tablespoons milk
3 tablespoon oil
3 tablespoons chocolate chips (optional)
a splash of vanilla extract (optional)
cooking spray for easy clean up
1 large coffee mug or hot chocolate mug


Add dry ingredients to mug, and mix well. Add the egg and mix thoroughly. Pour in the milk and oil and mix well. Add vanilla extract and coat the chocolate chips with flour (if using, this will prevent the chips from collecting on the bottom.), and mix again. Put your mug in the microwave and cook for 3 minutes in a 1000 watts microwave. Adjust time if needed. The cake will rise over the top of the mug a little, but don't be alarmed. Allow to cool a little, and tip out onto a plate if desired.


*snort* Like chocolate chips are ever optional. Whatever. That's funny. So anyway, I was chuckling to myself as I put this concoction together. I kept thinking that there was no way this would work out - it was just too simple! But as the ingredients gradually came together I realized this was starting to resemble actual cake batter. It was precisely at that moment that I knew I was in big trouble if this actually creates an edible cake. And did it ever. I am so in trouble. It's really, really good.

Five Minute Chocolate Cake in a Mug


Don't you just want to jump through the computer screen and take a huge bite? Yes, you do. Because there is easily enough for two (or three) people to dive into this thing. I did coat the chocolate chips with flour but they still sunk to the bottom of the mug after cooking. And regarding the mug, I used the biggest one I have. It's probably 5.5" tall with about a 3.5" wide mouth. I'm just estimating here, but it's bigger than your run of the mill coffee mug. When it was baking, the cake rose up over the top by about an inch, but there were only those small drips down the side. And you'll see there is a mention of cooking spray in the ingredient list but no mention of applying said cooking spray to the inside of the mug before you add the ingredients. I think the spray would work, although I didn't use it and all I had to do was run a knife around the outside edge of the cake to loosen it enough for the cake to plop out (with the exception of the chocolate chips). I think I would apply the cooking spray, mix the ingredients in a separate bowl and then pour into the mug. That might work.

The texture of the cake was pretty spongy and not quite as moist as a box cake mix would be. The taste was good. Like, really good. For the minimal effort that goes into the recipe, the taste delivers tenfold. No, it's not Duncan Hines or Betty Crocker, but it works well in a pinch. If you need a quick chocolate fix or you have a birthday girl/boy coming over on short notice, whip this up. You can even throw on some icing and pop a candle in the top. Make it. You know you want to. I'll even share my elastic waistband pants with you.