I said I had used one in place of the other before, but truthfully it was only because I wasn’t paying attention to my recipe and didn’t realize what I had done until after everything was already mixed. Oops. But after some quick research, I discovered that they are interchangeable in a pinch. The website Joy of Baking states the two products are both “chemical leavening agents that cause batters to rise when baked.” They suggest an appropriate substitution is two teaspoons of a double-acting baking powder. It is also noted that too much baking powder can give batter a bitter taste, so that’s why it’s really appropriate only in a pinch. If you’re interested in looking at more of the chemical reaction of baking soda, here’s a link.
Monday, April 25, 2011
Ask the Blogger!
On Saturday I received a call from my friend who was in the middle of a cooking conundrum. She had a lot of overripe bananas and was making banana bread. She was in the middle of mixing ingredients when she realized the recipe called for baking soda, and she only had baking powder. Hmm. She called to ask if the two are interchangeable, since she didn’t want to stop what she was doing to go to the store and get a box of baking soda.

Monday, April 18, 2011
Salsa Verde
I didn’t actually set out to make my own salsa verde. I have a black bean soup recipe I’ve made before that’s really good and it calls for a whole cup of the stuff. I figured if I’m making this soup from scratch, then why in the world can’t I make the salsa verde from scratch, too? Good question.
This is pretty easy to make, but it does take a little while what with all of the charring and husking and cooking involved. The tomatillos are funny little things. They’re so cute and like… you guessed it… little bitty tomatoes. They are firm and not juicy at all so they dice really well. As far as the Anaheim chilies, I tend to use Poblanos. They’re available in my local stores and while I’ve seen the Anaheims (lighter green) before, I’ve just always used Poblanos (darker green).

Unhusked tomatillo

Tomatillo after being husked and rinsed
I also use jarred sliced jalapenos instead of a Serrano. I just don’t want to have that level of heat. I could use a fresh jalapeno, too. I know there would be a taste difference in the two, especially if I can get some of the fresh ones from our summer farmers market. The most recent time I made this, I used too many jarred jalapenos and the salsa came out a little on the spicy side. The chips evened it all out in the end, and with the addition of the salsa to the soup as called for in the recipe, the other flavors greatly tamed the heat.
If I ever got into canning, I would make batch after batch of this stuff and put it up all summer long. It’s really good and so fresh tasting. It’s even really good to eat alone. I can dip chips in this stuff all day long.
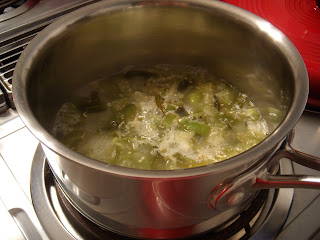
Simmering on the stove

Open wide!
So back to the black bean soup recipe I mentioned earlier. After I made the salsa, I added the requisite one cup of it to the blender along with two cans of undrained black beans, a teaspoon of cumin, a handful of cilantro, a cup of chicken broth and a dash of fat free half and half.
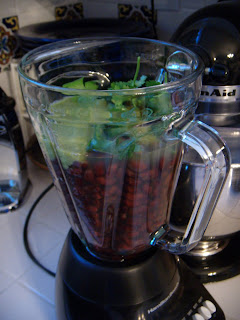
Getting ready to blend this bad boy up
After it was thoroughly blended, the soup went into a pot and simmered on the stove until it was warm. Then I topped the soup with a little more salsa verde and some crumbled queso fresco. Delicious and good for you on a cool evening.

Voila!
Salsa Verde
Ingredients:
2 large fresh Anaheim chilies
1/2 pound tomatillos, husked, rinsed, diced
1 1/2 cups low-salt chicken broth
2 large green onions, chopped
1 large serrano chili, stemmed, seeded
1 large garlic clove
1/4 cup (firmly packed) fresh cilantro leaves
1 tablespoon whipping cream
1 tablespoon fresh lime juice (optional)
Char Anaheim chilies directly over gas flame or in broiler until blackened on all sides. Enclose in paper bag; let stand 10 minutes. Peel, seed, and chop chilies.
Combine tomatillos, broth, green onions, serrano chili, and garlic in medium saucepan; bring to boil over medium-high heat. Reduce heat to medium-low; simmer until mixture is reduced to 1 2/3 cups, stirring occasionally, about 18 minutes. Transfer mixture to blender. Add Anaheim chilies, cilantro, and cream. Puree until smooth. Season salsa with salt and pepper. Add lime juice, if desired. (Can be made one day ahead. Transfer to small bowl; cover and chill. Rewarm before serving.)
This is pretty easy to make, but it does take a little while what with all of the charring and husking and cooking involved. The tomatillos are funny little things. They’re so cute and like… you guessed it… little bitty tomatoes. They are firm and not juicy at all so they dice really well. As far as the Anaheim chilies, I tend to use Poblanos. They’re available in my local stores and while I’ve seen the Anaheims (lighter green) before, I’ve just always used Poblanos (darker green).
I also use jarred sliced jalapenos instead of a Serrano. I just don’t want to have that level of heat. I could use a fresh jalapeno, too. I know there would be a taste difference in the two, especially if I can get some of the fresh ones from our summer farmers market. The most recent time I made this, I used too many jarred jalapenos and the salsa came out a little on the spicy side. The chips evened it all out in the end, and with the addition of the salsa to the soup as called for in the recipe, the other flavors greatly tamed the heat.
If I ever got into canning, I would make batch after batch of this stuff and put it up all summer long. It’s really good and so fresh tasting. It’s even really good to eat alone. I can dip chips in this stuff all day long.
So back to the black bean soup recipe I mentioned earlier. After I made the salsa, I added the requisite one cup of it to the blender along with two cans of undrained black beans, a teaspoon of cumin, a handful of cilantro, a cup of chicken broth and a dash of fat free half and half.
After it was thoroughly blended, the soup went into a pot and simmered on the stove until it was warm. Then I topped the soup with a little more salsa verde and some crumbled queso fresco. Delicious and good for you on a cool evening.
Tuesday, February 15, 2011
My take on the movie "Julie and Julia"
I just saw this movie for the first time this past weekend, courtesy of Netflix. And yes, I immediately recognized the parallels between my life and the life of Julie Powell (both writers, both young-ish, both feeling that we would be farther along professionally, both like to cook). I do have the point out, though, that the movie was released nationally in August 2009 and I started this blog in December of 2008, so no direct copying there. Also, I honestly hadn't heard of Julie Powell and her blog before I started this one. Besides, our goals were totally different. And why am I defending myself to y'all anyway?
I can appreciate wanting to take on a task as monumental as cooking/blogging through the entirety of Mastering the Art of French Cooking and then debating whether you were actually sane when you decided to undergo such a feat. That's pretty much the feeling I have toward this blog. If you've been paying any attention to my original list of recipes, you would see that I am about five short from completing my goal. However, life gets in the way of these things sometimes and I think it's important that I'm continuing to blog regardless of the actual recipes I make. But to Julie Powell's credit she trudges through the whole cookbook, even cooking more than one recipe per day since the cookbook's 524 recipes divided by 365 days equals 1.4. I wonder how that worked out.
Julie is also comparing herself to people around her who are much more professionally advanced than she is and feels that she will never compare to them as long as she stays in her current job. From what I gather, she was able to stop working post-movie or post-book deal, whichever came first, and now spends her days as a full time writer. Jealous, party of one. But her feelings of inadequacy didn't immediately spur her to start the blog to one-up her friends or land a book deal. She had no idea that would ever happen. She just thought she would be spending time doing something she enjoyed that didn't revolve around work. She liked cooking, she liked writing, so she combined the two. She also wanted to have something she could finish for once. A goal she could work toward and be able to say at the end, "I finished something." Honey, I know the feeling.
So in the end, and I'm really not spoiling anything here, both Julie and Julia get their desired results (Julia with her cookbook and Julie with her new found fame thanks to the blog) and they all appear to live happily ever after. The only problem I have is that the movie ended so abruptly, but hey, they didn't consult me. But what I loved about the movie is that they actually showed the Julie character cooking throughout the movie. She makes lobster, hollandaise sauce, poached eggs and even bones a duck toward the end of the movie. I'm not into boning any ducks, but the recipe of Julia's that I would love to make is Boeuf Bourguignon, which you can retrieve here from the website of the company that originally published her cookbook back in the day. I am totally going to do this meal, but it will have to wait until a weekend so the proper amount of time can be devoted to it.
So, the movie was good, the lesson was even better, and I loved the connection with cooking and blogging. Highly recommend it.
I can appreciate wanting to take on a task as monumental as cooking/blogging through the entirety of Mastering the Art of French Cooking and then debating whether you were actually sane when you decided to undergo such a feat. That's pretty much the feeling I have toward this blog. If you've been paying any attention to my original list of recipes, you would see that I am about five short from completing my goal. However, life gets in the way of these things sometimes and I think it's important that I'm continuing to blog regardless of the actual recipes I make. But to Julie Powell's credit she trudges through the whole cookbook, even cooking more than one recipe per day since the cookbook's 524 recipes divided by 365 days equals 1.4. I wonder how that worked out.
Julie is also comparing herself to people around her who are much more professionally advanced than she is and feels that she will never compare to them as long as she stays in her current job. From what I gather, she was able to stop working post-movie or post-book deal, whichever came first, and now spends her days as a full time writer. Jealous, party of one. But her feelings of inadequacy didn't immediately spur her to start the blog to one-up her friends or land a book deal. She had no idea that would ever happen. She just thought she would be spending time doing something she enjoyed that didn't revolve around work. She liked cooking, she liked writing, so she combined the two. She also wanted to have something she could finish for once. A goal she could work toward and be able to say at the end, "I finished something." Honey, I know the feeling.
So in the end, and I'm really not spoiling anything here, both Julie and Julia get their desired results (Julia with her cookbook and Julie with her new found fame thanks to the blog) and they all appear to live happily ever after. The only problem I have is that the movie ended so abruptly, but hey, they didn't consult me. But what I loved about the movie is that they actually showed the Julie character cooking throughout the movie. She makes lobster, hollandaise sauce, poached eggs and even bones a duck toward the end of the movie. I'm not into boning any ducks, but the recipe of Julia's that I would love to make is Boeuf Bourguignon, which you can retrieve here from the website of the company that originally published her cookbook back in the day. I am totally going to do this meal, but it will have to wait until a weekend so the proper amount of time can be devoted to it.
So, the movie was good, the lesson was even better, and I loved the connection with cooking and blogging. Highly recommend it.
Tuesday, February 1, 2011
Why Lodge Cast Iron Enamel Pots Rock!
I got a toy for Christmas! A culinary toy, that is. Ta da!

This thing flat out rocks! I have wanted one for a while, but I had no idea how versatile they were nor how well they performed until I actually put mine to use. I've made a few soups and they've all turned out wonderfully. I also made a great Thai Coconut Chicken from Cooking Light that was incredible. Sure, I played a part in how well it turned out simply by the addition of my own hand (/bragging), but the pot cooked so evenly and did a fantastic job of browning the chicken and cooking it all the way through while not drying it out or burning it at all. It really was amazing.
These pots do come with their very own set of instructions and the manufacturers are particular about how you take care of them. They're cast iron and sturdy, but the enamel is fragile and can chip or crack. It can be put in the oven, but not too hot because the black plastic handle on the lid will melt. Also, they advise that you not heat the pans to more than medium or so on the stove top, as they will hold more than enough heat for you at a low setting. I was able to maintain a low boil with one of my soups at a three or four setting (out of 10) on the stove eye. No metal tools in the pot, only wooden or plastic. The best place to store it is on top of your stove to prevent getting beaten up in the cupboards. Hand wash and don't air dry (oops...). But I plan to take care of this little jewel and look forward to using it for many, many years to come.
*Source: Amazon.com
This thing flat out rocks! I have wanted one for a while, but I had no idea how versatile they were nor how well they performed until I actually put mine to use. I've made a few soups and they've all turned out wonderfully. I also made a great Thai Coconut Chicken from Cooking Light that was incredible. Sure, I played a part in how well it turned out simply by the addition of my own hand (/bragging), but the pot cooked so evenly and did a fantastic job of browning the chicken and cooking it all the way through while not drying it out or burning it at all. It really was amazing.
These pots do come with their very own set of instructions and the manufacturers are particular about how you take care of them. They're cast iron and sturdy, but the enamel is fragile and can chip or crack. It can be put in the oven, but not too hot because the black plastic handle on the lid will melt. Also, they advise that you not heat the pans to more than medium or so on the stove top, as they will hold more than enough heat for you at a low setting. I was able to maintain a low boil with one of my soups at a three or four setting (out of 10) on the stove eye. No metal tools in the pot, only wooden or plastic. The best place to store it is on top of your stove to prevent getting beaten up in the cupboards. Hand wash and don't air dry (oops...). But I plan to take care of this little jewel and look forward to using it for many, many years to come.
Friday, July 9, 2010
Beef Lo Mein
I'm a huge fan of Chinese/Japanese food. There are a few good places around here to get good ethnic food, but they're limited. The main things to watch out for are whether the egg rolls are frozen (most are, but some are good and some are horrible) and if the sushi is fresh. There's a great little hole in the wall here in town that we really enjoy, but the place is almost empty 98% of the times we're there. It's in a run down strip mall and we are surprised it's lasted this long, but we're not questioning it.
This is a really good, basic recipe for lo mein. If you're not up for beef, you can sub tofu, chicken or shrimp. And with the extra additions at the end, you can really make this dish your own by adding any extra veggie, spice or whatever you like.
If you can't get your hands on soba noodles, you can use spaghetti in a pinch. But soba noodles are going to be thicker and I think they have a more delicate texture than spaghetti noodles. Here's the package we were able to find locally:

And here's the final product! Please disregard the spills on the countertop:
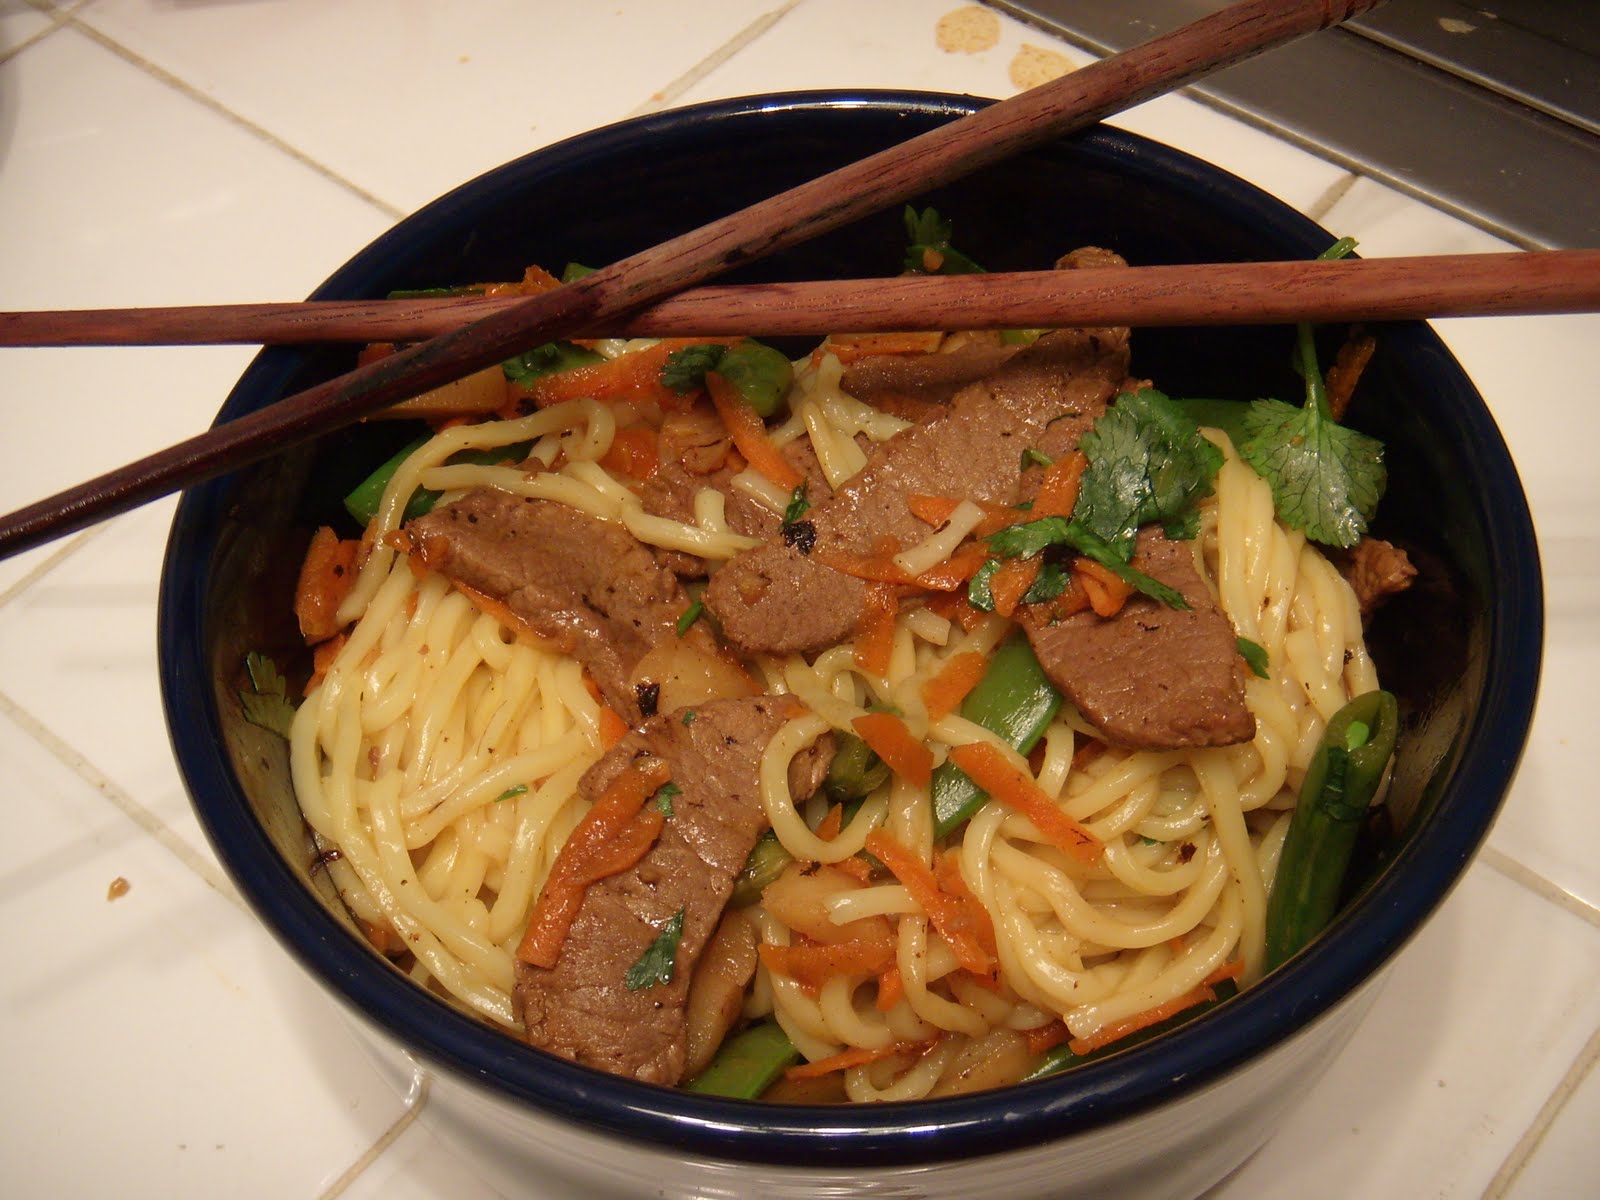
Beef Lo Mein
Cook Time:10 min
Yield: 4 servings
Ingredients
12 ounces soba noodles
2 teaspoons sesame oil
2 teaspoons minced fresh ginger
2 cloves garlic, minced
12 ounces grilled beef, cut into 1/4-inch pieces
8 grilled scallions, chopped
1 cup snap peas
1/3 cup shredded carrots
3/4 cup reduced-sodium beef broth
1/4 cup reduced-sodium soy sauce
1/4 cup chopped fresh cilantro leaves
Cook soba noodles according to package directions.
Meanwhile, heat the sesame oil in a large skillet. Add ginger and garlic and sauté 1 minute. Add beef, scallions, snap peas and carrots and sauté 1 minute. Add broth and soy sauce and bring to a simmer and cook 5 minutes, until carrots are soft. Drain noodles and add to sauce. Toss together with cilantro.
*add some cornstarch and water to thicken the sauce, add more garlic and onion powder, add water chestnuts, do matchstick carrots
This is a really good, basic recipe for lo mein. If you're not up for beef, you can sub tofu, chicken or shrimp. And with the extra additions at the end, you can really make this dish your own by adding any extra veggie, spice or whatever you like.
If you can't get your hands on soba noodles, you can use spaghetti in a pinch. But soba noodles are going to be thicker and I think they have a more delicate texture than spaghetti noodles. Here's the package we were able to find locally:
And here's the final product! Please disregard the spills on the countertop:
Fried Green Tomatoes
There are a few foods that are quintessentially Southern. Chief among those are sweet tea, grits with butter and salt (not sugar), chicken and waffles, pimento cheese, casseroles of any shape or form, and these little golden brown delicacies right here. You can't get green tomatoes just any time of the year, so anyone with a craving for them in, say, December, will have to find refuge in the freezer case of their local grocery store or try to satiate their desires with some suitable replacement. If you find out what that replacement is, please let me know.
Then you can go one step better and add toasted bread and bacon:

Sorry, you'll have to give me just a minute to recover after seeing those pictures. They just look. So. Good.
Okay, I'm better. And yes, that's a pickle on the plate. We like our pickles fried in the South, too, but that's another recipe for another time.
Fried Green Tomatoes
Green tomatoes
Cornmeal
Buttermilk or regular milk
Oil, for frying
Salt and pepper, to taste
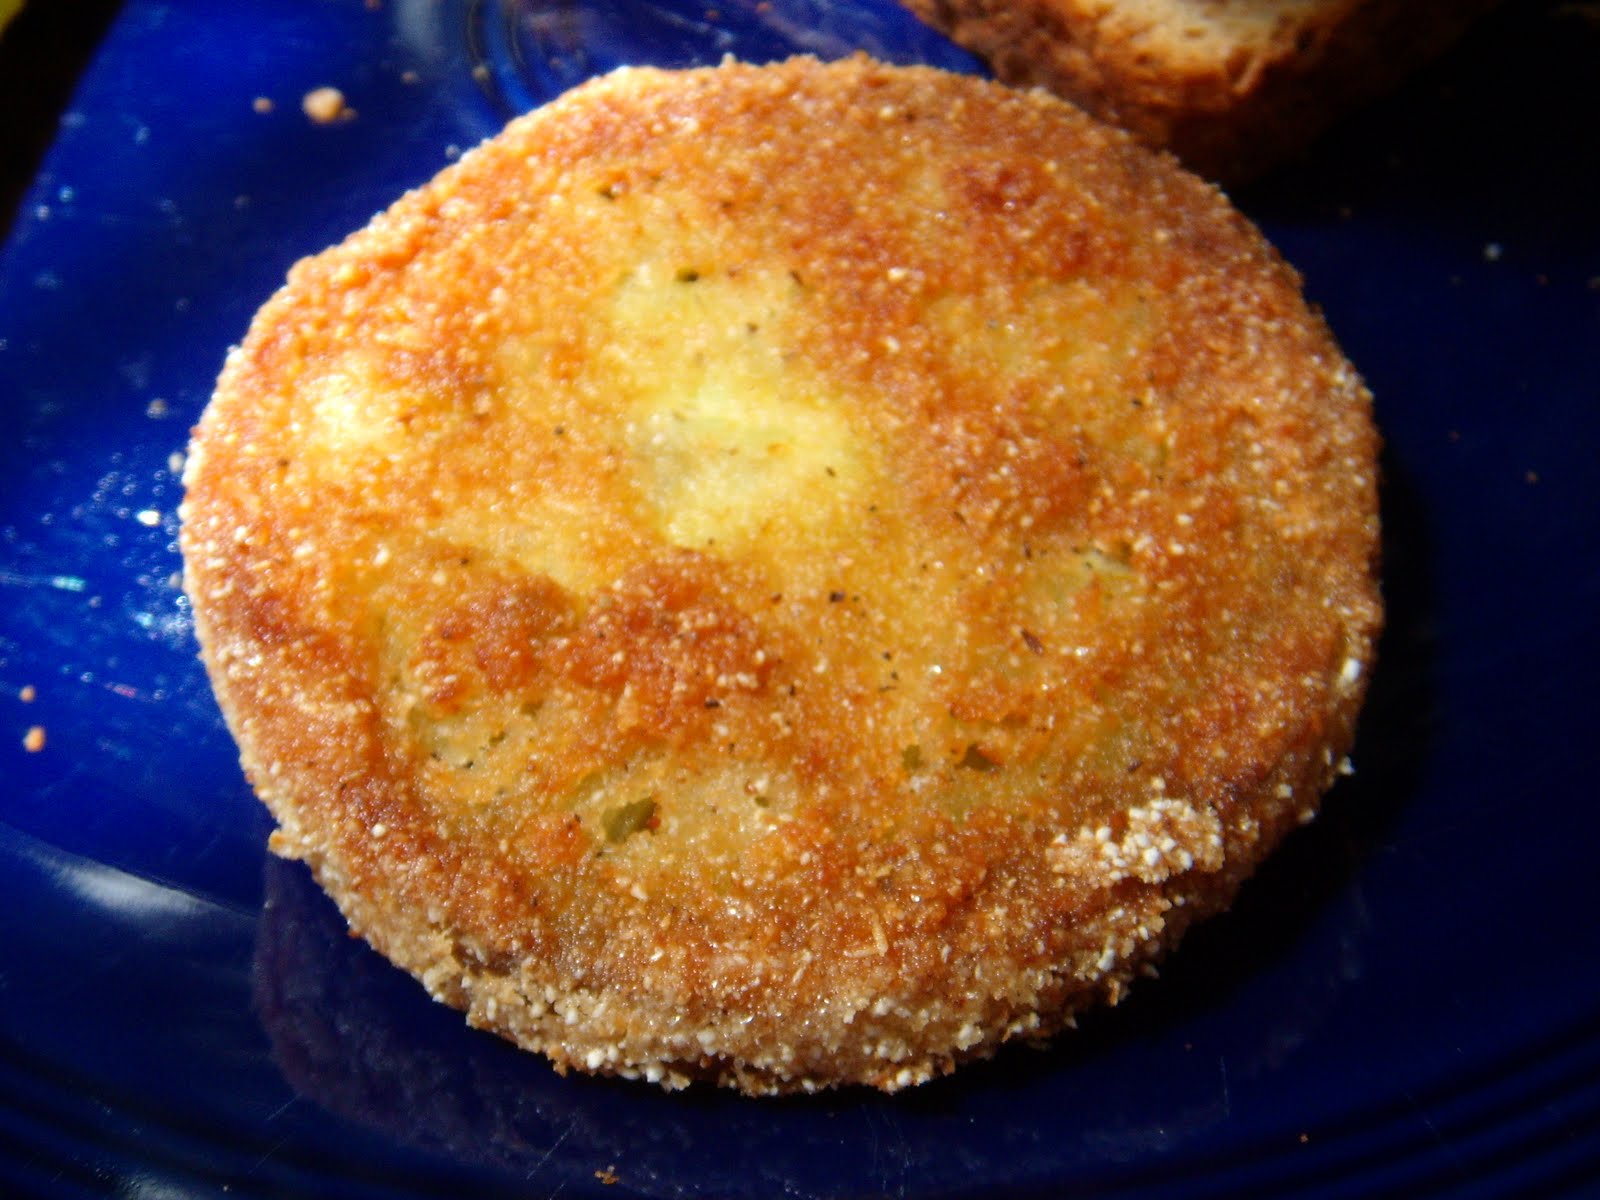
Slice green tomatoes to approximately ½ or ¾ inch thickness. Blot with paper towels to remove any excess juice. Dredge tomato slices in milk, letting excess drip off, then dredge in cornmeal to cover. Shake off excess cornmeal and set aside until the cornmeal has absorbed the milk. Fry in hot oil for two to three minutes on each side, or until golden brown. Drain on paper towels and season to taste. Serve hot.
There are some very important rules to follow in this recipe. First of all is the buttermilk versus regular milk debate. I've done both and the buttermilk holds the cornmeal much more effectively. Regular milk also does well, but there is a noticeable difference. If anything, the coating might be a little more crispy with the buttermilk since it will hold more cornmeal. Second is how thick to slice the tomatoes. I would definitely go with the 1/2 inch measurement at least. You don't want a floppy tomato slice. It should be firm. Additionally, blotting the tomatoes lets you control the amount of moisture in the slices. Too much moisture and they'll be soggy.
On that note, the other important thing to note is that when all of the slices are dredged and waiting to go into the fryer, make sure the cornmeal has been absorbed by the milk. This is important because if you were to dredge the slices and immediately drop them in the hot oil, the cornmeal would fall off in the oil and start to burn in the pan, thereby burning your tomatoes. Not good eats. But if you follow all of the directions, you should come up with something like this:
Then you can go one step better and add toasted bread and bacon:
Sorry, you'll have to give me just a minute to recover after seeing those pictures. They just look. So. Good.
Okay, I'm better. And yes, that's a pickle on the plate. We like our pickles fried in the South, too, but that's another recipe for another time.
Monday, June 7, 2010
Hot Chicken Casserole
This recipe is truly an oldie, but a goodie. It belongs to the Husband's side of the family and he's been eating it for years. It's absolutely the definition of comfort food and has really become a treat for us since we're eating healthier these days.

Yes, I forgot to wipe the plate before I photographed it. I once had a kitchen manager who insisted all plates went out clean and would personally inspect them. I guess it makes for a good impression. And yes, this is a fairly monochromatic dish thanks to all that cheese. You can see some of the green peppers and the tomatoes from the Rotel, but everything else is the color of Velveeta. Again with the onion, I don't use a whole one. I'm good on about two or three slices, finely diced. I do use a whole green pepper, though, but it's going to be on the smaller side than some of those behemoth peppers. As for the cooking time, I have been known to cheat and raise the temperature to 300˚ and cook for only one hour. It still turns out fine. Just remember to stir it occasionally. So there you have it - a down home, creamy, cheesy, comfort food. Should you attempt to pass this off as a family recipe of your very own, I won't take offense.
Hot Chicken Casserole
2 chicken breasts
1 small package of spaghetti
1 chopped green bell pepper
1 chopped onion
½ stick of butter
¾ pound Velveeta cheese, cubed
1 can Rotel
½ t salt
½ t pepper
Boil the chicken breasts until done. Shred the chicken. Using the same water, cook a small package of spaghetti noodles. Let it cook down but leave it a bit soupy.
Brown the chopped bell pepper and onion in butter in a medium skillet. Mix pepper and onions, noodles in remaining liquid, shredded chicken, Velveeta, Rotel, salt and pepper in a large casserole dish.
Cook at 200˚ for 2 hours covered, stirring occasionally.
Who doesn't love a dish smothered in Velveeta? No one I know. If you don't cook with Velveeta in the South, people look at you funny. Now I sure don't use ¾ lb of the stuff as the recipe suggests, but I can assure you the cheese level is sufficient. This recipe also makes a ton - I cook it in a 2 ½ quart baking dish and it comes to the very top. Leftovers heat very well and last for a few days, so you have to not mind eating the same thing over and over again for a short time. Freezing does weird things to the texture of pasta in my experience, so I don't know if I would do that. It's also important to stir it about every 20-30 minutes so the top doesn't get crunchy and everything melts well.
Yes, I forgot to wipe the plate before I photographed it. I once had a kitchen manager who insisted all plates went out clean and would personally inspect them. I guess it makes for a good impression. And yes, this is a fairly monochromatic dish thanks to all that cheese. You can see some of the green peppers and the tomatoes from the Rotel, but everything else is the color of Velveeta. Again with the onion, I don't use a whole one. I'm good on about two or three slices, finely diced. I do use a whole green pepper, though, but it's going to be on the smaller side than some of those behemoth peppers. As for the cooking time, I have been known to cheat and raise the temperature to 300˚ and cook for only one hour. It still turns out fine. Just remember to stir it occasionally. So there you have it - a down home, creamy, cheesy, comfort food. Should you attempt to pass this off as a family recipe of your very own, I won't take offense.
Wednesday, April 7, 2010
Marbled Chocolate Banana Bread
I want to start off by saying I found this recipe in Cooking Light. I note that point specifically because once you take a bite of this moist, chocolaty bread, you will not at all believe it is light. Everything in moderation and all that jazz, but this is an outstanding recipe and a great way to use up some over ripe bananas.
This is so incredibly delicious. The first time I made it, I literally wanted to eat the entire loaf hot out of the oven. The mouth watering combination of chocolate and bananas with the texture of hot, fresh bread will quite literally send your senses into gastronomic overdrive. This bread keeps pretty well for a few days, but honestly, there is no sensible reason for it to sit more than three or four days before it's gobbled right up. It also freezes well, too, if wrapped in plastic wrap and aluminum foil.
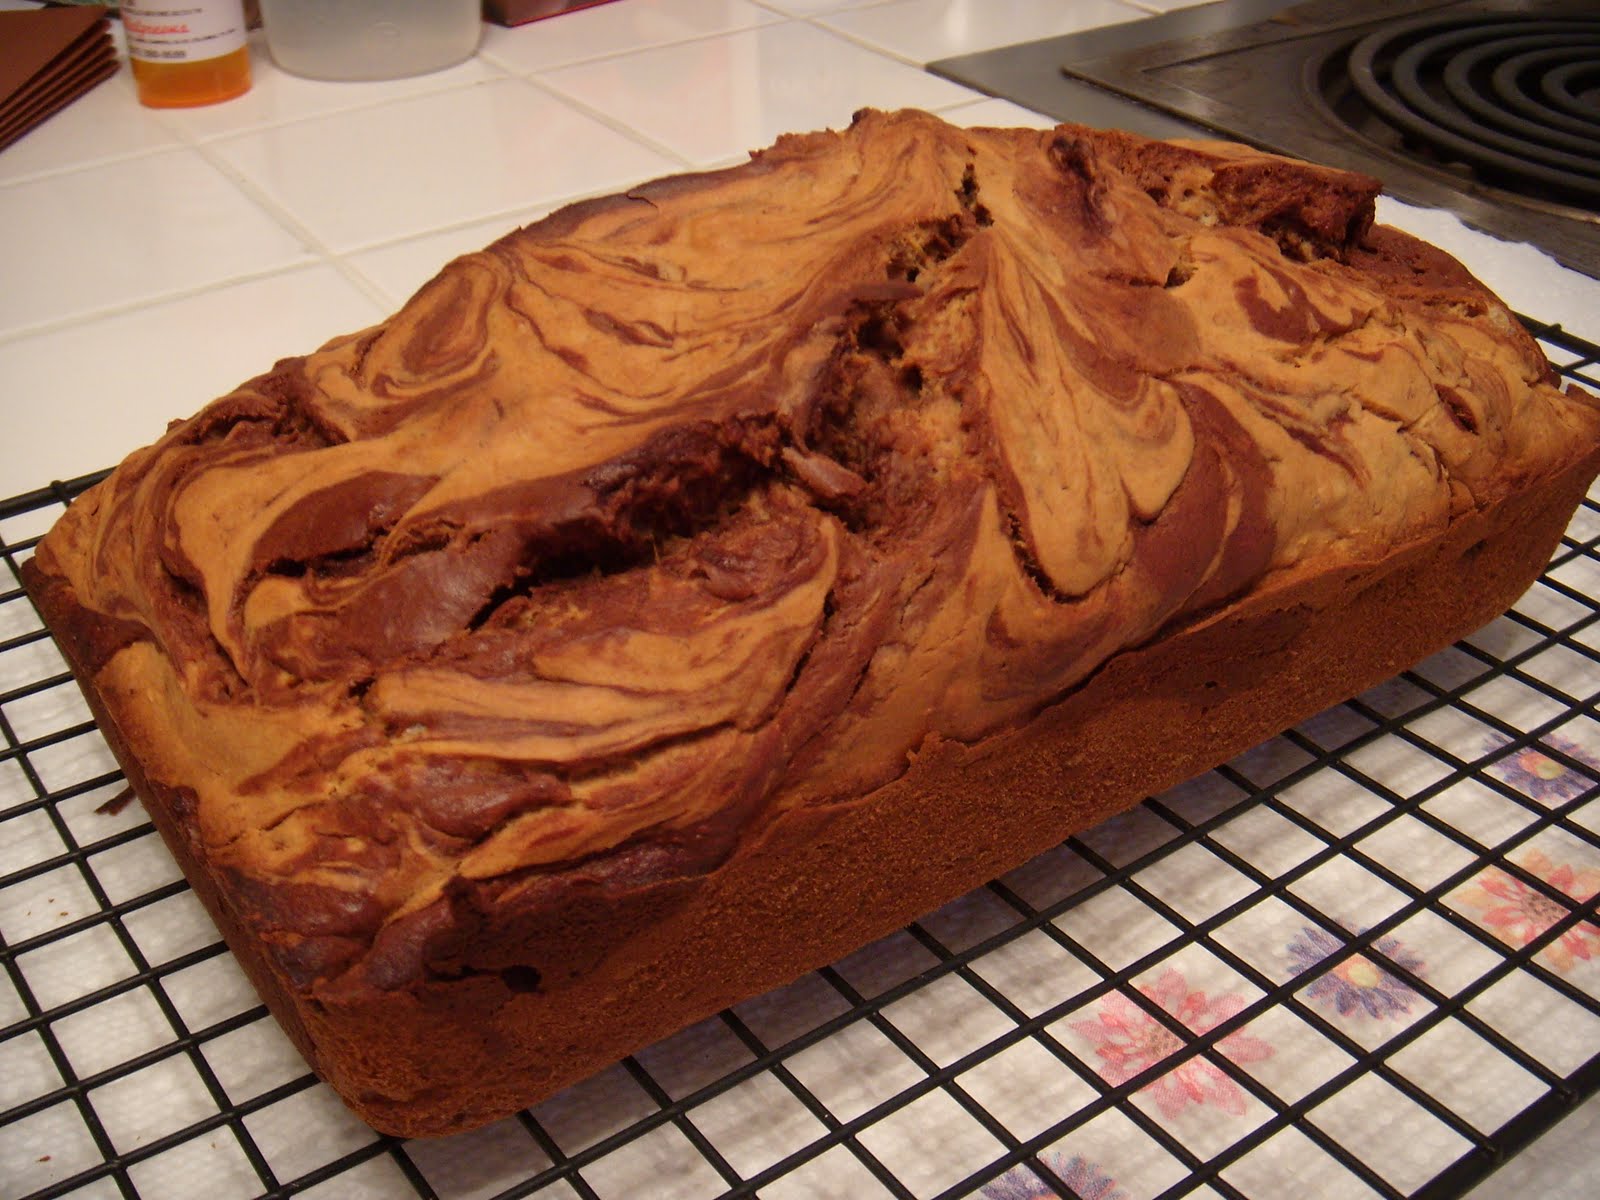
This bread is so versatile and can be eaten as a snack, a light dessert or my favorite, breakfast! Toast two pieces in the oven until slightly browned and the ends crunchy (the slices would likely fall apart in a traditional toaster oven, but be my guest), and then - wait for it! - spread a little peanut butter on each slice. Ring, ring! Hello, who is it? It's your stomach and brain calling, and they have just simultaneously passed out from the lip smacking fusion of the holy trinity of taste and deliciousness. The Cajun holy trinity has nothing on this combo.
A few notes. With the bananas, it's really important that they be very ripe simply because it makes them easier to mash, plus they are much sweeter when they're more ripe. Some good black speckling on the peel is a fine indicator. I sliced them up into chunks and use a pastry cutter to do the mashing, or you could also use a blender or a fork. But they have to be pretty well mashed for this to work. A few little solids here and there won't cause a problem. Also, instead of the plain low-fat yogurt, I use low-fat vanilla yogurt just to add that little extra pop. Plus, I use real eggs and not the egg substitute. You could also sub in some whole wheat flour, a teaspoon of cinnamon, a smidgen of vanilla extract, etc. Whatever your little heart desires.
Marbled Chocolate Banana Bread
Yield: 16 slices
2 C all purpose flour
½ t salt
1 C sugar
1 ½ C mashed bananas (about 3)
½ C egg substitute (2 eggs)
1/3 C plain low-fat yogurt
½ C semi-sweet chocolate chips
¾ t baking soda
¼ C butter, softened
Cooking spray
Preheat oven to 350˚. Lightly spoon flour into dry measuring cups. Combine flour, baking soda and salt. Place sugar and butter in a large bowl; beat with a mixer at medium speed until well blended. Add banana, egg and yogurt; beat until blended. Add flour mixture; beat at low speed until just moist.
Place chocolate chips in a medium microwave safe bowl. Microwave at high for one minute until almost melted, stirring until smooth. Cool slightly. Add 1 cup of batter to chocolate and stir until combined. Spoon chocolate batter alternately with plain batter into an 8 ½ x 4 ½ greased loaf pan. Swirl batters together using a knife. Bake at 350˚ for one hour or until wooden pick inserted in center comes out clean. Cool 10 minutes in pan on a wire rack; remove from pan; cool completely on wire rack.
Calories: 183 (23% from fat)
Fat: 4.7g (sat 2.8g,mono 1.4g,poly 0.2g)
Protein: 3.1g
Carbohydrate: 33.4g
Fiber: 1.3g
Cholesterol:
8mg
Iron: 1.1mg
Sodium: 180mg
Calcium: 18mg
This is so incredibly delicious. The first time I made it, I literally wanted to eat the entire loaf hot out of the oven. The mouth watering combination of chocolate and bananas with the texture of hot, fresh bread will quite literally send your senses into gastronomic overdrive. This bread keeps pretty well for a few days, but honestly, there is no sensible reason for it to sit more than three or four days before it's gobbled right up. It also freezes well, too, if wrapped in plastic wrap and aluminum foil.
This bread is so versatile and can be eaten as a snack, a light dessert or my favorite, breakfast! Toast two pieces in the oven until slightly browned and the ends crunchy (the slices would likely fall apart in a traditional toaster oven, but be my guest), and then - wait for it! - spread a little peanut butter on each slice. Ring, ring! Hello, who is it? It's your stomach and brain calling, and they have just simultaneously passed out from the lip smacking fusion of the holy trinity of taste and deliciousness. The Cajun holy trinity has nothing on this combo.
A few notes. With the bananas, it's really important that they be very ripe simply because it makes them easier to mash, plus they are much sweeter when they're more ripe. Some good black speckling on the peel is a fine indicator. I sliced them up into chunks and use a pastry cutter to do the mashing, or you could also use a blender or a fork. But they have to be pretty well mashed for this to work. A few little solids here and there won't cause a problem. Also, instead of the plain low-fat yogurt, I use low-fat vanilla yogurt just to add that little extra pop. Plus, I use real eggs and not the egg substitute. You could also sub in some whole wheat flour, a teaspoon of cinnamon, a smidgen of vanilla extract, etc. Whatever your little heart desires.
Empanadas
You know those Totinos Pizza Rolls in the freezer section at the store? The little crispy pillows of overly processed dried out "meat" that may or may not actually be pepperoni, chemically enhanced cheese that cooks to a blob consistency and a sauce with tomato-like qualities that super heats to temperatures only found during NASA missions to the center of our solar system? Yeah, those things. Well, after making these Empanadas I don't see how I could ever purchase anything like that ever again. Not that I was making it a habit to purchase them before, but now I really won't. So there, Totinos.
This recipe uses wonton wrappers - my favorite! I've used them so many different ways and I know there are other uses out there just dying to be discovered. These would be great for appetizers or for kids coming home from school and wanting a treat. You know exactly what is in them and while they're not exactly health food, they're still not store-bought processed unknowns. And I'm not bashing store-bought processed food, but I think this is a better alternative.
The mixture was a little moist when I took it out of the food processor and I didn't use the bread crumbs - they're optional anyway. I also halved this recipe and it made fewer than half of the full recipe quantity but I may have overstuffed the empanadas a bit. It didn't seem to affect the final product. The only change I made was not to add olives since I didn't have any. I did add raisins and I couldn't taste them at all, but you have to think that a tablespoon of raisins is maybe five or six. Maybe seven. I don't know, but they didn't shine through.


They do need time to cool, but since there is no sauce then that time is dramatically reduced. They would probably be good with a dipping sauce of some kind, but off the top of my head I can't think of one. I would steer clear from any kind of Ranch dressing, but I bet there are other options out there that would work well.
Empanadas
Makes 36 servings
Ingredients
8 ounces skinned and boned chicken breasts, cut into 1/2-inch pieces
1/2 small onion, minced (about 1/4 cup)
1/2 green bell pepper, minced
1/2 tomato, seeded and coarsely chopped
4 pimento-stuffed green olives, coarsely chopped
2 tablespoons raisins
2 tablespoons chicken broth
1 tablespoon tomato paste
1 teaspoon minced fresh cilantro or parsley
1 garlic clove, minced
1/2 teaspoon salt
1/2 teaspoon ground cumin
1/2 teaspoon pepper
Vegetable cooking spray
1 tablespoon dry breadcrumbs (optional)
36 (3-inch) square wonton wrappers
Salt to taste
Cook first 13 ingredients in a large skillet coated with cooking spray over medium heat 5 minutes or until chicken is done, stirring often.
Process chicken mixture in a food processor until coarsely chopped. (Mixture should be fairly dry. Add 1 tablespoon breadcrumbs if mixture is wet.) Cover and chill 30 minutes.
Arrange 1 wonton wrapper on a clean, flat surface. Lightly brush edges of wrapper with water. Place 1 heaping teaspoon of chicken mixture in center of wrapper. Fold dough over filling, pressing edges with a fork to seal. Repeat with remaining wrappers and chicken mixture. Arrange empanadas on a baking sheet coated with cooking spray. Lightly coat empanadas with cooking spray.
Bake at 400° for 12 minutes or until golden brown, turning after 6 minutes. Sprinkle with salt to taste.
This recipe uses wonton wrappers - my favorite! I've used them so many different ways and I know there are other uses out there just dying to be discovered. These would be great for appetizers or for kids coming home from school and wanting a treat. You know exactly what is in them and while they're not exactly health food, they're still not store-bought processed unknowns. And I'm not bashing store-bought processed food, but I think this is a better alternative.
The mixture was a little moist when I took it out of the food processor and I didn't use the bread crumbs - they're optional anyway. I also halved this recipe and it made fewer than half of the full recipe quantity but I may have overstuffed the empanadas a bit. It didn't seem to affect the final product. The only change I made was not to add olives since I didn't have any. I did add raisins and I couldn't taste them at all, but you have to think that a tablespoon of raisins is maybe five or six. Maybe seven. I don't know, but they didn't shine through.
Thanks to the world's most imprecise oven, I once again cooked these little things a smidgen too long and the edges were extra browned. They still tasted fine. And speaking of taste, they had a distinct sweetness to them. No, I don't think that was the raisin coming through, but it could have been the sauteing of the vegetables at the beginning which brought out some of the natural sugars. I don't know. But they were good.

They do need time to cool, but since there is no sauce then that time is dramatically reduced. They would probably be good with a dipping sauce of some kind, but off the top of my head I can't think of one. I would steer clear from any kind of Ranch dressing, but I bet there are other options out there that would work well.
Grilled Shrimp with Bacon and Jalapenos
This is a party recipe. Something you make when you have a lot of people coming over, space on the grill and lights strung up all over your porch. Cinco de Mayo, perhaps? The jalapeno can be increased or decreased depending on the heat you desire, but truth be told these peppers aren't blazing hot like some people think. Or maybe I'm just accustomed to heat and everyone else is a big wuss. The world may never know.
I used regular Oscar Meyer bacon for this recipe but I think it would be fabulous with some of that peppered, thick cut bacon. I like my bacon a little more crisp than the average person but I didn't take into account that the bacon needed to be more pliable in order to wrap it around the shrimp, and would continue to cook once it's in the oven. Therefore I overcooked a few pieces in the microwave and - bummer! - had to eat them because they wouldn't wrap. Poor me.
Also, the shrimp I used were the 41-60 size which ended up being a little small. I would go with larger shrimp next time. As far as my cooking method, I didn't cook these on a grill because I just didn't want to fire the grill up. No other reason. So I did these in the oven under the broiler and they tasted fine.
Additionally, I think fresh shrimp are key. I used frozen cooked shrimp and I bet the fresh ones would possibly end up a little less rubbery. Maybe a marinade for the shrimp, too? Look at me, I'm totally dissecting the entire recipe. It's not that I didn't like them - I did - but there's always room for improvement.

Grilled Shrimp with Bacon and Jalapenos
16 thick, round wooden picks
16 unpeeled large fresh shrimp
2 jalapeno peppers
2 T olive oil
¼ t salt
1/8 t black pepper
8 thick-cut bacon slices, halved
Soak round wooden picks in water 30 minutes. Peel shrimp, leaving tails on; devein if desired. Set shrimp aside. Cut each pepper lengthwise into 8 pieces; remove seeds. Toss together shrimp, jalapeno peppers, olive oil, salt and black pepper in a large bowl. Set aside.
Microwave bacon slices on high 30 seconds. Wrap one bacon slice half around one shrimp and one piece of jalapeno pepper. Secure with a wooden pick.
Repeat procedure with remaining bacon slices, shrimp and jalapenos. Grill without grill lid over medium-high heat (350-400 degrees) for four to six minutes, or until shrimp turn pink, turning once.
I used regular Oscar Meyer bacon for this recipe but I think it would be fabulous with some of that peppered, thick cut bacon. I like my bacon a little more crisp than the average person but I didn't take into account that the bacon needed to be more pliable in order to wrap it around the shrimp, and would continue to cook once it's in the oven. Therefore I overcooked a few pieces in the microwave and - bummer! - had to eat them because they wouldn't wrap. Poor me.
Also, the shrimp I used were the 41-60 size which ended up being a little small. I would go with larger shrimp next time. As far as my cooking method, I didn't cook these on a grill because I just didn't want to fire the grill up. No other reason. So I did these in the oven under the broiler and they tasted fine.
Additionally, I think fresh shrimp are key. I used frozen cooked shrimp and I bet the fresh ones would possibly end up a little less rubbery. Maybe a marinade for the shrimp, too? Look at me, I'm totally dissecting the entire recipe. It's not that I didn't like them - I did - but there's always room for improvement.
They photographed really well unlike the evil soup the Husband and I made, so you know they're good eats. My slices of jalapeno were a little larger than the recipe indicated because I like the extra heat, but again, you can do them however you like. And I promise I won't call you a wuss.
Subscribe to:
Posts (Atom)